
Enabling Log Access
Scenarios
SecMaster can access logs of multiple cloud products with your authorization. After you authorize the access, you can manage logs centrally and search and analyze all collected logs.

You are advised to enable access to asset details, asset alerts, baseline inspection results, vulnerability data, and logs in one workspace. This will make it easier for centralized security operations and association analysis.
This topic describes how to access logs and view where logs are stored.
Limitations and Constraints
- It takes about 10 minutes for the log access settings to take effect.
Integrating Cloud Service Logs
- Log in to the management console.
- Click
 in the upper part of the page and choose Security > SecMaster.
 - In the navigation pane on the left, choose Workspaces > Management. In the workspace list, click the name of the target workspace.
- In the navigation pane on the left, choose .
Figure 1 Cloud Service Access
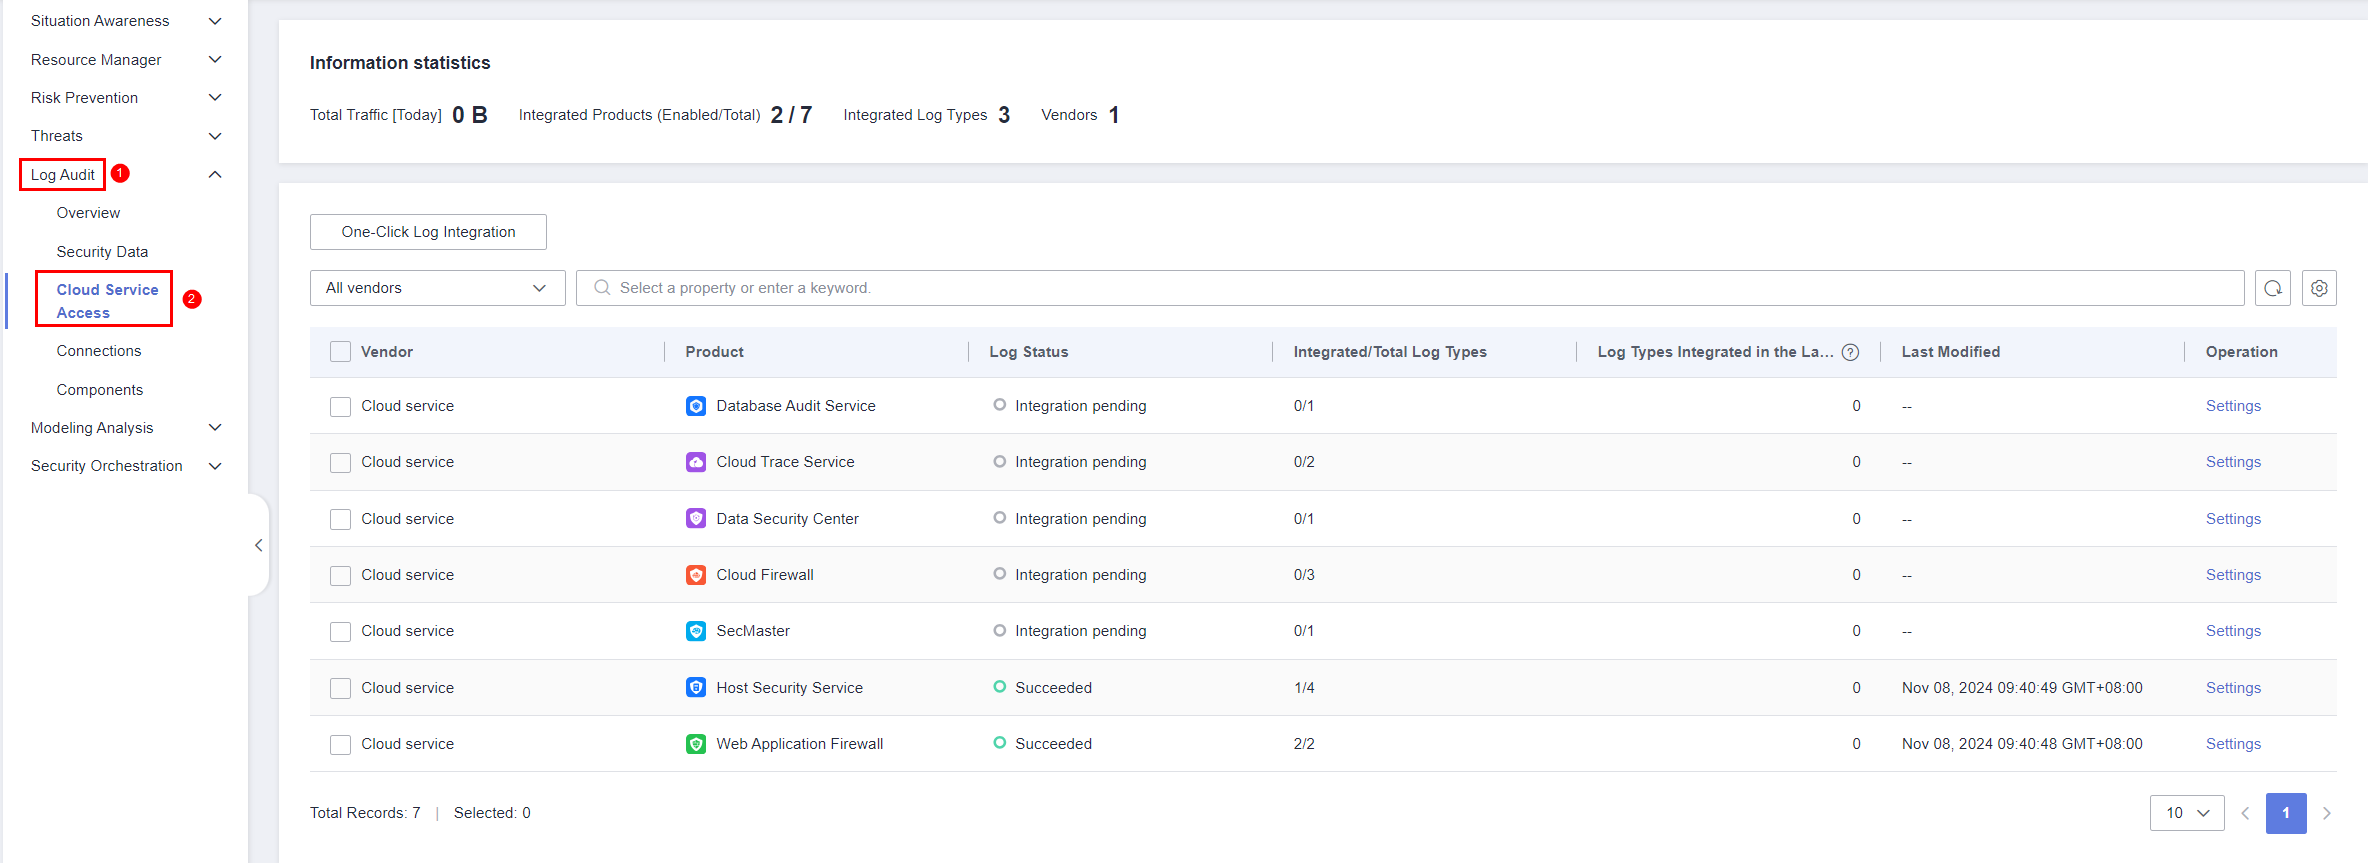
- On the Cloud Service Access page, configure log integration. Enable log integration based on the cloud services you have enabled in the current region.
Enable one-click log integration of multiple cloud service products: Click One-Click Log Integration. On the One-Click Log Integration page, select the data source region from the Region drop-down list and select the cloud service log types you need to integrate. After completing the configuration, click OK.
- Enable log integration of a cloud service product: click Settings in the Operation column of the cloud service product.
On the settings page, enable log types of products based on your needs.
Table 1 Parameters on the log integration settings page Parameter
Description
Log Type
Log type.
Enable Log Integration
Whether to enable log integration. If this button is toggled on, logs will be integrated into SecMaster.
Auto Alert Conversion
In the Auto Alert Conversion column, click
 to enable the function. After that, if cloud service logs meet certain alert rules, SecMaster will automatically convert them into alerts. Those alerts will be displayed on the Alerts page.
Lifecycle
Log retention duration after integration.
Log Status
Log integration status.
- Succeeded: Logs have been integrated and the integration is successful.
- Integration pending: Logs have not been integrated.
- Failed: Logs failed to be integrated.
Last Active
Last log integration time.
Operation
You can Edit the lifecycle of the log type, in days. Lifecycle indicates the retention duration of integrated logs.
- After completing log integration, check the log access status of cloud service products on the page.
It takes about 10 minutes for the log access settings to take effect. After the access is complete, a default data space and pipeline are created.
Viewing Logs and Storage Locations
After log integration, choose Security Analysis > Security Data Tables and view integrated logs.
- In the navigation pane on the left, choose .
- In the data space navigation tree on the left, click a data space name to show the pipeline list. Click a pipeline name. On the page displayed on the right, you can search the pipeline data.
You can view the integrated logs on the pipeline data query page.
Related Operations
- Canceling data access
- On the Cloud Service Access page, click Settings in the Operation column of the target cloud service product.
- On the Settings page, click
 in the Enable Log Integration column to disable log integration for the cloud service.
- Editing the data access lifecycle
- On the Cloud Service Access page, click Settings in the Operation column of the target cloud service product.
- On the Settings page, click Edit in the Operation column of the target log type.
- On the displayed page, modify the Lifecycle configuration.
- Click OK.
- Disabling Auto Alert Conversion
- On the Cloud Service Access page, click Settings in the Operation column of the target cloud service product.
- On the Settings page, click
 in the Auto Alert Conversion column to disable alert mapping.
Feedback
Was this page helpful?
Provide feedbackThank you very much for your feedback. We will continue working to improve the documentation.See the reply and handling status in My Cloud VOC.
For any further questions, feel free to contact us through the chatbot.
Chatbot


