
Java SDK Demo
This section provides a demo application that uses a Java SDK and supports the OSCCA-published cryptographic algorithms to help you quickly understand the concepts and process of using BCS.

This is a demo only and is not for actual use.
Preparations
| Action | Description |
|---|---|
| Install an integrated development environment (IDE). | Install Java Development Kit (JDK), Maven, and Eclipse. You can replace Eclipse with another IDE you prefer. The JDK version must be 1.8 (64-bit). If you have installed JDK, run the java -version command in the command line to check the JDK version. |
Buying a BCS Instance
- Log in to the BCS console.
- On the Instance Management page, click Buy next to Enhanced Hyperledger Fabric Instance.
- Configure basic information about the BCS instance by referring to Table 1.

To ensure that the demo runs properly, set the parameters as described in the following table.
Table 1 Basic settings Parameter
Setting
Billing Mode
Select Pay-per-use.
Region
Retain the default value.
Enterprise Project
Select an existing enterprise project, for example, default.
If the enterprise management service is not enabled, this parameter is unavailable.
Instance Name
Enter java-sdk-demo.
Edition
Select Basic.
Blockchain Type
Select Private.
Enhanced Hyperledger Fabric Version
v2.2
Consensus Mechanism
Select Raft (CFT).
Resource Access Initial Password
Enter a password.
Confirm Password
-
- Click Next: Configure Resources. Table 2 describes the resource parameters.
Table 2 Resource configurations Parameter
Example
Environment Resources
Select Custom.
Cluster
Select Create a new CCE cluster.
AZ
Select an AZ.
Cross-AZ Scheduling
Select No.
ECS Specifications
Select the flavor for 4 vCPUs | 8 GB.
ECS Quantity
Enter 1.
High Availability
Select No.
VPC
Select Automatically create VPC.
Subnet
Select Automatically create subnet.
ECS Login Method
Select Password.
Password of Root User
If you do not enter a password here, the previously specified resource access initial password will be used.
Confirm Password
-
Use EIP of a CCE Node
Select Yes.
EIP Billed By
Retain the default value.
EIP Bandwidth
Set it to 5 Mbit/s.
- Click Next: Configure Blockchain. Table 3 describes the blockchain parameters.
Table 3 Blockchain configurations Parameter
Example
Blockchain Configuration
Select Custom.
Blockchain Mgmt. Initial Password
If you do not enter a password here, the previously specified resource access initial password will be used.
Confirm Password
-
Volume Type
Select SFS Turbo or select another one as prompted.
Storage Capacity of Peer Organization (GB)
Retain the default value.
Ledger Storage
Select File database (GoLevelDB).
Peer Organization
A peer organization named organization has been automatically created. Change the peer quantity to 1.
Channel Configuration
The organization organization has been added to the channel automatically. Retain this default setting.
Orderer Quantity
Retain the default value.
Security Mechanism
Select ECDSA.
NOTICE:The OSCCA-published cryptographic algorithms option is available. If you select this option, other modifications are required for the demo deployment. Pay attention to the descriptions of modifications.
Configure Block Generation
Select No.
Enable Support for RESTful API
Select No.
- Click Next: Confirm.
- Confirm the configurations and finish the purchase process.
Wait for several minutes. After a message is displayed indicating successful installation, check the status of the instance. If it is Normal, the deployment is completed.
Installing and Instantiating a Chaincode
- Log in to the BCS console.
- In the navigation pane on the left, click Instance Management.
- Find the instance you just created and click Manage Blockchain to go to the Blockchain Management console.
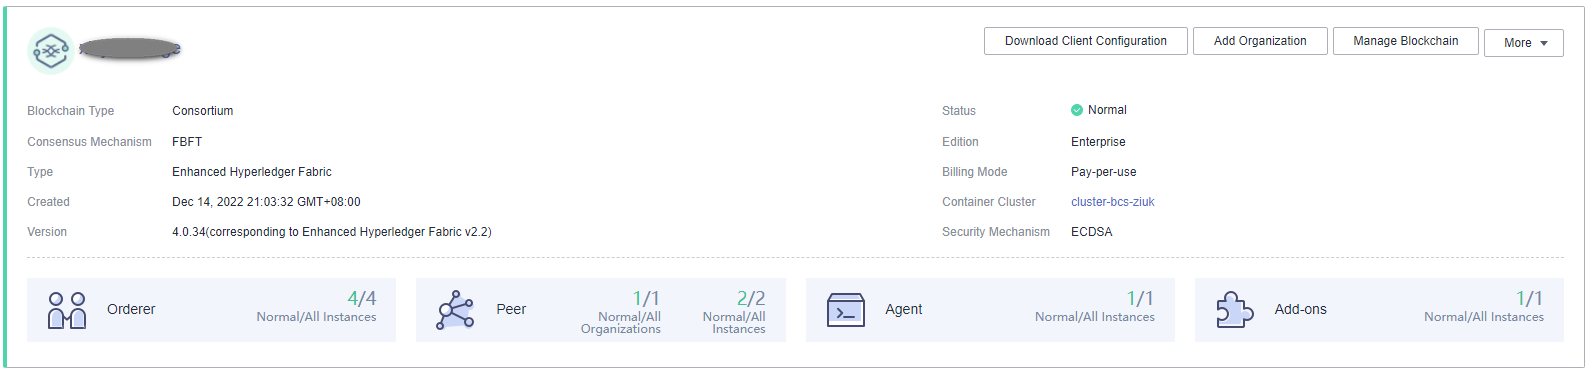
- On the login page, enter the username and password, and click Log In.
The username is admin, and the password is the Blockchain Mgmt. Initial Password set when you created the BCS instance. If you have not set this password, use the resource access initial password.
- Click
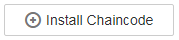 in the upper left corner of the page. The parameters for chaincode installation are as follows.
Table 4 Installation parameters Parameter
Setting
Chaincode Name
Enter chaincode.
Chaincode Version
Select 2.0.
Ledger Storage
File database (goleveldb)
Select All Peers
Check the box.
Organization & Peer
Select peer-0.
Language
Select Golang.
Chaincode File
Chaincode_Go_Demo: To obtain it, go to the BCS console and click Use Cases. Download the example Go chaincode in the Java SDK Demo area.
Chaincode Description
Enter a description of the chaincode.
Code Security Check
This option is displayed only when the chaincode language is Golang. Enable this option to check chaincode security.
- Click Install.
- After installing the chaincode, click Instantiate in the Operation column of the chaincode list. The parameters for chaincode instantiation are as follows.
Table 5 Instantiation parameters Parameter
Setting
Chaincode Name
Enter chaincode.
Channel
Select channel.
Chaincode Version
Select 2.0.
Initialization Function
Enter init.
Chaincode Parameters
a,200,b,250
Endorsement Policy
Select Endorsement from any of the following organizations.
Endorsing Organizations
Select organization.
Privacy Protection Configuration
Select No.
- Click Instantiate.
Wait for 2 to 3 minutes and refresh the page. Click View more in the Instantiation column to check the instantiation status.
Configuring the Application
- Import the project.
Obtain the project code and decompress it. To obtain the project code, go to the BCS console and choose Use Cases. Download the example Java chaincode in the Java SDK Demo area.
Right-click the Eclipse page, and choose Import from the shortcut menu to import the project code file (Maven project) to Eclipse.

- Download SDK configurations and certificates.
- On the Instance Management page, click Download Client Configuration on an instance card.
- Select SDK Configuration File and set the parameters as described in the following table.
Table 6 SDK parameters Parameter
Description
Chaincode Name
Enter chaincode.
NOTICE:The chaincode name must be the same as the name specified during chaincode installation and instantiation.
Certificate Root Path
Enter the path to the config folder of the javasdkdemo project.
NOTICE:Change the backslashes (\) to slashes (/), for example, D:/javasdkdemo/config.
Channel
Select channel.
Organization & Peer
Select all peers in the channel.
Select Orderer Certificate.
Select Peer Certificates, select organization for Peer Organization, and select Administrator certificate.
- Click Download to download the SDK configuration file and the administrator certificates for the java-sdk-demo-orderer and organization organizations to the config directory in the demo project.
- Copy and decompress the package.
- Decompress demo-config.zip and copy the contents in the java-sdk-demo-orderer-admin-cert, organization-admin-cert, and sdk-config folders to the config directory in the demo project.
Deploying the Application
- In the Maven project, find the Main.java file in the /javasdkdemo/src/main/java/handler/ directory, and change the file path in the following code of the Main class to the absolute path of the java-sdk-demo-sdk-config.yaml file. The path can be found in 2.c. Change the backslashes (\) to slashes (/).
helper.setConfigCtx("E:/yourdir/huawei.yaml");For example, change the path to helper.setConfigCtx("D:/javasdkdemo/config/java-sdk-demo-channel-sdk-config.yaml"). Add the dependency upon fabric-sdk-java-1.4.1-jar-with-dependencies.jar in the lib folder of the project to pom.xml because OSCCA-published cryptographic algorithms and other cryptographic algorithms need to refer to the fabric-sdk dependency package provided by Huawei. To add the dependency, remove the comments on the dependency as shown in the following figure. Otherwise, the project may not run properly.Figure 1 File details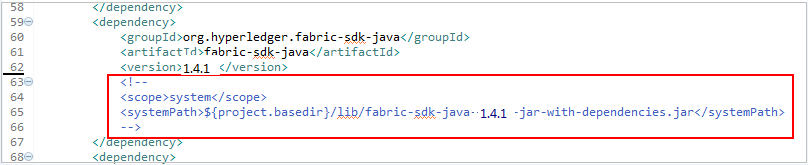
- Run the main function.
Each time the command is successfully executed, the key-value pair <testuser,100> is saved to the blockchain. If you query key testuser, the value is 100. You can also view the transaction records in Block Browser.
Figure 2 Transaction records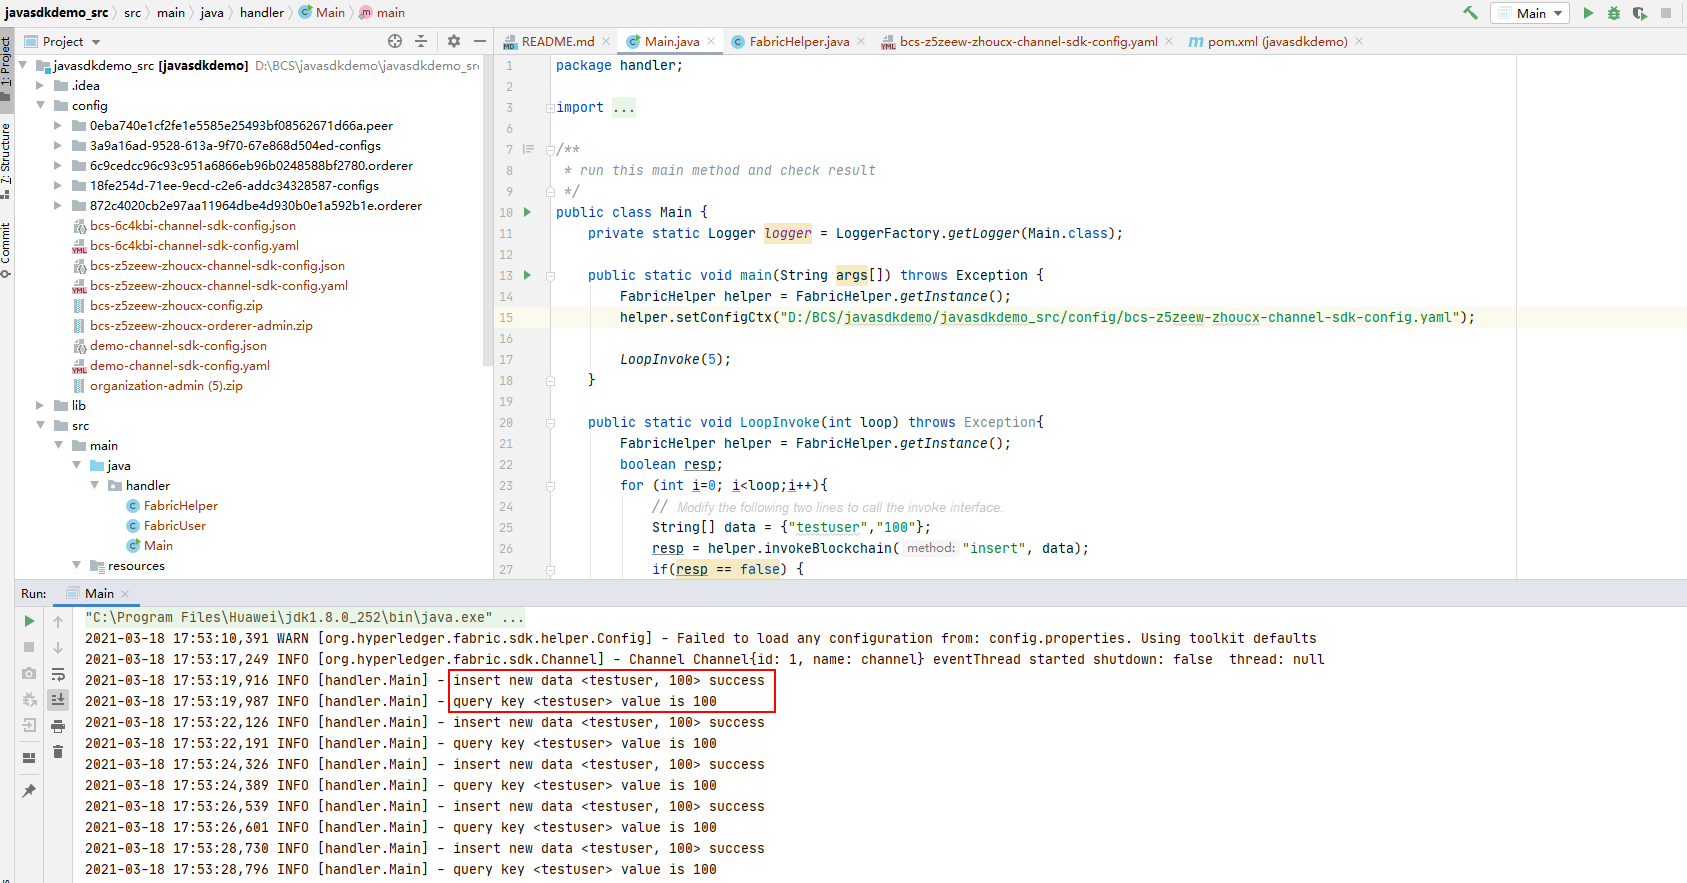
Transferring Private Keys in Memory
Encrypt the private key file, decrypt it in the demo, and transfer it to Fabric SDK.
For an MSP private key, in the genFabricUser function of the FabricHelper file, invoke the function:
// Retrieve the encrypted MSP private key from the specified directory in the configuration file.
String adminPrivateKeyString = extractPemString(msp, "keystore");
// Decrypt adminPrivateKeyString to obtain the decryptedKey string.
// Assign the decrypted MSP private key to the adminPrivateKeyString variable.
String adminPrivateKeyString = decryptedKey;
Currently, TLS private keys cannot be transferred through the memory.
Feedback
Was this page helpful?
Provide feedbackThank you very much for your feedback. We will continue working to improve the documentation.See the reply and handling status in My Cloud VOC.
For any further questions, feel free to contact us through the chatbot.
Chatbot


