How Do I Use jib-maven-plugin to Build a Maven Project and Create an Image?
Symptoms
The Maven image provided by CodeArts does not contain the Docker environment. An error is reported when an image is created using CodeArts Build and the docker-maven-plugin extension. For example:
INFO: I/O exception (java.io.IOException) caught when processing request to {}->unix://localhost:80: No such file or directory
This document describes how to use the jib-maven-plugin extension to create a TAR file with an image in a Maven environment without Docker.
Solution
- Modify the code of the project for which you want to create an image.
Find the POM file and import the extension. The content is as follows:
<!--Use the jib extension.--> <plugin> <groupId>com.google.cloud.tools</groupId> <artifactId>jib-maven-plugin</artifactId> <version>1.3.0</version> <configuration> <!--The from node is used to set the base image, which is equivalent to the FROM keyword in a Dockerfile.--> <from> <!—You are advised to use SWR public images for fast download and more stable download. --> <image>swr.example.myxxcloud.com/xxxx/xxx:xxxxx</image> </from> <to> <!--Image name and tag. The mvn built-in variable ${project.version} is used, indicating the version of the current project.--> <image> hellojib:${project.version}</image> </to> <!--Attribute related to containers--> <container> <!--JVM memory parameter--> <jvmFlags> <jvmFlag>-Xms4g</jvmFlag> <jvmFlag>-Xmx4g</jvmFlag> </jvmFlags> <!--Port to be exposed--> <ports> <port>8080</port> </ports> </container> </configuration> </plugin>- From tag: Set the base image, which is equivalent to the FROM keyword in a Dockerfile. You are advised to use the image in SWR because the download speed is fast and stable.
- To tag: Set the name and tag of the created image.
- Container tag: Set the container attribute, JVM memory parameter, port, and so on.
- mainClass tag: Set the main program for starting the project, that is, the Application class of Spring Boot.
- Create build task and execute it.
- Add two build actions: Build with Maven and Upload to Release Repos. Change the default Maven build command to the following command:
mvn compile jib:buildTar -Dmaven.test.skip=true -U -e -X –B

The Jib build tool provides four powerful functions. The build and dockerBuild commands cannot be used to create images because the build tool is built without the Docker environment. You can only run the buildTar command to create a .tar file that contains images.
- build allows you to create images and push them to a remote repository.
- buildTar provides the function of creating a .tar file that contains images.
- dockerBuild provides the function of creating Docker images to a local PC.
- exportDockerContext provides the Dockerfile creation function.
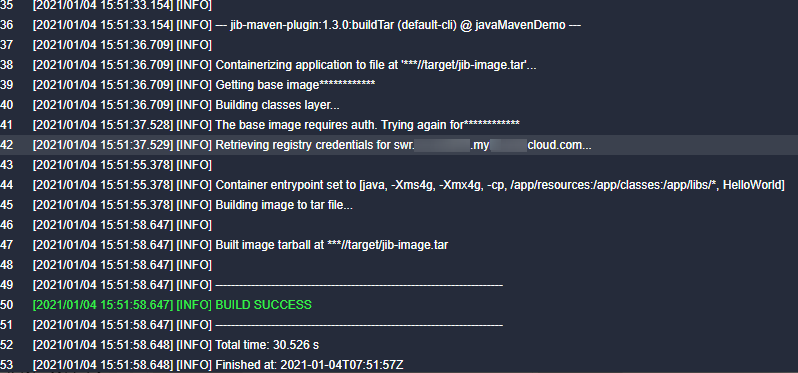
After the building is successful, the following information is displayed in the log:

- In the target directory of the Java project, the jib-image.tar file is generated. In addition, the task uploads the software to release repos.
- Add two build actions: Build with Maven and Upload to Release Repos. Change the default Maven build command to the following command:
- Use the tar image.
Run the script or download command to download the .tar file from the release repo o the server where the application is to be deployed. Run the docker load command to load the image of the .tar file to the local image repository, and run the docker run command to start the image.
Feedback
Was this page helpful?
Provide feedbackThank you very much for your feedback. We will continue working to improve the documentation.See the reply and handling status in My Cloud VOC.
For any further questions, feel free to contact us through the chatbot.
Chatbot


