
Configuring Agency Authorization for ModelArts with One Click
Scenarios
ModelArts, the AI platform, must access other services when executing tasks. For example, ModelArts must access OBS to read your data for training. In such cases, ModelArts accesses other cloud services on behalf of you. To ensure security, ModelArts requires your authorization before accessing any cloud services, which is the agency process. Then, you can perform AI computing tasks on ModelArts.
ModelArts allows you to add authorization. You can quickly configure agency authorization on the Permission Management page of ModelArts Standard. Then, ModelArts will automatically create an agency for you and configure it in ModelArts.
ModelArts Standard supports common and high-privilege permissions.
- Common: In this mode, users can customize the authorization scope based on service scenarios and grant only the minimum required access. This mode is flexible and secure. This mode applies to scenarios with strict requirements on the authorization scope.
- High-privilege: The configuration of this mode is simple, but the agency created has high permissions. This mode is suitable for users who require administrator permissions. If you need to precisely control the permissions granted to an agency, the common permissions are recommended.
Constraints
- Huawei Cloud account
- Only a Huawei Cloud account can use an agency to authorize the current account or all IAM users under the current account.
- Multiple IAM users or accounts can use the same agency.
- A maximum of 100 agencies can be created under an account.
- If you use ModelArts for the first time, add an agency. Generally, common user permissions are sufficient for your requirements. You can also customize permissions for refined permissions management.
- IAM user
- If you have obtained the authorization, you can view the authorization information on the Permission Management page.
- If you have not been authorized, ModelArts will display a message indicating that you have not been authorized when you access the Add Authorization page. In this case, contact your administrator to add authorization.
Adding Authorization
- Log in to the ModelArts console. In the navigation pane on the left, choose System Management > Permission Management. The Permission Management page is displayed.

On the ModelArts console of the old version, choose Global Configuration from the navigation pane. The permission configuration page is displayed.
- Click Add Authorization. On the displayed page, set parameters.
Table 1 Parameters Parameter
Description
Authorized User
The options are IAM user, Federated user, Agency, and All users.
- IAM user: You can use a tenant account to create IAM users and assign permissions for specific resources. Each IAM user has their own identity credentials (password and access keys) and uses cloud resources based on the assigned permissions. For details about IAM users, see IAM User.
- Federated user: A federated user is also called a virtual enterprise user. For details about federated users, see Configuring Federated Identity Authentication.
- Agency: You can create agencies in IAM. For details about how to create an agency, see Creating an Agency.
- All users: If you select this option, the agency permissions will be granted to all IAM users under the account, including those created in the future. For individual users, select All users.
Authorized To
This parameter is not displayed when Authorized User is set to All users.
- IAM user: Select an IAM user and configure an agency for the IAM user.
Figure 1 Selecting an IAM user

- Federated user: Enter the username or user ID of the target federated user.
Figure 2 Entering a federated user

- Agency: Select an agency name. You can create an agency under account A and grant the agency permissions to account B. When using account B, you can switch the role in the upper right corner of the console to account A and use the agency permissions of account A.
Figure 3 Switch Role

Agency
- Use existing: If there are agencies in the list, select an available one to authorize the selected user. Click the drop-down arrow next to an agency name to view its permission details.
- Add agency: If there is no available agency, create one. If you use ModelArts for the first time, select Add agency.
Add agency > Agency Name
ModelArts automatically creates an agency name for you, but it is editable.
Add agency > Permissions > Common
In common mode, users can customize the authorization scope based on service scenarios and grant only the minimum required access. This mode is flexible and secure. This mode applies to scenarios with refined management requirements on the authorization scope.
You can select the required permission from the list.
The common mode provides preset permissions templates that allow for quick configuration of permissions. For example, when selecting the permission template for the training module, the system automatically chooses all necessary service and function permissions.
Add agency > Permissions > High-privilege
In high-privilege mode, higher permissions are assigned. This mode is suitable for users who require administrator permissions. To quickly find specific permissions, enter keywords into the search box.
Figure 4 High-privilege
- Select I have read and agree to the ModelArts Service Statement. Click Create.
Viewing Authorized Permissions
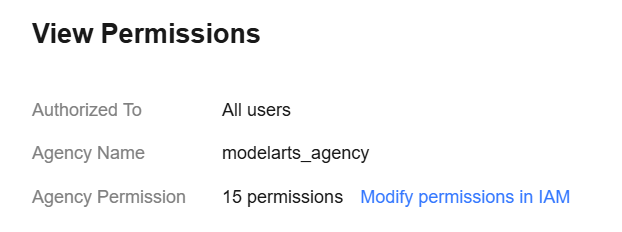
You can view the configured authorizations on the Permission Management page. Locate an authorization and click View Permissions in the Operation column to view the permission details.

Modifying the Authorization Scope
- To modify the authorization scope, click Modify permissions in IAM in the View Permissions dialog box.
Figure 6 Modify permissions in IAM
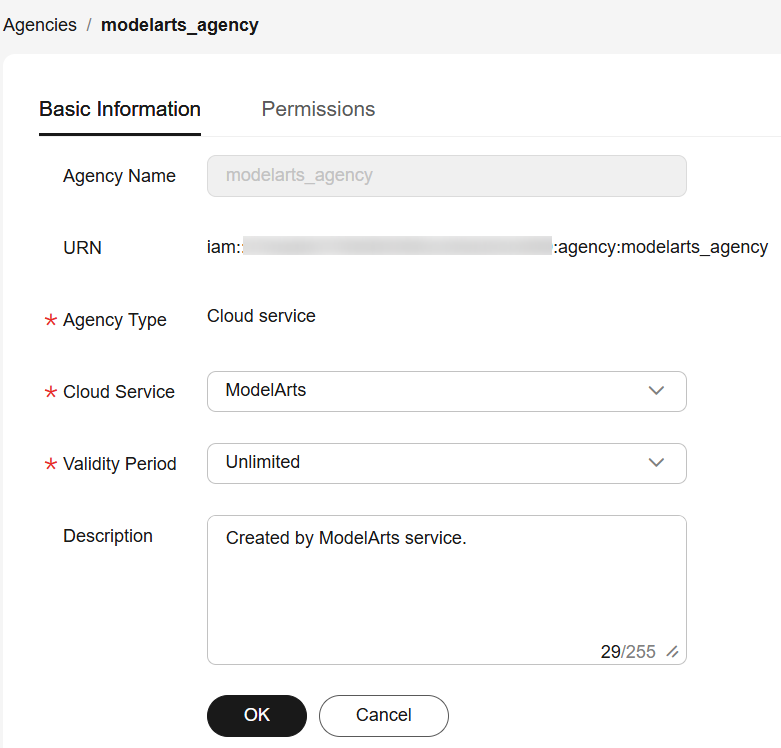
- On the Agencies page of the IAM console, locate the target agency and modify the agency information on the Basic Information tab. Set Validity Period as needed. The value can be Unlimited, 1 day, or Custom. If you select Custom, you can then enter the number of days you want the agency to stay valid for, for example, 30.
Figure 7 Agency information
- On the Permissions page, click Authorize, select policies or roles, and click Next. Select the scope for minimum authorization and click OK.
When setting the minimum authorization scope, you can select specified projects or all resources. If you select All resources, the selected permissions will be applied to all resources.
Deleting an Authorization
To better manage your authorization, you can delete the authorization of an IAM user or delete the authorizations of all users in batches.
- Deleting the authorization of a user
The authorizations configured for the IAM user of the current account are displayed on the Permission Management page. You can locate an authorization, click Delete in the Operation column, enter DELETE in the text box, and click OK. After it is deleted, the user cannot use ModelArts functions.
- Deleting authorizations in batches
On the Permission Management page, click Clear Authorization above the authorization list. Enter DELETE in the text box and click OK. After the deletion, the account and all its IAM users cannot use ModelArts functions.
FAQs
- How do I delete an existing agency from the agency list?
Figure 8 Use existing

Go to the IAM console, choose Agencies in the navigation pane, and delete the target agency.
Figure 9 Identity and Access Management
- Why is a message indicating insufficient permissions displayed when I access a page on the ModelArts console?
The permissions configured for the user agency are insufficient or the module has been upgraded. The authorization information needs to be updated. In this case, you can add authorization as prompted.
Feedback
Was this page helpful?
Provide feedbackThank you very much for your feedback. We will continue working to improve the documentation.See the reply and handling status in My Cloud VOC.
For any further questions, feel free to contact us through the chatbot.
Chatbot


