
Scaling a Lite Server Supernode
Description
After using Lite Server supernodes for a period of time, you may need to increase or decrease the number of supernodes due to service changes.
Constraints
Scaling out
- This applies only to the scale–out of Snt9b23 supernodes.
- There can be no more than 48 child nodes during the supernode scale–out.
- Only available nodes can be scaled out.
- The scale–out does not affect services on original nodes.
Scaling in
- This applies only to the scale-in of Snt9b23 supernodes.
- If the supernode has only one child node, scale-in is not supported.
- If the node to be scaled in is in an intermediate state, such as switching OS, restarting, starting, or stopping, scale-in is not supported.
- Scaling in affects services on original nodes and the EVS disks of the nodes are released. Ensure that services have been migrated away from the nodes to be scaled in to prevent data loss.
Billing
Yearly/monthly is supported for both node scale-out and scale-in. A billing order will be generated for the new nodes.
Scaling out the Supernodes
- Log in to the ModelArts console. In the navigation pane, choose Resource Management > Lite Servers. The Resources tab is displayed.
- New console: In the navigation pane, choose Resource Management > Lite Compute Resources > Lite Servers.
- Old console: In the navigation pane, choose Resource Management > Lite Servers.
- Click the Supernodes tab, locate the target supernode in the list, and choose
 > Change Supernode Specifications on the right.
 - On the displayed page, view the resource information to be changed and select the target specifications. Sold-out resources are displayed in gray and cannot be selected.
- Set the parameters.
Table 1 Parameters Parameter
Description
System Disk
Select System Disk Type and set Size. A system disk is automatically created when you create a Lite Server. Set the system disk size to at least 200 GB.
Add Data Disk
Click Add Data Disk to attach a data disk to the Lite Server. You can also attach data disks on ECS after the Lite Server resource is created. For details, see Using EVS for Storage.
Image
- Public image
Public images are available for all users. All users can read the image by image ID.
ModelArts allows you to perform development and training directly without additional configuration as it provides multiple public images, supports multiple OSs, and has built–in AI drivers and software.
For details about the supported public images, see Mappings Between Lite Compute Nodes and OS Images.
- Private image
Only the image creator can use the image. You can select a private image to save your time from repeatedly configuring servers.
Login Credential
Key pair is recommended as it features higher security than Password. Only key pairs can be used as the login credential for expanding the capacity of supernodes.
- Key pair
Use a key pair to log in to the Server node. You can select an existing key pair, or click Create Key Pair to create one.
NOTE:If you use an existing key pair, ensure that you have saved the key file locally. Otherwise, logging in to the Server node will fail.
(Optional) Custom Instance Injection
Use this function to configure Server nodes if you want to:
- Use scripts to simplify the Server node configuration.
- Use scripts to initialize OSs.
- Use existing scripts and upload them to the server when creating the Server node.
- Use scripts for other purposes.
Currently, As text and As file are supported. For details, see Injecting User Data.
- Public image
- Click Next to preview the change information, view the node configuration and fee, and click Submit.
- After the scale-out is complete, expand the supernode that has been scaled out on the resource list page and check the status of the new child nodes under the supernode.
Scaling in the Supernodes
- Log in to the ModelArts console. In the navigation pane, choose Resource Management > Lite Servers. The Resources tab is displayed.
- New console: In the navigation pane, choose Resource Management > Lite Compute Resources > Lite Servers.
- Old console: In the navigation pane, choose Resource Management > Lite Servers.
Figure 1 Resource list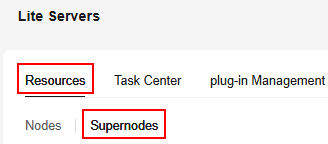
- Click the Supernodes tab, locate the target supernode in the list, and choose
 > Change Supernode Specifications on the right.
 - On the displayed page, view the resource information to be changed and select the target specifications. In the list of target reserved nodes, select the nodes to be reserved.
Target specifications specify specifications of the nodes to be reserved.
The number of reserved nodes must be the same as the number of compute nodes in the target specifications. Otherwise, the scale-in task fails to be submitted.
- Select I acknowledge the potential risks and agree to proceed with the scale-in and enter YES to confirm the scale-in.

When scaling in, unreserved nodes and their associated EVS disks will be removed. Move your services off these nodes first to avoid losing data.
- Click Next to preview the change information, view the node reservation and deletion information, confirm the information, and click Submit.
Feedback
Was this page helpful?
Provide feedbackThank you very much for your feedback. We will continue working to improve the documentation.See the reply and handling status in My Cloud VOC.
For any further questions, feel free to contact us through the chatbot.
Chatbot


