
Estos contenidos se han traducido de forma automática para su comodidad, pero Huawei Cloud no garantiza la exactitud de estos. Para consultar los contenidos originales, acceda a la versión en inglés.
Centro de ayuda/ Cloud Container Engine/ Guía del usuario/ Red/ Configuración de red de clúster/ Adición de un bloque CIDR de VPC secundario para un clúster
Actualización más reciente 2024-09-10 GMT+08:00
Adición de un bloque CIDR de VPC secundario para un clúster
Escenario
Al crear un clúster, debe desplegarlo en una VPC. Si la VPC planificada es demasiado pequeña y las direcciones IP son insuficientes, puede usar un bloque CIDR de VPC secundario para admitir el ajuste de su servicio. Esta sección describe cómo agregar un bloque CIDR de VPC secundario para su clúster.
Notas y restricciones
Solo se admiten los clústeres de CCE y de CCE Turbo de v1.21 y posteriores.
Planificación de un bloque secundario CIDR
Antes de agregar un bloque secundario de CIDR, planifique adecuadamente para prevenir los conflictos de CIDR. Tener en cuenta los siguientes puntos:
- Todas las subredes (incluidas las subredes extendidas) de la VPC donde reside el clúster no pueden entrar en conflicto con los bloques contenedor y Service CIDR.
- Los bloques de CIDR 10.0.0.0/8, 172.16.0.0/12 y 192.168.0.0/16 pueden entrar en conflicto con las direcciones IP asignadas a los nodos maestros del clúster. No se recomienda seleccionarlos como bloques CIDR secundarios.
- Si un ECS que no está en un clúster en la misma VPC necesita tener acceso al clúster, se realiza la Secure Network Address Translation (SNAT). La dirección de origen de pod es la dirección IP del nodo en lugar de la dirección IP de pod.
- Los ECS de un bloque CIDR secundario no pueden acceder a los pods del clúster a menos que este bloque CIDR se haya utilizado para agregar nodos en el clúster.
Procedimiento
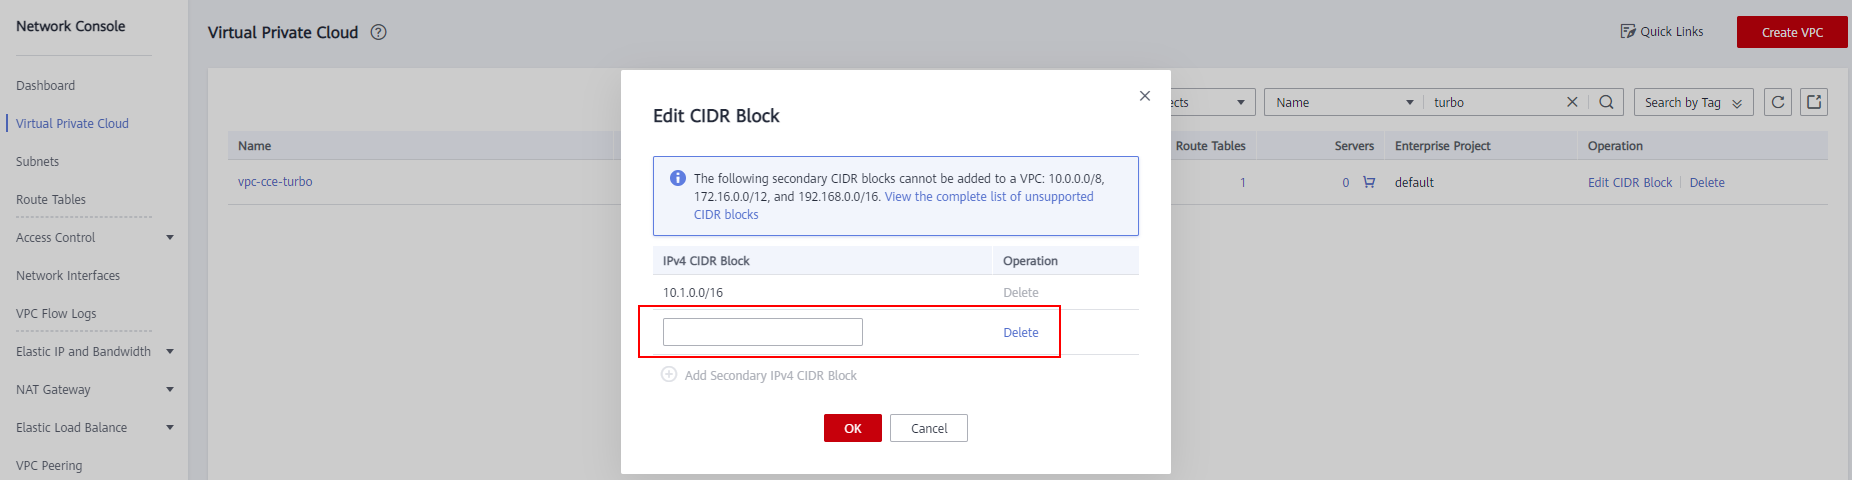
- Inicie sesión en la consola de VPC, seleccione la VPC a la que pertenece el clúster, haga clic en Edit CIDR Block y haga clic en Add Secondary IPv4 CIDR Block. Figura 1 Adición de un bloque CIDR IPv4 secundario
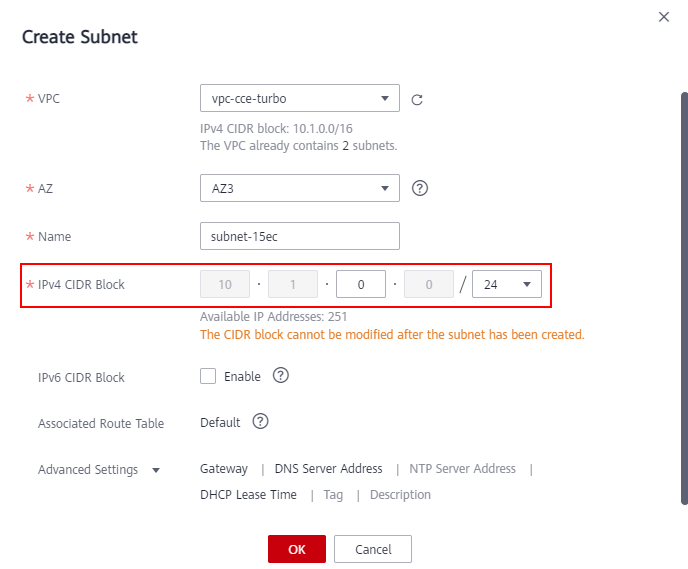
- Cree una subred en el bloque CIDR IPv4 secundario para el clúster.
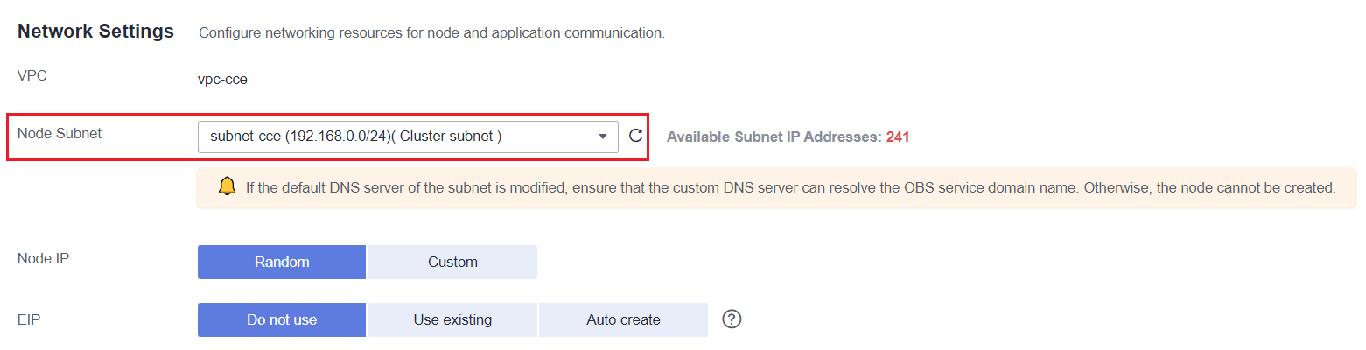
- Después de crear una subred utilizando el bloque CIDR IPv4 secundario, puede seleccionar la subred al crear un nodo o un grupo de nodos en la página Network Settings.
Tema principal: Configuración de red de clúster
Comentarios
¿Le pareció útil esta página?
Deje algún comentario Muchas gracias por sus comentarios. Seguiremos trabajando para mejorar la documentación.
El sistema está ocupado. Vuelva a intentarlo más tarde.


