Quick Deployment
This section describes how to deploy the Scheduled Startup/Shutdown solution.
|
Parameter |
Type |
Mandatory |
Description |
Default Value |
|---|---|---|---|---|
|
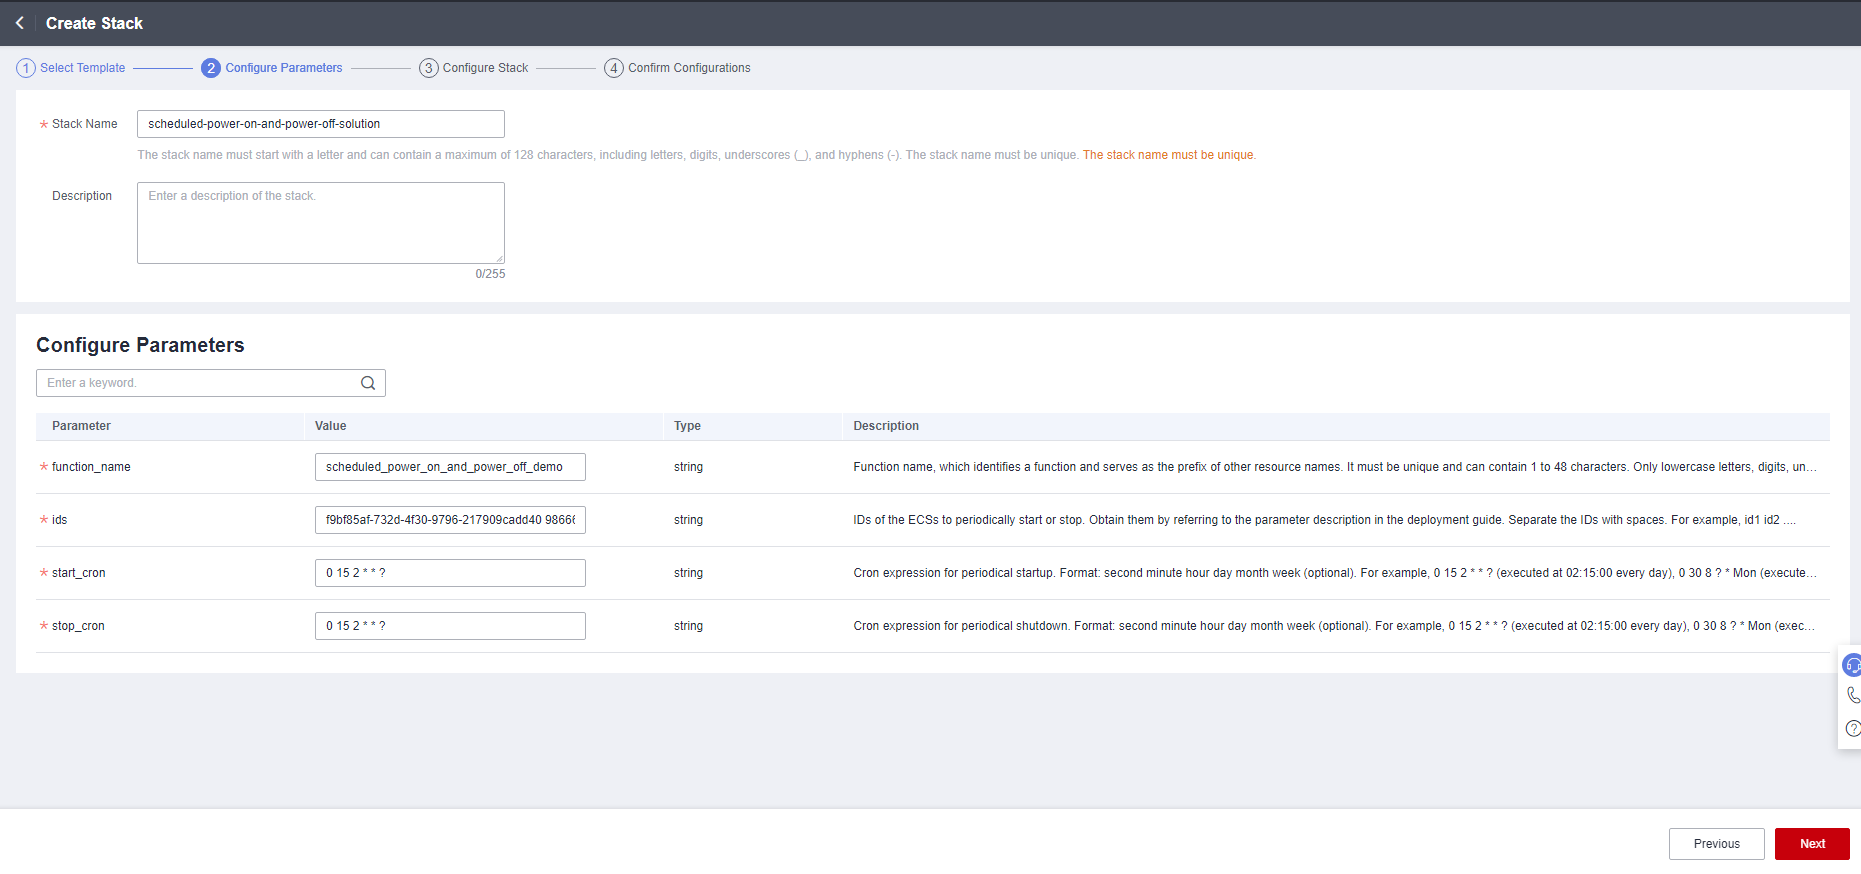
function_name |
string |
Yes |
Function name, which identifies a function and serves as the prefix of other resource names. It must be unique and can contain 2 to 48 characters, including letters, digits, underscores (_), and hyphens (-). Start with a letter. |
scheduled_power_on_and_power_off_demo |
|
ids |
string |
Yes |
IDs of the ECSs to periodically start or stop. Separate the IDs with spaces. For example, id1 id2 .... |
Left blank |
|
start_cron |
string |
Yes |
Cron expression for periodical startup. Format: second minute hour day month week (optional). For example, 0 15 2 * * ? (executed at 02:15:00 every day), 0 30 8 ? * Mon (executed at 08:30:00 every Monday), 0 0 7 1 * ? (executed at 07:00:00 on the first day of every month). For details about how to set a cron expression, see Appendix: Cron Expressions for a Function Timer Trigger. |
Left blank |
|
stop_cron |
string |
Yes |
Cron expression for periodical shutdown. Format: second minute hour day month week (optional). For example, 0 15 2 * * ? (executed at 02:15:00 every day), 0 30 8 ? * Mon (executed at 08:30:00 every Monday), 0 0 7 1 * ? (executed at 07:00:00 on the first day of every month). For details about how to set a cron expression, see Appendix: Cron Expressions for a Function Timer Trigger. |
Left blank |
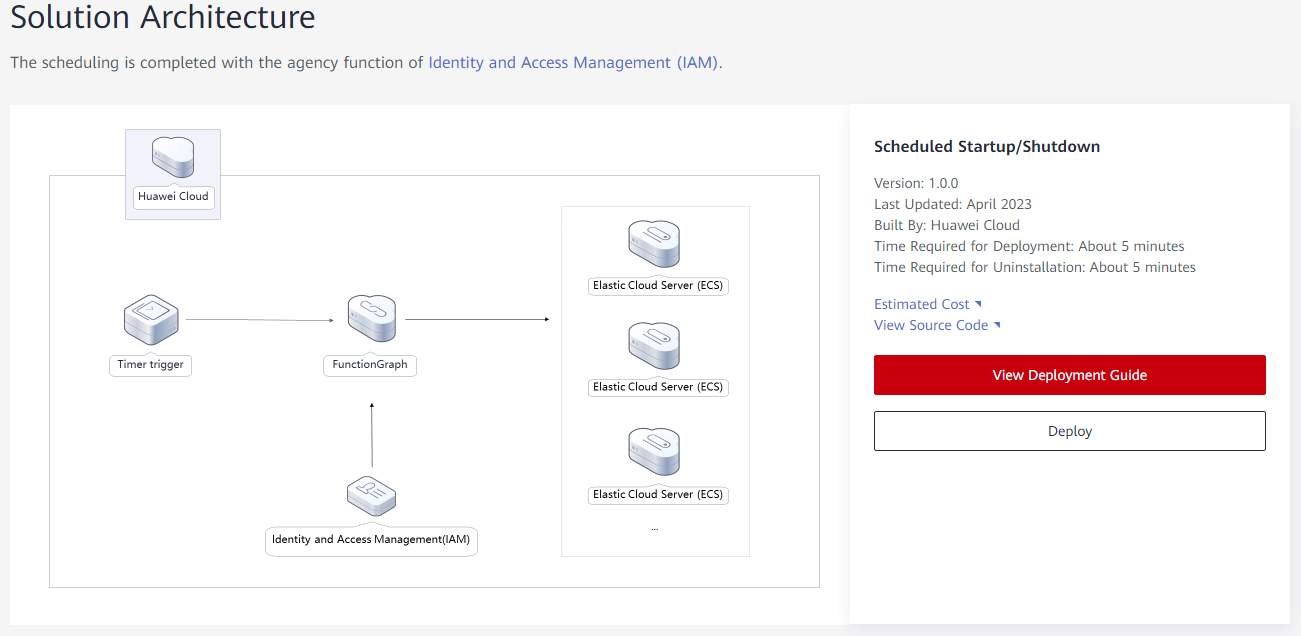
- Log in to Huawei Cloud Solution Best Practices, choose Scheduled Startup/Shutdown, and click Deploy.
Figure 1 Deploying the solution
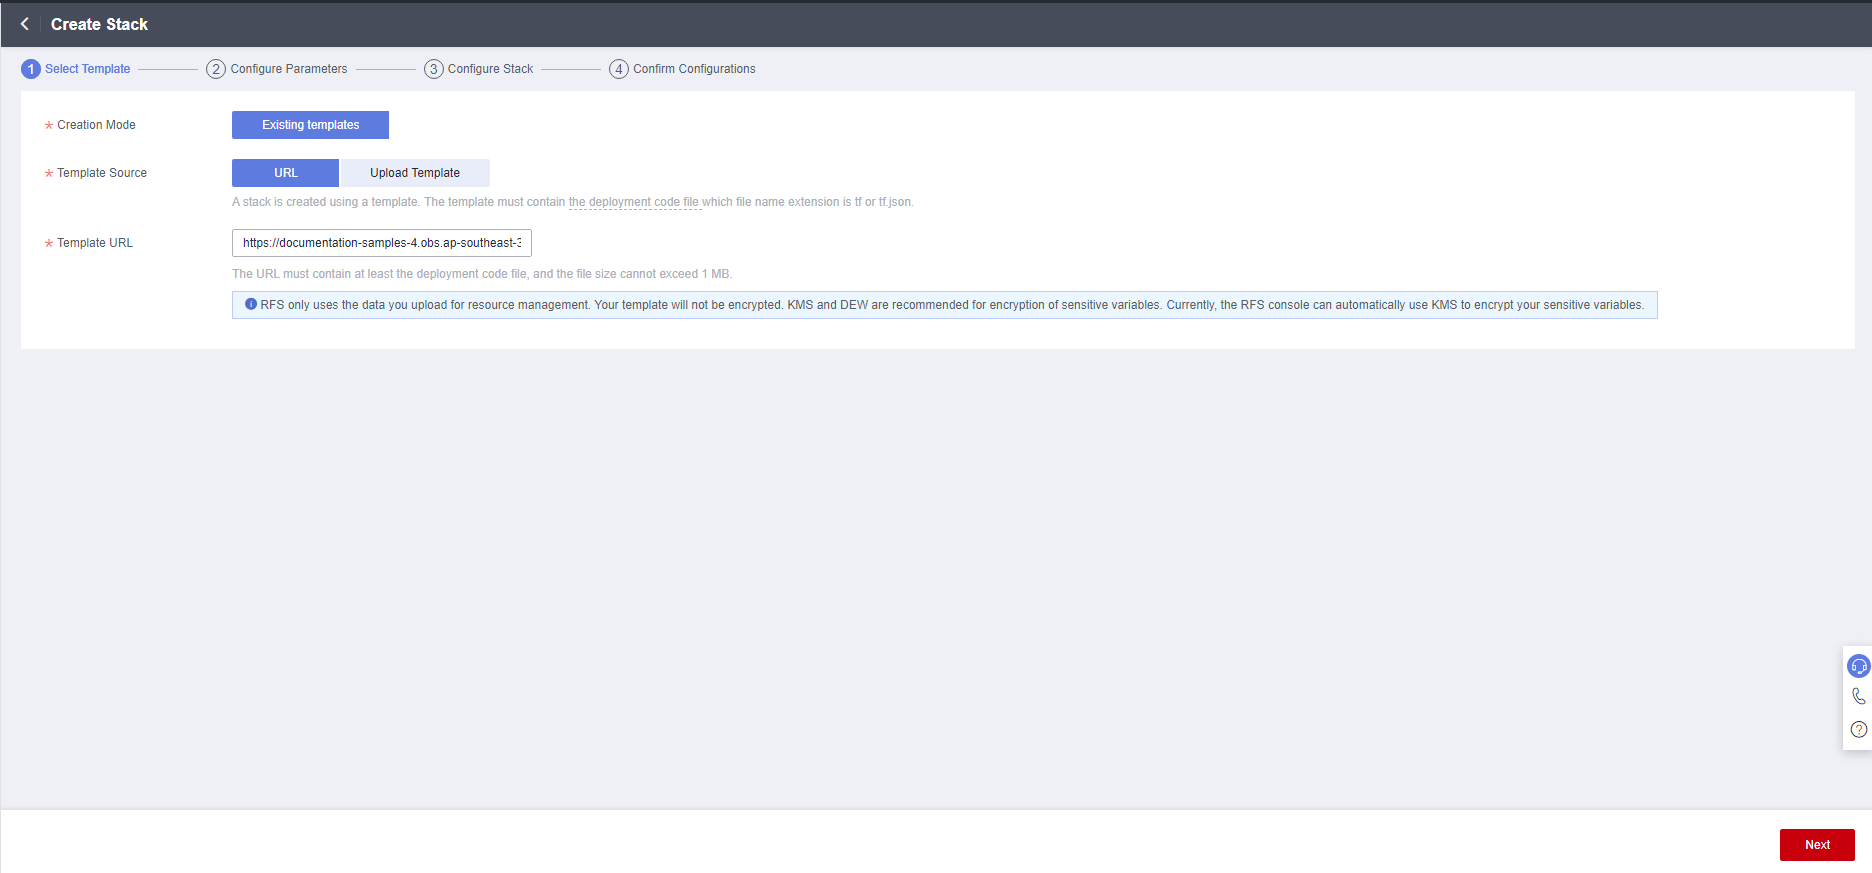
- On the Select Template page, click Next.
Figure 2 Selecting a template
- On the Configure Parameters page, configure parameters by referring to Table 1 and click Next.
Figure 3 Configuring parameters
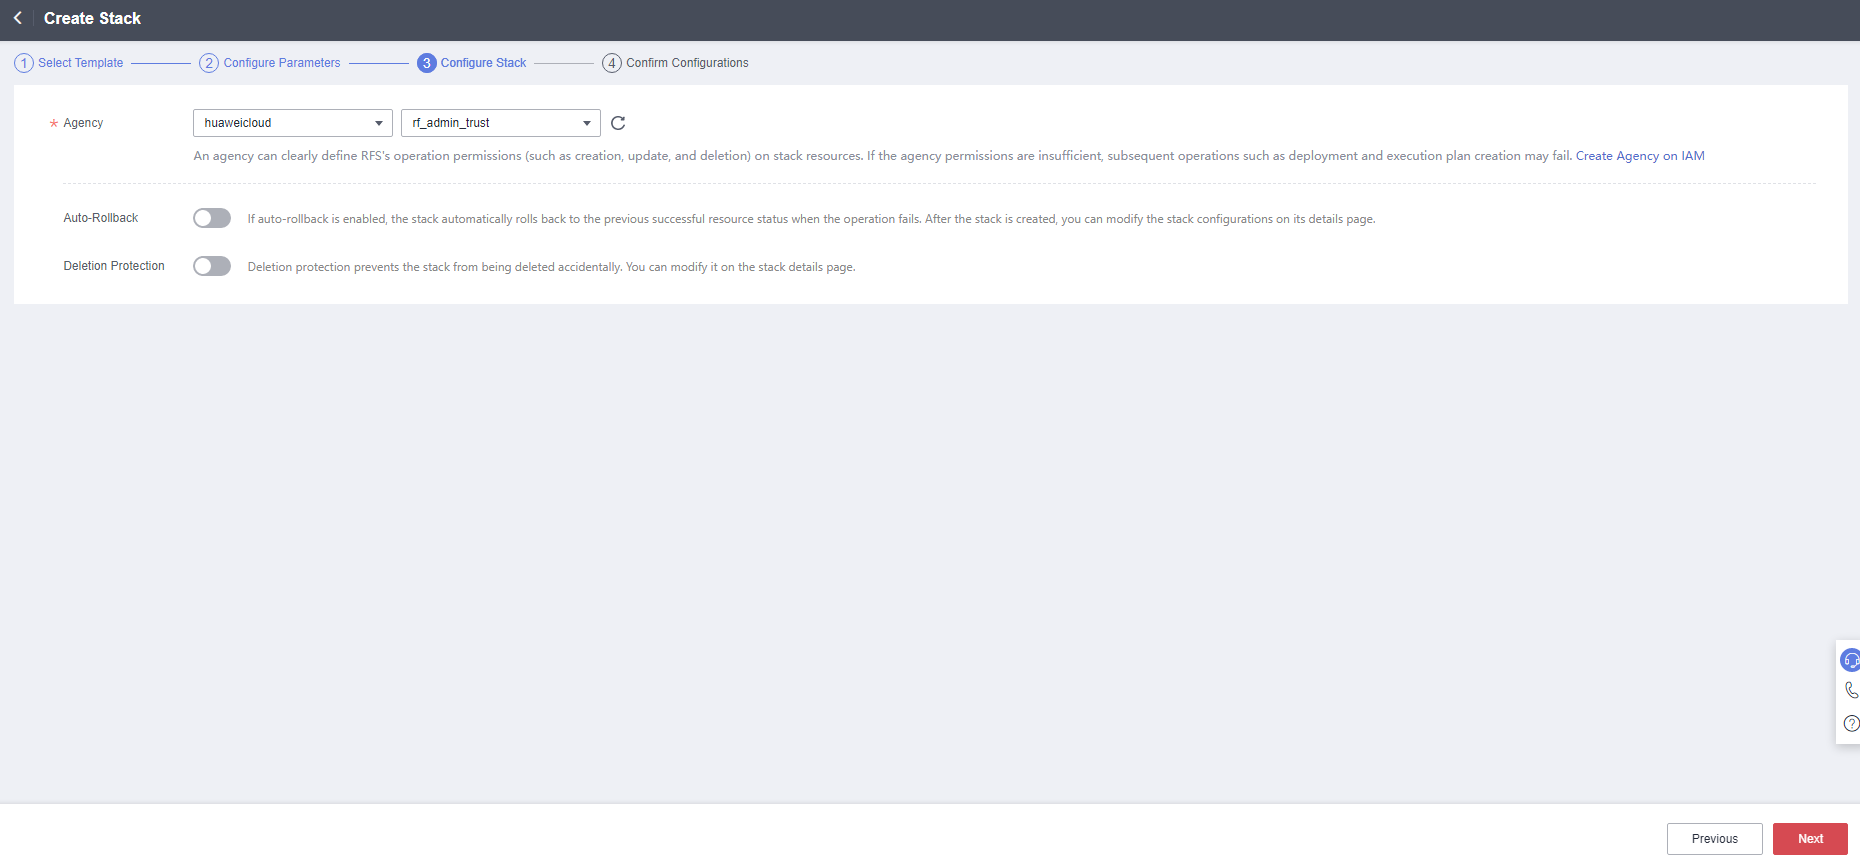
- On the displayed page, select rf_admin_trust from the Agency drop-down list and click Next.
Figure 4 Configuring a stack
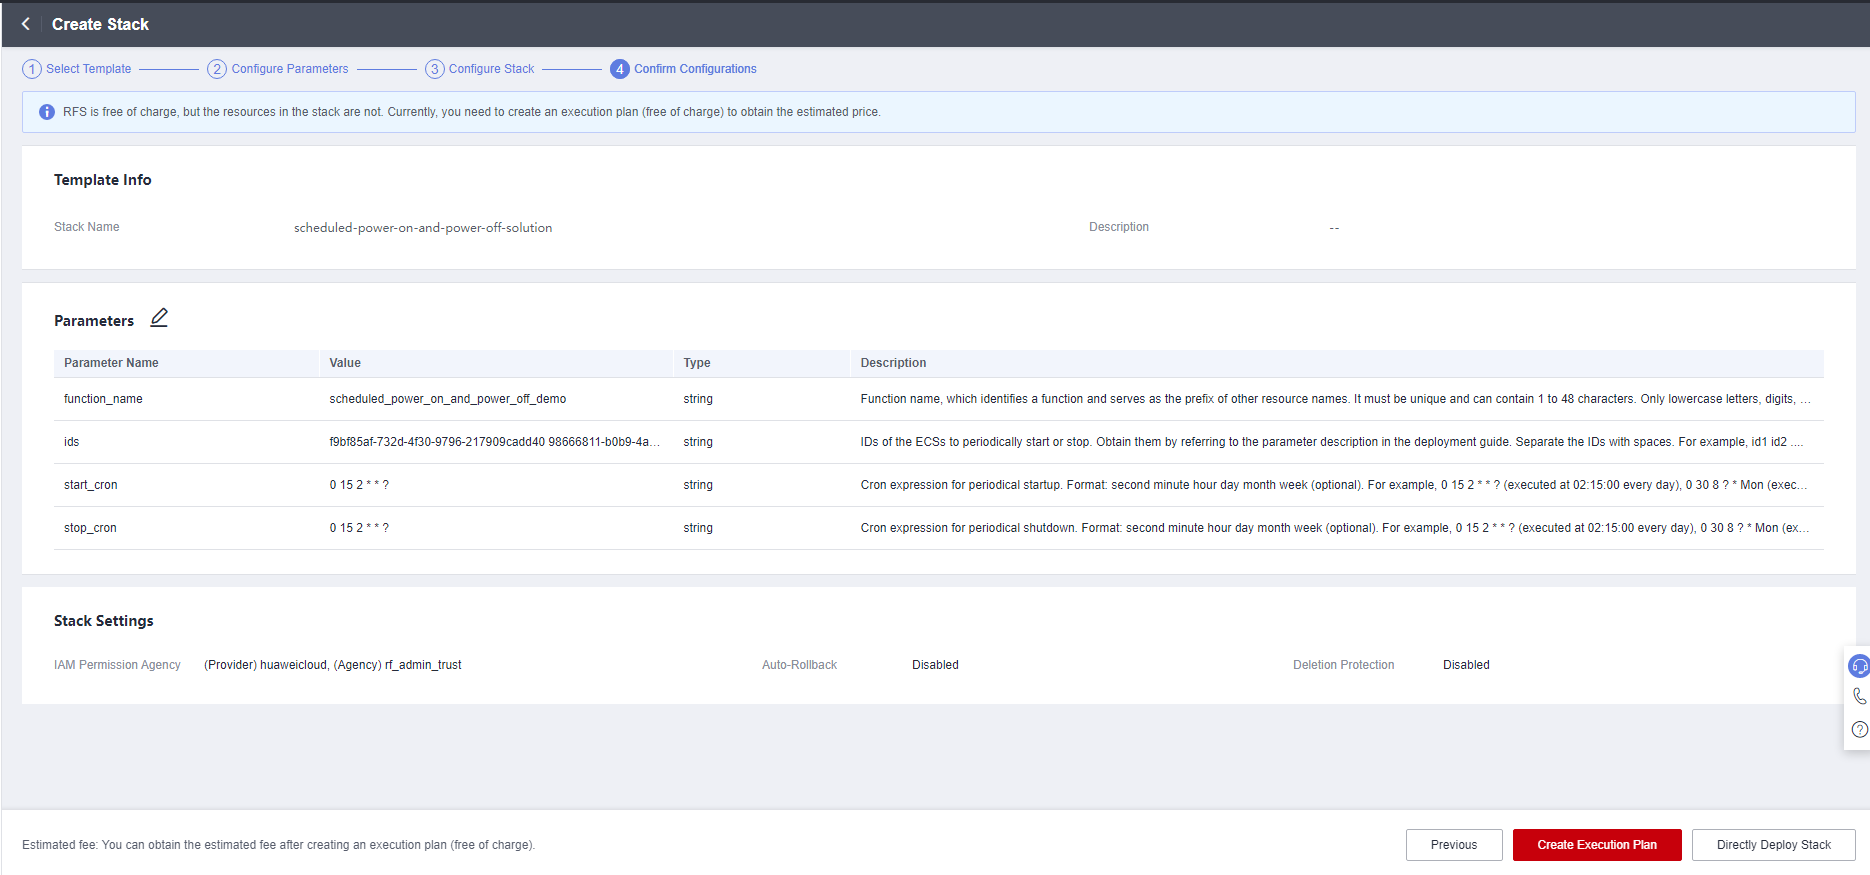
- On the Confirm Configurations page, click Create Execution Plan.
Figure 5 Confirming configurations
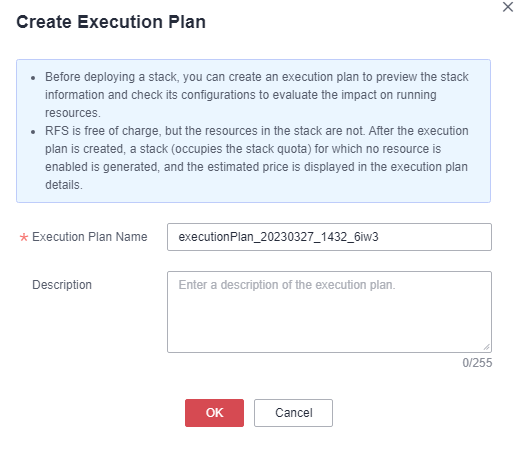
- In the displayed Create Execution Plan dialog box, enter an execution plan name and click OK.
Figure 6 Creating an execution plan
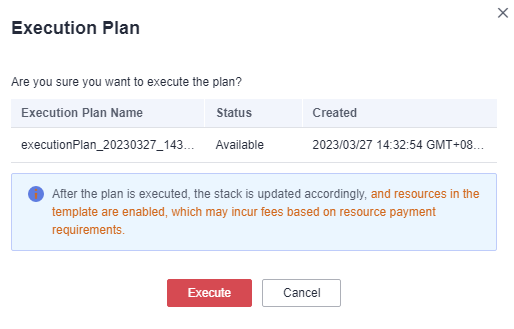
- Click Deploy. In the displayed dialog box, click Execute.
Figure 7 Execution Plans tab
 Figure 8 Confirming the execution plan
- Click the Events tab and check whether the message "Apply required resource success." is displayed. If yes, the solution is successfully deployed.
Figure 9 Solution deployed

Feedback
Was this page helpful?
Provide feedbackThank you very much for your feedback. We will continue working to improve the documentation.See the reply and handling status in My Cloud VOC.
For any further questions, feel free to contact us through the chatbot.
Chatbot


