
Calling the Face Detection APIs
This section describes how to call the Face Detection API to help you get familiar with FRS.
To call an FRS API, perform the following steps:
Step 1: Subscribe to the Service
Step 2: Configure the Environment
Step 3: Use a Token for Authentication
Preparations
Register an account with HUAWEI CLOUD and make sure your account is not in arrears or frozen.
Step 1: Subscribe to the Subservice
- Log in to the FRS console.
- In the navigation pane on the left click Authorization. On the displayed page, click Agree to authorize FRS to access the data stored on OBS.
- On the displayed Subscription page, select and subscribe to your desired APIs.
In this example, subscribe to the Face Detection API.
Step 3: Use a Token for Authentication
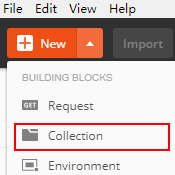
- On the Postman homepage, choose , specify the name, and click Create.
- Right-click the created collection and select Add Request from the shortcut menu. Set the request name and click Save.

- Change the request mode to POST and enter the URL.
For example, if your region is ap-southeast-1, set the URL to https://iam.ap-southeast-1.myhuaweicloud.com/v3/auth/tokens.
- In the Headers list, set KEY to Content-Type and VALUE to application/json.

- Click the Body configuration item, select raw, and enter the following code in the blank area.

Replace username, domainname, ******** (login password), and name (region where the service is deployed) with the actual values in the following request body. To obtain the values of these parameters, log in to the management console and hover over the username in the upper right corner, and select My Credentials from the drop-down list.
The region where FRS is deployed must be the same as the region where you call the service. In this example, the region is ap-southeast-1.
{ "auth": { "identity": { "methods": [ "password" ], "password": { "user": { "name": "username", "password": "**********", "domain": { "name": "domainname" } } } }, "scope": { "project": { "name": "ap-southeast-1" } } } } - Click Send in the upper right corner to send the request. Obtain the token from the returned result. The token is valid for 24 hours.

Step 4: Send API Calling Requests
- Create a request, set the request mode to POST, and enter the URL as needed.
For example, if the Face Detection subservice is deployed in the CN-Hong Kong region, the request URL is https://face.ap-southeast-1.myhuaweicloud.com/v2/{project_id}/face-detect.
Click Headers and copy the token to X-Auth-Token.
Log in to the FRS console, hover over the username in the upper right corner, and select My Credentials from the drop-down list. Query the ID of a project in the CN-Hong Kong region, and replace {project_id} in the URL with the queried project ID.


- Click Body and add the Base64 code of an image to the request body. For details about the API parameters, see Face Detection.
{ "image_base64":"/9j/4AAQSkZJRgABAgEASABIAAD/4RFZRXhpZgAATU0AKgAAAA..." } - Click Send in the upper right corner to send the request and view the results.
Feedback
Was this page helpful?
Provide feedbackThank you very much for your feedback. We will continue working to improve the documentation.See the reply and handling status in My Cloud VOC.
For any further questions, feel free to contact us through the chatbot.
Chatbot


