
Installing the Agent on Cloud Platform Servers
Scenario
You can enable HSS for servers only after installing the agent. This section describes how to install the agent on cloud platform servers.
Prerequisites
- The settings of security group outbound portsand third-party security software are appropriate and do not hinder agent installation. You have performed the operations in Preparing the Installation Environment.
- The VPCOperatePolicy and VPCEPOperatePolicy permissions have been granted to HSS. For details, see Authorization.
Agent Installation Modes
HSS supports two installation modes. For details about their differences, see Table 1.
|
Agent Installation Mode |
Description |
Scenario |
|---|---|---|
|
GUI |
It is easy and more efficient than installing the agent using commands. To install the agent in this mode, you simply need to provide HSS with the server username-password pair or key. HSS does not store the password file you upload. |
There is at least one server with an online agent in the VPC of the servers where the agent is to be installed. |
|
Commands or script |
You need to log in to the server and run commands or a script to install the agent. This method is more complex and slower than installation through the GUI. |
|
Using a Username and Password to Install the Agent on a Cloud Platform Server
- Log in to the management console.
- Click
 in the upper left corner and select a region or project.
 - In the upper left corner of the page, click
 and choose .
 - In the navigation pane, choose .
- (Optional) If you have enabled the enterprise project function, select an enterprise project from the Enterprise Project drop-down list in the upper part of the page to view its data.
- In the upper right corner of the page, click Install HSS Agent.
- Select ECS and click Configure Now.
- Configure installation parameters as follows:
- Install Mode: Select GUI.
- Server Authentication Mode: Select Account and password.
- Scale: Select Single.
- Select a server and click Next.
- Enter a username and password as prompted.
- Linux
Provide information based on whether the server can be logged in using the root account.
- If Allow direct connection with root permissions is selected:
The root account can be used to log in to the server. Provide the root user password and login port. HSS will use your root account to install the agent for the server.
- If Allow direct connection with root permissions is not selected:
The root account cannot be used to log in to the server. Provide another username and password for login, and the root password for privilege escalation. HSS will use the provided account information to install the agent for the server.
- If Allow direct connection with root permissions is selected:
- Windows
- Linux
- Confirm the information and click OK.
You can view the Agent Status column to check the agent installation progress. If the Agent Status is Online, the agent has been installed.
Using a Username and Password to Install the Agent on Multiple Cloud Platform Servers
- Log in to the management console.
- Click in the upper left corner and select a region or project.
- In the upper left corner of the page, click and choose .
- In the navigation pane, choose .
- (Optional) If you have enabled the enterprise project function, select an enterprise project from the Enterprise Project drop-down list in the upper part of the page to view its data.
- In the upper right corner of the page, click Install HSS Agent.
- Select ECS and click Configure Now.
- Configure installation parameters as follows:
- Install Mode: Select GUI.
- Server Authentication Mode: Select Account and password.
- Scale: Select Batch.
- Upload the installation template.
- Click Download Template to download the batch installation template to your local PC.
- Open the downloaded file, fill in server information as required, and save the file.
- Click Select File and upload the file.
HSS will automatically match the servers based on IP addresses. If the matching fails, you can click View Failed Servers and check the failure cause.
- Select servers.
- Confirm the information and click OK.
You can view the Agent Status column to check the agent installation progress. If the Agent Status is Online, the agent has been installed.
Using DEW to Install the Agent on One or Multiple Cloud Platform Servers
- Log in to the management console.
- Click in the upper left corner and select a region or project.
- In the upper left corner of the page, click and choose .
- In the navigation pane, choose .
- (Optional) If you have enabled the enterprise project function, select an enterprise project from the Enterprise Project drop-down list in the upper part of the page to view its data.
- In the upper right corner of the page, click Install HSS Agent.
- Select ECS and click Configure Now.
- Configure installation parameters as follows:
- Install Mode: Select GUI.
- Server Authentication Mode: Select Key.
- Key Source: Select DEW
- Select servers and click OK.
In the server list, only the servers bound to DEW are displayed.
- In the row of a server, check its agent installation progress in the Agent Status column.
If the Agent Status is Online, the agent has been installed.
Using a User-created Key to Install the Agent on One or Multiple Cloud Platform Servers (Linux Only)
- Log in to the management console.
- Click in the upper left corner and select a region or project.
- In the upper left corner of the page, click and choose .
- In the navigation pane, choose .
- (Optional) If you have enabled the enterprise project function, select an enterprise project from the Enterprise Project drop-down list in the upper part of the page to view its data.
- In the upper right corner of the page, click Install HSS Agent.
- Select ECS and click Configure Now.
- Configure installation parameters as follows:
- Install Mode: Select GUI.
- Server Authentication Mode: Select Key.
- Key Source: Select User-created key (Linux only).
- Upload the installation template.
- Click Download Template to download the batch installation template to your local PC.
- Open the downloaded file, fill in server information as required, and save the file.
- Click Select File and upload the file.
HSS will automatically parse the file and identify the servers you specified. If the parsing fails, you can click View Failed Servers and check the failure cause.
- Confirm the information and click OK.
- In the row of a server, check its agent installation progress in the Agent Status column.
If the Agent Status is Online, the agent has been installed.
Using Commands to Install the Agent on a Cloud Platform Linux Server
- Log in to the management console.
- Click in the upper left corner and select a region or project.
- In the upper left corner of the page, click and choose .
- In the navigation pane, choose .
- (Optional) If you have enabled the enterprise project function, select an enterprise project from the Enterprise Project drop-down list in the upper part of the page to view its data.
- In the upper right corner of the page, click Install HSS Agent.
- Select ECS and click Configure Now.
- Configure installation parameters as follows:
- Install Mode: Select Command.
- Server OS: Select Linux.
- Scale: Select Single.
- Install the agent as prompted.
- On the console page, click
 in the Install HSS Agent dialog box to copy the installation command.
 - Log in to the server as the root user and paste the installation command.
If the command output shown in Figure 1 is displayed, the agent has been installed.
- Wait for 5 to 10 minutes and return to the HSS console. On the Server Install & Config page, click the Agents tab, and click Servers with Agents. Check the agent status of the target server.
If the Agent Status is Online, the agent has been installed.
- On the console page, click

Using Commands to Install the Agent on Multiple Cloud Platform Linux Servers
- Log in to the management console.
- Click in the upper left corner and select a region or project.
- In the upper left corner of the page, click and choose .
- In the navigation pane, choose .
- (Optional) If you have enabled the enterprise project function, select an enterprise project from the Enterprise Project drop-down list in the upper part of the page to view its data.
- In the upper right corner of the page, click Install HSS Agent.
- Select ECS and click Configure Now.
- Configure installation parameters as follows:
- Install Mode: Select Command.
- Server OS: Select Linux.
- Scale: Select Batch.
- Server Authentication Mode: Select Account and password or Key as needed.
- Install the agent as prompted.
Perform the following operations on any server:
- On the console, click linux-host-list.csv in the Install HSS Agent dialog box to download the template.
- Enter the server information based on the requirements in the linux-host-list.csv template and save the template.
Ensure that the entered server verification information is consistent with the verification mode selected in 8.
- Use the root account to remotely log in to any target server.
- Use the SSH client to upload the linux-host-list.csv file to the /tmp directory on the server.
- Return to the HSS console. In the Install HSS Agent dialog box, click
 to copy the installation command.
 - Paste and run the installation command on the server to install the agent.
If the information shown in Figure 2 is displayed, the installation is complete.
- Wait for 5 to 10 minutes and return to the HSS console. On the Server Install & Config page, click the Agents tab, and click Servers with Agents. Check the agent status of the target server.
If the Agent Status is Online, the agent has been installed.

Using the Script to Install the Agent on a Cloud Platform Windows Server
- Log in to the management console.
- Click in the upper left corner and select a region or project.
- In the upper left corner of the page, click and choose .
- In the navigation pane, choose .
- (Optional) If you have enabled the enterprise project function, select an enterprise project from the Enterprise Project drop-down list in the upper part of the page to view its data.
- In the upper right corner of the page, click Install HSS Agent.
- Select ECS and click Configure Now.
- Configure installation parameters as follows:
- Install Mode: Select Command.
- Server OS: Select Windows.
- Scale: Select Single.
- Install the agent as prompted.
- On the console, click installAgent.ps1 in the Install HSS Agent dialog box to download the installation script.
- Log in as user Administrator to the server where the agent is to be installed.
- Copy the installAgent.ps1 file to the C:\Users directory of the server where the agent is to be installed.
- Right-click installAgent.ps1 and choose Run with PowerShell.
- (Optional) In the dialog box that is displayed, enter Y to run the script to install the agent.
If no dialog box is displayed, skip this step.
Figure 3 Changing the execution policy
- After the execution, open the Task Manager and check whether hostguard.exe and hostwatch.exe exist. If they do, the agent has been installed.
Figure 4 Agent installed

- Wait for 5 to 10 minutes and return to the HSS console. On the Server Install & Config page, click the Agents tab, and click Servers with Agents. Check the agent status of the target server.
If the Agent Status is Online, the agent has been installed.
Using the Script to Install the Agent on Multiple Cloud Platform Windows Servers
- Log in to the management console.
- Click in the upper left corner and select a region or project.
- In the upper left corner of the page, click and choose .
- In the navigation pane, choose .
- (Optional) If you have enabled the enterprise project function, select an enterprise project from the Enterprise Project drop-down list in the upper part of the page to view its data.
- In the upper right corner of the page, click Install HSS Agent.
- Select ECS and click Configure Now.
- Configure installation parameters as follows:
- Install Mode: Select Command.
- Server OS: Select Windows.
- Scale: Select Batch.
- Install the agent as prompted.

- Perform the following operations on any server.
- To install the agent, the server where the script is executed needs to access the port 5985 on other servers. Modify the inbound rules of the security groups on those servers to allow such access, or HSS will temporarily modify their security group rules while installing the agent. After the agent is installed, the modified settings will be deleted.
- On the console, click windows-host-list.xlsx in the Install HSS Agent dialog box to download the template to the local PC.
- Enter server information based on the requirements in the windows-host-list.xlsx template and save it.
- Return to the HSS console and click BatchInstallAgent.ps1 to download the installation script.
- Log in as user Administrator to a server where the agent is to be installed.
- Copy the windows-host-list.xlsx and BatchInstallAgent.ps1 files to the C:\Users directory of the server where the agent is to be installed.
- Right-click BatchInstallAgent.ps1 and choose Run with PowerShell.
- (Optional) In the dialog box that is displayed, enter Y to run the script to install the agent.
If no dialog box is displayed, skip this step.
Figure 5 Changing the execution policy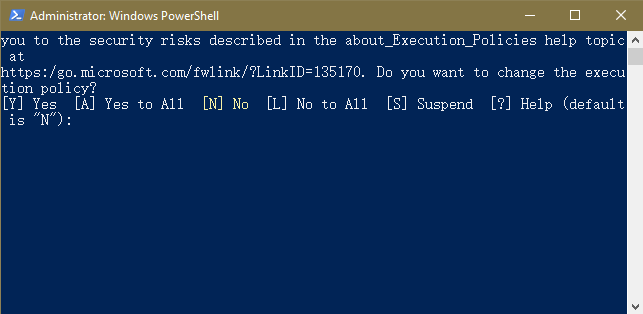
- After the script is executed successfully, check whether the BatchInstallAgent.log file exists in C:\Users\Administrator.
If the BatchInstallAgent.log file exists, the agent has been installed.
- Wait for 5 to 10 minutes and return to the HSS console. On the Server Install & Config page, click the Agents tab, and click Servers with Agents. Check the agent status of the target server.
If the Agent Status is Online, the agent has been installed.
Follow-up Procedure
After the agent is installed on servers, enable protection.
Feedback
Was this page helpful?
Provide feedbackThank you very much for your feedback. We will continue working to improve the documentation.See the reply and handling status in My Cloud VOC.
For any further questions, feel free to contact us through the chatbot.
Chatbot


