
Commissioning Flink Applications on Flink WebUI and Linux
Scenario
IoTDB applications can run in a Linux environment where the Flink client is installed and in an environment where the Flink web UI is installed. After the application code is developed, you can upload the JAR file to the prepared environment.
Prerequisites
- The Flink component has been installed in the cluster and the FlinkServer instance has been added.
- The cluster client that contains the Flink service has been installed, for example, in the /opt/client directory.
- If the host where the client is installed is not a node in the cluster, the mapping between the host name and the IP address must be set in the hosts file on the node where the client is located. The host names and IP addresses must be mapped one by one.
Procedure
- Build a JAR file.
- In IntelliJ IDEA, configure Artifacts of the project before generating a JAR file.
- On the IDEA homepage, choose to go to the Project Structure page.
- On the Project Structure page, select Artifacts, click +, and select From modules with dependencies....
Figure 1 Adding Artifacts

- Select extract to the target JAR and click OK.

- Set the name, type, and output path of the JAR file based on the site requirements.
To avoid JAR file conflicts caused by unnecessary JAR files, you only need to load the following basic JAR files related to IoTDB:
- flink-iotdb-connector-*
- flink-tsfile-connector-*
- hdoop-tsfile-*
- influxdb-thrift-*
- iotdb-antlr-
- iotdb-session-*
- iotdb-thrift-*
- iotdb-thrift-commons-*
- isession-*
- libthrift-*
- iotdb-session-*
- iotdb-thrift-*
- service-rpc-*
- tsfile-*
Click OK.
- On the IDEA home page, choose . On the Build Artifact page that is displayed, choose Action > Build.


- After the build is successful, the message "Build completed successfully" is displayed in the lower right corner, and the corresponding JAR file is generated in the Output Directory directory.
- In IntelliJ IDEA, configure Artifacts of the project before generating a JAR file.
- Run a Flink job.
- Scenario 1: Run a Flink job on the Flink WebUI
- Log in to FusionInsight Manager of the cluster as a user who has the FlinkServer web UI management permission, choose Cluster > Services > Flink, and click the hyperlink next to Flink WebUI on the dashboard page to go to the FlinkServer web UI.
- On the FusionInsight Flink web UI, choose Job Management > Create Job to create a job.

- Set Type to Flink Jar, enter the name of the job to be created, select a task type, and click OK.

- Upload the JAR file generated in 1, set Main Class to Specify, enter the class to be executed in Class Parameter, and click Submit.
For example, set Type to com.huawei.bigdata.iotdb.FlinkIoTDBSink (development program that executes FlinkIoTDBSink Sample Program) or com.huawei.bigdata.iotdb.FlinkIoTDBSource (development program that executes FlinkIoTDBSource Sample Program).

- Scenario 2: Submit a Flink job on the Flink client in the Linux environment.
- Log in to the MRS client as a client installation user.
- Run the following command to initialize environment variables:
- If Kerberos authentication is enabled for the cluster, perform 2.d to 2.k. If Kerberos authentication is disabled for the cluster, skip these steps.
- Prepare a user for submitting Flink jobs.
For details, see Preparing MRS Application Development User.
- Log in to Manager using the created user, choose System > Permission > User. Locate the row that contains the new user and choose More > Download Authentication Credential in the Operation column.
- Decompress the downloaded authentication credential package and copy the user.keytab file to the client node, for example, to the /opt/client/Flink/flink/conf directory on the client node.
- In security mode, append the service IP address of the node where the client is installed and floating IP address of Manager to the jobmanager.web.allow-access-address configuration item in the /opt/client/Flink/flink/conf/flink-conf.yaml file. Use commas (,) to separate IP addresses.
- Run the following commands to configure security authentication by adding the keytab path and username to the /opt/client/Flink/flink/conf/flink-conf.yaml configuration file.
security.kerberos.login.keytab: <user.keytab file path>
security.kerberos.login.principal: <Username>
Example:
security.kerberos.login.keytab: /opt/client/Flink/flink/conf/user.keytab security.kerberos.login.principal: test - In the bin directory on the Flink client, run the following command to perform security hardening. For details, see Authentication and Encryption.
sh generate_keystore.sh
After the script is executed, enter a password for submitting jobs. Then, the value of SSL in /opt/client/Flink/flink/conf/flink-conf.yaml is automatically replaced.

- In Authentication and Encryption, the generated flink.keystore, flink.truststore, and security.cookie are automatically filled in the corresponding configuration items in flink-conf.yaml.
- The values of security.ssl.key-password, security.ssl.keystore-password, and security.ssl.truststore-password must be obtained using the Manager plaintext encryption API by running the following command:
curl -k -i -u <user name>:<password> -X POST -HContent-type:application/json -d '{"plainText":"<password>"}' 'https://x.x.x.x:28443/web/api/v2/tools/encrypt'; in the preceding command, <password> must be the same as the password used for issuing the certificate, and x.x.x.x indicates the floating IP address of Manager in the cluster.
- Configure paths for the flink.keystore and flink.truststore files.
- Absolute path: After the script is executed, the flink.keystore and flink.truststore file paths are automatically set to absolute paths in the flink-conf.yaml file. In this case, you need to place the flink.keystore and flink.truststore files in the conf directory to the absolute paths of the Flink client and each Yarn node in the cluster, respectively.
- Relative path: Perform the following operations to set the flink.keystore and flink.truststore files to relative paths:
- In the /opt/client/Flink/flink/conf/ directory, create a directory, for example, ssl.
cd /opt/client/Flink/flink/conf
mkdir ssl
- Move the flink.keystore and flink.truststore files to the new folder.
mv flink.keystore flink.truststore ssl/
- Change the values of the following parameters to relative paths in the flink-conf.yaml file:
security.ssl.keystore: ssl/flink.keystore
security.ssl.truststore: ssl/flink.truststore
- In the /opt/client/Flink/flink/conf/ directory, create a directory, for example, ssl.
- Add the IP addresses of the nodes where the clients are located to the following configuration items in the flink-conf.yaml file. Use commas (,) to separate IP addresses.
web.access-control-allow-origin: xx.xx.xxx.xxx
jobmanager.web.allow-access-address: xx.xx.xxx.xxx
- Upload the JAR file generated in 1 to the Flink client node, for example, /opt/client/Flink/flink, and submit the job.

To submit or run jobs on Flink, the user must have the following permissions:
- If Ranger authentication is enabled, the current user must belong to the hadoop group or the user has been granted the /flink read and write permissions in Ranger.
- If Ranger authentication is disabled, the current user must belong to the hadoop group.
- If the flink.keystore and flink.truststore files are stored in the absolute path:
Run the following commands to start a session and submit a job in the session: com.huawei.bigdata.iotdb.FlinkIoTDBSink is the application in FlinkIoTDBSink Sample Program.
yarn-session.sh -nm "session-name"
flink run --class com.huawei.bigdata.iotdb.FlinkIoTDBSink /opt/client/Flink/flink/flink-example.jar
- If the flink.keystore and flink.truststore files are stored in the relative path:
In the same directory of SSL, run the following commands to start a session and submit a job in the session. The SSL directory is a relative path. For example, if the SSL directory is /opt/client/Flink/flink/conf/, then run the following commands in this directory.
com.huawei.bigdata.iotdb.FlinkIoTDBSink is the application in FlinkIoTDBSink Sample Program.
yarn-session.sh -t ssl/ -nm "session-name"
flink run --class com.huawei.bigdata.iotdb.FlinkIoTDBSink /opt/client/Flink/flink/flink-example.jar
- Scenario 1: Run a Flink job on the Flink WebUI
Viewing Commissioning Results
- Check whether the job is executed.
- Using the Flink web UI
If a success message is returned on the Flink web UI, the execution is successful. You can choose More > Job Monitoring in the Operation column to view detailed logs.

- Using the Flink client
Log in to FusionInsight Manager as a running user, go to the native page of the Yarn service, find the application of the corresponding job, and click the application name to go to the job details page.
- If the job is not complete, click Tracking URL to go to the native Flink service page and view the job running information.
- If the job submitted in a session has been completed, you can click Tracking URL to log in to the native Flink service page to view job information.

- Using the Flink web UI
- Verify the job execution result.
- FlinkIoTDBSink execution result:
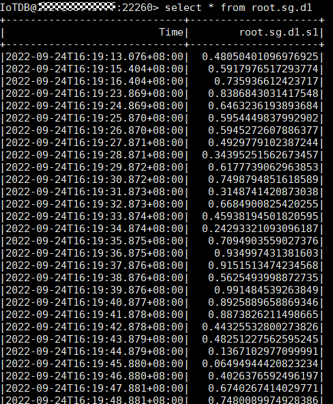
- Run the following command on the IoTDB client and check whether the data has been written from Flink to IoTDB:
- FlinkIoTDBSource execution result:
- Log in to FusionInsight Manager as a running user and choose Cluster > Services > HDFS. Click the hyperlink next to NameNode WebUI to access the HDFS web UI.
- Choose Utilities > Browse the file system.

- Go to the /tmp/logs/Execution username/bucket-logs-tfile/Task ID/Flink task ID directory and download all files in the directory to the local PC.

- Search for root.sg.d1 in the files downloaded in 2.c. If the following information is displayed, data is successfully read from IoTDB.

- Run the following command on the IoTDB client and check whether the data has been written from Flink to IoTDB:
- FlinkIoTDBSink execution result:
Feedback
Was this page helpful?
Provide feedbackThank you very much for your feedback. We will continue working to improve the documentation.See the reply and handling status in My Cloud VOC.
For any further questions, feel free to contact us through the chatbot.
Chatbot


