
Configuring the VM
Install VirtIO Drivers
If VirtIO drivers are not installed, the image you create will be unavailable.
- Download a VirtIO driver package.
Download a virtio-win.iso driver package of the required version from:
https://fedorapeople.org/groups/virt/virtio-win/direct-downloads/archive-virtio/
- On the VirtualBox Windows VM, choose Device > Allocate Drive > virtio-win.iso.
- Choose Computer > CD Drive.
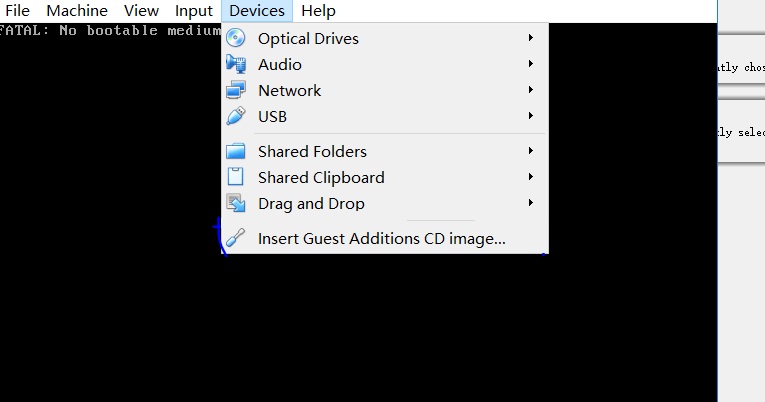
Install VirtualBox Guest Additions
After Guest Additions are installed on a Windows VM, files can be easily shared between the VM and host.
- On the VirtualBox Windows VM, choose Devices > Insert Guest Additions CD image. Figure 1 Installing Guest Additions
- Choose Computer > CD Drive, double-click VirtualBox Guest, and complete the installation as prompted.
- Verify the installation.
After the installation is complete, click Devices to check whether a shared folder exists.
Figure 2 Verifying the installation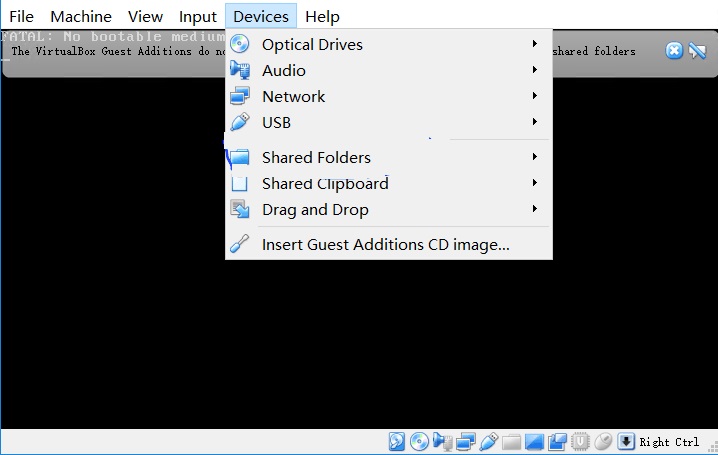
- Set the folder sharing mode.
Select a folder path on the host where VirtualBox has been installed and set the sharing mode. After the folder is shared, you can access it from the VirtualBox VM.
Figure 3 Setting the folder sharing mode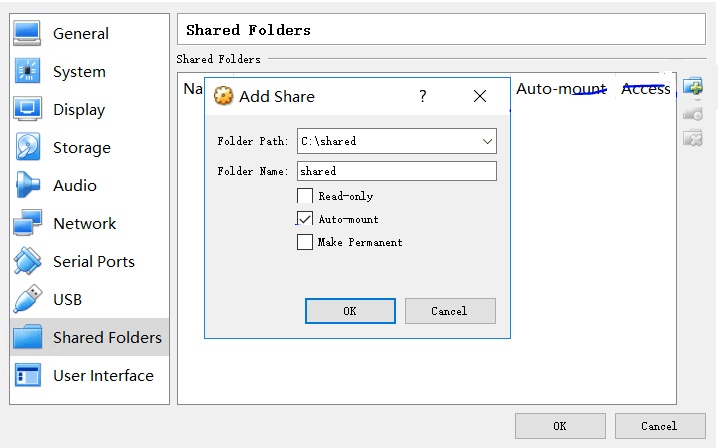
(Optional) Install Cloudbase-Init
To ensure that you can inject custom information (for example, the login password) into ECSs created from the image, you are advised to install Cloudbase-Init on the VM that is used as the image source. If you do not install it, you can log in to the ECSs only with the password specified in the image.

Cloudbase-Init is open-source software. If the installed version has security vulnerabilities, you are advised to upgrade it to the latest version.
- Download a Cloudbase-Init package.
Download a Cloudbase-Init package of the required version based on the OS bit and save the package to a local shared folder.
Cloudbase-Init official website: https://www.cloudbase.it/cloud-init-for-windows-instances/
- On the VirtualBox Windows VM, choose Computer > Network > VBOXSVR.
- Double-click the shared folder, copy the Cloudbase-Init package to the VM, and double-click the package to install Cloudbase-Init.
In this section, CloudbaseInitSetup_0_9_11_x64 is used as an example.
Configure Cloudbase-Init
- Edit the configuration file C:\Program Files\Cloudbase Solutions\Cloudbase-Init\conf\cloudbase-init.conf in the Cloudbase-Init installation path.
- Add netbios_host_name_compatibility=false to the last line of the file so that the hostname can have a maximum of 63 characters.
If you are using NetBIOS in your network, the hostname cannot exceed 15 characters because NetBIOS has a 15-character limit.
- Add metadata_services=cloudbaseinit.metadata.services.httpservice.HttpService to enable the agent to access the IaaS OpenStack data source.
- Add plugins to configure the plugins that will be loaded. Separate plugins with commas (,). The information in bold is the keyword of each plugin.
- The following plugins are loaded by default. You can keep all or some of them as needed.
plugins=cloudbaseinit.plugins.common.localscripts.LocalScriptsPlugin,cloudbaseinit.plugins.common.mtu.MTUPlugin,cloudbaseinit.plugins.windows.createuser.CreateUserPlugin,cloudbaseinit.plugins.common.setuserpassword.SetUserPasswordPlugin,cloudbaseinit.plugins.common.sshpublickeys.SetUserSSHPublicKeysPlugin,cloudbaseinit.plugins.common.sethostname.SetHostNamePlugin,cloudbaseinit.plugins.windows.extendvolumes.ExtendVolumesPlugin,cloudbaseinit.plugins.common.userdata.UserDataPlugin,cloudbaseinit.plugins.windows.licensing.WindowsLicensingPlugin
Plugin functions:
- LocalScriptsPlugin configures scripts.
- MTUPlugin configures MTU network interfaces.
- CreateUserPlugin creates a user.
- SetUserPasswordPlugin configures a password.
- SetUserSSHPublicKeysPlugin configures a key.
- SetHostNamePlugin configures a hostname.
- ExtendVolumesPlugin expands disk space.
- UserDataPlugin injects user data.
- WindowsLicensingPlugin activates Windows instances.
If you need to change the hostname of ECSs after they are created from this image, and services on the ECSs are sensitive to hostname changes, you are not advised to configure the SetHostNamePlugin here.
- Optional plugins:
plugins=cloudbaseinit.plugins.windows.winrmlistener.ConfigWinRMListenerPlugin,cloudbaseinit.plugins.windows.winrmcertificateauth.ConfigWinRMCertificateAuthPlugin
Plugin functions:
- ConfigWinRMListenerPlugin configures listening to remote logins.
- ConfigWinRMCertificateAuthPlugin configures remote logins without password authentication.

The WinRM plug-ins use a weak cryptographic algorithm, which may cause security risks. So, you are advised not to load these plug-ins.
- The following plugins are loaded by default. You can keep all or some of them as needed.
- (Optional) Add the following configuration items to configure the number of retry times and interval for obtaining metadata:
retry_count=40
retry_count_interval=5
- (Optional) Add the following configuration item to prevent metadata network disconnections caused by the default route added by Windows:
[openstack]
add_metadata_private_ip_route=False
- (Optional) If the Cloudbase-Init version is 0.9.12 or later, you can customize the password length.
Change the value of user_password_length to customize the password length.
- (Optional) Add the following configuration item to disable password changing upon first login:
- (Optional) Add the following configuration item to ensure that time synchronization from BIOS persists through system restarts:
The registry entry RealTimeIsUniversal=1 allows the system to synchronize time from BIOS. If real_time_clock_utc=true is not added, Cloudbase-Init will set RealTimeIsUniversal back to 0, causing the system to not synchronize time from BIOS after a restart.
- Add netbios_host_name_compatibility=false to the last line of the file so that the hostname can have a maximum of 63 characters.
- Release the current DHCP address so that the created ECSs can obtain correct addresses.
In the Windows command line, run the following command to release the current DHCP address:
ipconfig /release
This operation will interrupt network connection and adversely affect ECS use. The network will automatically recover after the ECSs are started again.
- When creating an image using a Windows ECS, you need to change the SAN policy of the ECS to OnlineAll. Otherwise, EVS disks attached to the ECSs created from the image may be offline.
Windows has three types of SAN policies: OnlineAll, OfflineShared, and OfflineInternal.
Table 1 SAN policies Type
Description
OnlineAll
All newly detected disks are automatically brought online.
OfflineShared
All disks on sharable buses, such as iSCSI and FC, are left offline by default, while disks on non-sharable buses are kept online.
OfflineInternal
All newly detected disks are left offline.
- Execute cmd.exe and run the following command to query the current SAN policy of the ECS using DiskPart:
diskpart
- Run the following command to view the SAN policy of the ECS: san
- If the SAN policy is OnlineAll, run the exit command to exit DiskPart.
- If the SAN policy is not OnlineAll, go to 3.c.
- Run the following command to change the SAN policy of the ECS to OnlineAll:
san policy=onlineall
- Execute cmd.exe and run the following command to query the current SAN policy of the ECS using DiskPart:
- Press Win+R to open the Run window. Enter services.msc and click OK. In the Services window, locate cloudbase-init. Set Startup type to Automatic.


(Optional) Install the One-Click Password Reset Plug-In
To ensure that you can reset the password of each ECS created from the image with a few clicks, you are advised to install the one-click password reset plug-in (CloudResetPwdAgent) on the VM that is used as the image source.
- Download the one-click password reset plug-in CloudResetPwdAgent.
Download the CloudResetPwdAgent.zip package from the following link and decompress it to a local shared folder:
- On the VirtualBox Windows VM, choose Computer > Network > VBOXSVR. Copy CloudResetPwdAgent.zip to the VM.
- Install the one-click password reset plug-in.
- Open the shared folder and double-click setup.bat in the CloudResetPwdAgent.Windows folder.
- Open Task Manager and check whether the installation is successful.
If you can find cloudResetPwdAgent in Task Manager, the installation is successful. Otherwise, the installation failed.
If the installation failed, check whether the installation environment meets the requirements and install the plug-in again.
Feedback
Was this page helpful?
Provide feedbackThank you very much for your feedback. We will continue working to improve the documentation.See the reply and handling status in My Cloud VOC.
For any further questions, feel free to contact us through the chatbot.
Chatbot


