Getting Started
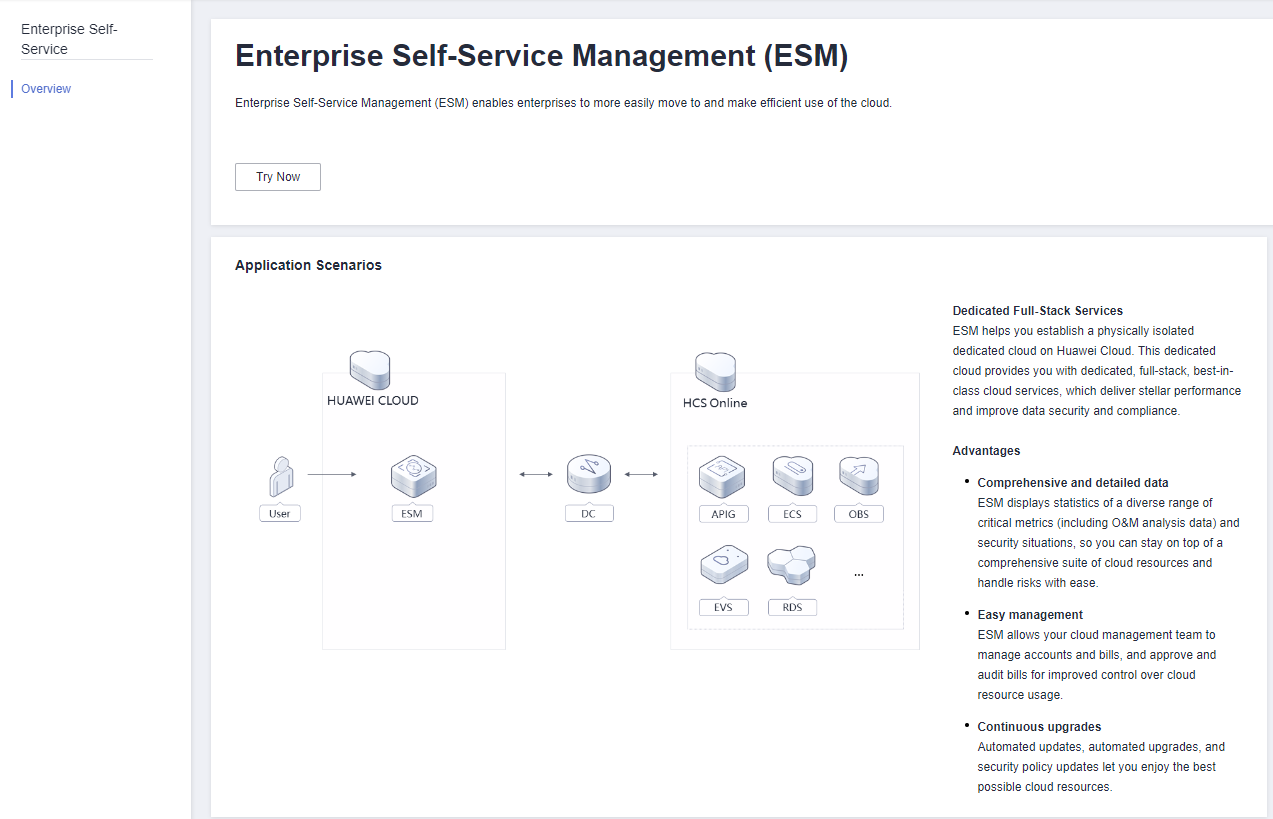
Accessing ESM Through the Huawei Cloud Console
- Log in to Huawei Cloud.
- Click
 in the upper left corner and choose All Services > Business Applications > Enterprise Self-Service Management (ESM).
 - In the navigation pane, choose Overview.

- Click Try Now to access ESM.
Creating a Tenant
- Choose Organization from the main menu.
- On the Tenants page, click Create Tenant.
- Set the parameters as described in Table 1.
- Click Confirm.
Viewing and Modifying Tenant Information
- Choose Organization from the main menu.
- On the Tenants page, perform the tasks described in Table 2 as needed.
Table 2 Related tasks Task
Description
Procedure
Viewing tenant information
You can view names, statuses, and descriptions of tenants in the tenant list.
View basic information about tenants.
Exporting tenant information
You can export basic information about tenants to your local system for backup and statistics collection.
Click Export and select Export Tenants. By default, information about all tenants is exported.
Exporting project information
You can export information about all projects in a tenant.
Click Export and select Export Projects. By default, information about all projects is exported.
- Locate the row that contains a tenant and click Modify in the Operation column.
- Change the tenant description.

When configuring a whitelist, you can change a tenant name.
- Click Confirm.
Configuring Quotas
- Choose Organization from the main menu.
- On the Tenants page, locate the row that contains a tenant and click Configure Quota in the Operation column. On the displayed page, set filter criteria on the right.
- Click Change Allocated Quota and enter a total quota for each metric item of each service.
- Click Save. In the displayed dialog box, confirm your quota changes.
- Click OK.
Freezing or Unfreezing a Tenant
- Choose Organization from the main menu.
- On the Tenants page, locate the row that contains the tenant to be frozen or unfrozen and choose More > Freeze or More > Unfreeze.

Only normal tenants can be frozen.
Only frozen tenants can be unfrozen.
- Click OK.
Managing Pre-deregistrations

Pre-deregistration management is enabled by default to prevent tenant accounts from being deleted by mistake or quickly restore accounts.
Pre-deregistering a tenant
- Choose Organization from the main menu.
- On the Tenants page, locate the row that contains the tenant to be deregistered and choose More > Pre-deregister.
- In the displayed dialog box, click OK.
- On the Pre-deregistrations tab page displayed by default, verify that the status of the tenant changes to Pre-deregistered.
Managing pre-deregistrations
- Choose Organization from the main menu.
- On the Tenants page, click the Pre-deregistrations tab.
- Perform the tasks described in Table 3 as needed.
Table 3 Pre-deregistration management tasks Task
Description
Procedure
Enabling or disabling frozen period configuration
You can choose whether to enable frozen period configuration.
Toggle on Set Frozen Period.
Toggle off Set Frozen Period.
Configuring a frozen period
You can configure a frozen period that applies to all tenants except the pre-deregistered ones whose frozen periods have started.
- Toggle on Set Frozen Period.
- Configure a frozen period before deregistration.
- Click OK.
Restoring a tenant
You can restore a pre-deregistered tenant.
NOTE:Only tenants in the Frozen state can be restored.
Locate the row that contains a pre-deregistered tenant and click Restore in the Operation column.
You can also select multiple tenants and click Restore on the left above the list to restore them.
Deleting a tenant
You can permanently delete a tenant that is no longer in use.
NOTE:- Only the tenants whose frozen periods have ended can be deleted.
- After a tenant is permanently deleted, all resource data and configurations of the tenant cannot be restored.
- Locate the row that contains the tenant and click Permanently Delete.
- In the displayed dialog box, enter Tenant name+DELETE and click OK.
Feedback
Was this page helpful?
Provide feedbackThank you very much for your feedback. We will continue working to improve the documentation.See the reply and handling status in My Cloud VOC.
For any further questions, feel free to contact us through the chatbot.
Chatbot


