
Triggers
Scenarios
You can create a trigger to automatically execute the defined HTTP POST requests. For example, when an image is pushed, the CI/CD pipeline will automatically pull and deploy the image to a cluster. In this way, you can quickly connect to the CI/CD pipeline for container DevOps.
Creating a Trigger
- Log in to the SWR Enterprise Edition console and switch to the target region in the upper left corner of the page. On the displayed page, click the name of the target repository.
- In the navigation pane, choose O&M Center > Triggers.
- In the upper right corner, click Add Trigger.
- In the displayed dialog box, configure the parameters.
Table 1 Parameter description Parameter
Description
Example
Name
Trigger name.
TriggerRule
Namespace
Namespace where a trigger will be created.
library1
Application Scope
Image: Image name. By default, a regular expression is used to match images. Alternatively, you can click
 to select images.
The regular expression can be nginx-* or {repo1, repo2}.
- *: matches any field that does not contain the path separator /.
- **: matches any field that contains the path separator /.
- ?: matches any single character except /.
- {option 1, option 2, ...}: matches any of the options.
Tag: Image tag. You can use a regular expression to specify tags. The matching rules are the same as those for images.
nginx-*
Trigger Action
You can set the following action as a trigger:
- Pushing an image
Pushing an image
Remote Certificate Verification
If you select this option, the system will check whether the remote certificate is released by an authorized organization. If you do not, it will not be checked.
-
Request Address Type
- Private network
- Public network
Private network
Request Address
IP address the trigger will send a POST request to.
CAUTION:The IP address must fall into the default VPC network CIDR block you specified when you purchased the repository.
-
Request Header
When a trigger sends a POST request, the header information can be in key:value format, for example, Authentication:xxxxxxx.
Use semicolons (;) to separate multiple headers, for example, param1:value1;param2:value2.
-
Figure 1 Creating a trigger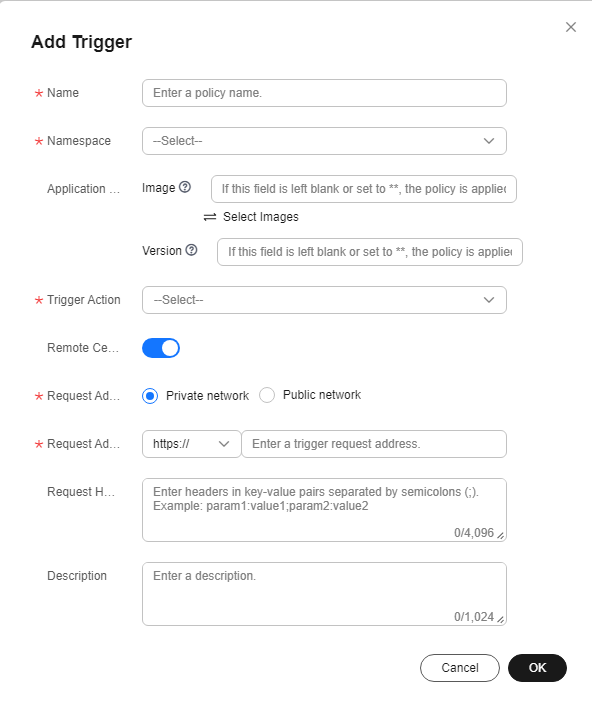
- Click OK.
Managing Triggers
You can manage your triggers as follows:
- Enable or disable a trigger.
 indicates a trigger is enabled and
  indicates the trigger is disabled. A new trigger is enabled by default.
 - Modify a trigger. All parameters except Namespace and Request Address can be modified.
- Delete a trigger.
- View a trigger. When the action specified in a trigger is executed, the trigger will send a request. You can click
 to view trigger records.
Table 2 Trigger records Parameter
Description
Trigger Action
Action that triggers a request.
Trigger Resource
Repository resource on which the action was performed.
Status
Status of the Webhook request sent by a trigger.
Created
Time when the Webhook request was sent.
Figure 2 Managing triggers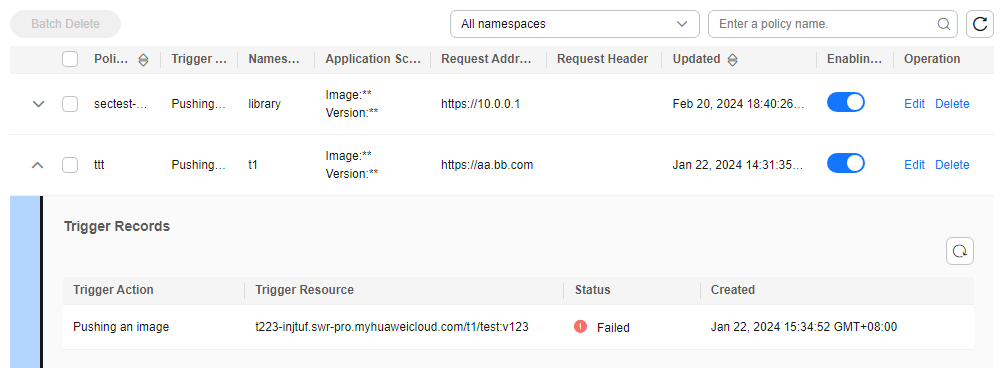
Feedback
Was this page helpful?
Provide feedbackThank you very much for your feedback. We will continue working to improve the documentation.See the reply and handling status in My Cloud VOC.
For any further questions, feel free to contact us through the chatbot.
Chatbot


