Creating Protected Instances
Scenarios
You can create protected instances for ECSs that require disaster recovery in a specific protection group. If a lot of production site servers become faulty due to force majeure, you can execute a failover to switch services from the production site to disaster recovery site to ensure service continuity.
When you create a protected instance, only disks are created at the disaster recovery site. The disk type can be different, but disk sizes must be the same as those of the production site server disks. After a protected instance is created, protection is automatically enabled until data has been synchronized.

When you create a protected instance, the background system automatically creates replication pairs for all the disks on the server, creates disks of the same specifications at the disaster recovery site, and then starts the initial data synchronization.
Initial synchronization occupies the disk read bandwidth, CPU, and memory of the production site server, so you are advised to create protected instances at off-peak hours, or disable protection for them when services are affected and then enable protection at off-peak hours.
Prerequisites
- Production site servers are not used to create protected instances.
- Production site servers are in the same AZ and VPC as the cloud disaster recovery gateway.

- If you have installed the proxy client on production site servers and then attach and detach disks on them, restart the servers before creating protected instances for them.
Procedure
- Log in to the management console.
- Click Service List and choose Storage > Business Recovery Service.
The Business Recovery Service page is displayed.
- Choose Asynchronous Replication. In the right pane, locate the replica pair in which you want to create protected instances and click Create Protected Instance in the Operation column.
The Create Protected Instance page is displayed.

- Configure the protected instance information.

Table 1 Parameter description Parameter
Description
Example Value
Production Site Server
Select production site servers you want to protect.
-
Disaster Recovery Site Disk
Select the disk type for each disaster recovery site disk.
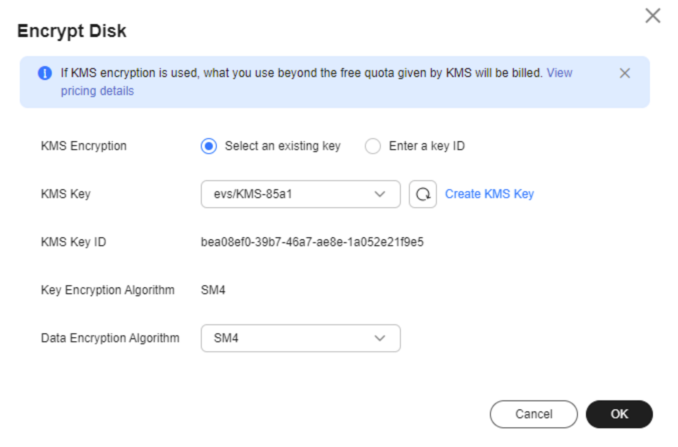
If you select Encrypt Disk, configure the encryption information in the displayed dialog box. For details, see the encryption configuration description in Purchasing an EVS Disk.
 NOTE:
NOTE:For the disaster recovery site servers created, the device type of system disks is VBD, and that of data disks is SCSI.
-
Protected Instance
Enter a name for each protected instance. The name can contain letters, digits, underscores (_), hyphens (-), or periods (.), can be no more than 64 characters long, and cannot contain spaces.
protected-instance-01
Protection Group
Select a protection group for the protected instances.
If you create protected instances first time ever or the current protection group does not meet your requirements, click Create Protection Group to create a new one.
It is recommended that you add servers of a specific business to the same protection group. In this case, you can start protection, perform failovers, and run disaster recovery drills for the entire group.
protected-group-01
- Click Next. On the displayed page, confirm the configuration information and click Submit.

- When the protected instance status changes from Creating to Protected, the protected instance is created successfully created, and the initial data synchronization starts.


- After 1 to 2 minutes, the protected instance status changes to Synchronizing, and the amount of data to be synchronized and estimated remaining time are displayed.


- An initial synchronization synchronizes all disk data on the servers to disaster recovery site disks. The time required for synchronization varies with the amount of the disk data. The larger the amount of data, the longer the time.
- The initial synchronization speed is affected by multiple factors, including the service loads, network quality, and network bandwidth on the servers. Normally, the synchronization speed is faster when servers have light loads and high network quality. The synchronization bandwidth of a single instance can reach up to 60 MB/s.
- The data upload bandwidth displayed on the protected instance page is the bandwidth after data is compressed. This bandwidth is usually smaller than the actual bandwidth.
- The synchronization progress displayed may restart from 0% if the synchronization is interrupted by a fault or manually disabled and then enabled. This is because the progress of the previous synchronization is not accumulated.
- When the protected instance status changes from Synchronization finished and the Execute Failover button is available, the initial synchronization is complete.
Feedback
Was this page helpful?
Provide feedbackThank you very much for your feedback. We will continue working to improve the documentation.See the reply and handling status in My Cloud VOC.
For any further questions, feel free to contact us through the chatbot.
Chatbot


