Managing Filters
You can create different filters to let SA show the events you expect. For example, you can create a filter by adding the product name and resource type, such as Host Security Service and ECS instance. Then you can select this filter to search events meeting both of those two conditions.
- Subject: indicates the title of the event. You can enter keywords. By default, Subject is selected.
- Severity: indicates severity of the event. The options are Critical, High, Medium, Low, and Informational.
- Category: indicates the category of the event. The options include Threat alarm, Vulnerability, Violation, Risk, Public opinion, Security notice, and Compliance check.
- Status: indicates the processing status of the event. The options are Unhandled, Ignored, and Handled Offline.
- Resource Name: indicates the name of the resource for which an event is generated. Enter the full name of the resource.
- Resource Type: indicates the type of the resource for which an event is generated. The options are ECS instance, VPC, Security Group, EIP, Disk, and Others.
- Company Name: indicates the name of the company from whose product the event is reported. Enter the full name of the company.
- Product Name: indicates the name of the product from which the event is reported. Enter the full product name.
Constraints
A filter can contain only one:
- Subject
- Resource Name
- Company Name
- Product Name
Creating a Filter
- Log in to the management console.
- Click
 in the upper left corner of the page and choose .
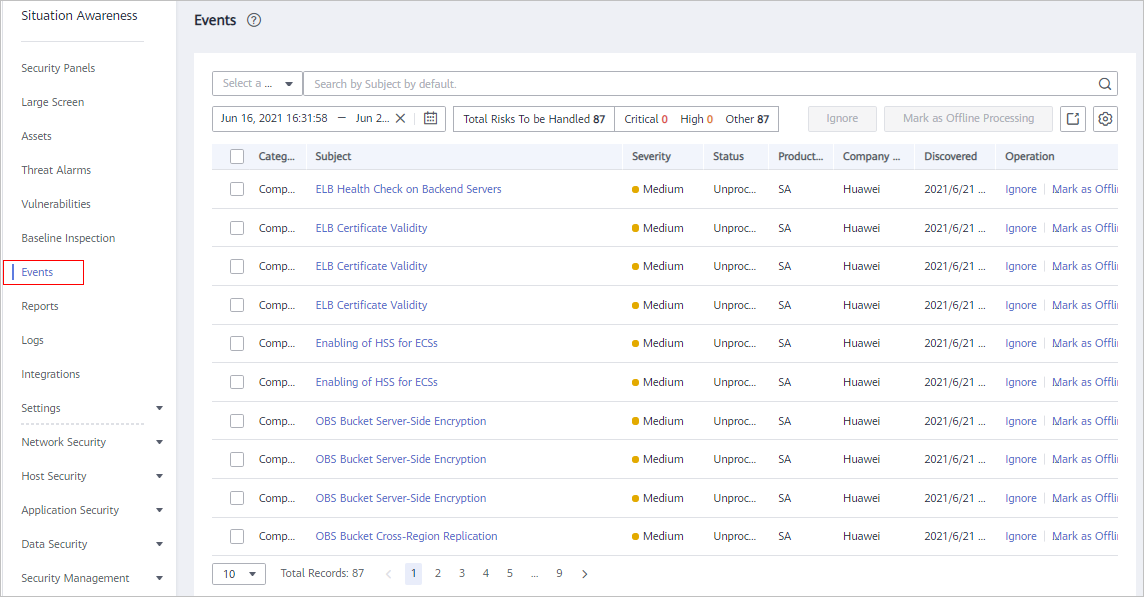
 - In the navigation pane on the left, choose Events.
Figure 1 Events

- Add conditions to the filter.
- Click the search box, select one or more filter criteria, and set attributes.
- In the time filter box, select a time range.
- Click Save on the right of the search box. The Save as Filter dialog box is displayed.
- Configure the filter.
- Set the Filter Name.
- (Optional) Select Set as default filter.
- Click OK.
Modifying a Filter
- Log in to the management console.
- Click
 in the upper left corner of the page and choose .
 - In the navigation pane on the left, choose Events.
- In the filter area, select a filter.
- Click Edit next to the filter box.
- Modify the filter name.
- Click OK.
Deleting a Filter
- Log in to the management console.
- Click
 in the upper left corner of the page and choose .
 - In the navigation pane on the left, choose Events.
- In the filter area, select a filter.
- Click Edit next to the filter box.
- Click Delete.
Feedback
Was this page helpful?
Provide feedbackThank you very much for your feedback. We will continue working to improve the documentation.See the reply and handling status in My Cloud VOC.
For any further questions, feel free to contact us through the chatbot.
Chatbot


