
Creating a User
Prerequisites
You have logged in to the Huawei Qiankun console and have one of the permissions of the following roles:
- Preset role: tenant administrator permission
- Custom role: user management permission of the user and tenant service
Context
By default, only the administrator of a workgroup can create users.
A common user can create users only after being assigned the user management permission.
Procedure
- Click your account in the upper right corner, and choose . The User Management page is displayed.
- Click Create above the user list, configure user information based on Table 1, and click Next.
Figure 1 Configuring basic user information
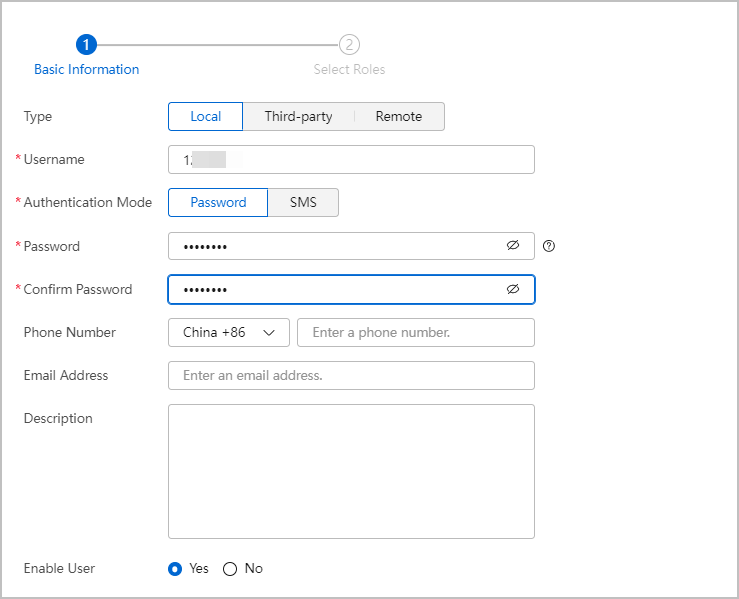
Table 1 Parameters for configuring a user Parameter
Description
Type
- Local: refers to a common user.
- Third-party: refers to a user who logs in to the console by invoking a northbound API. They are also known as northbound users.
- Remote: refers to a Huawei website user.
NOTE:Only users who have the user management permission of the user and tenant service in the root workgroup can create third-party system users.
Authentication Mode
Administrator authentication mode, which can be set to Password or SMS.
Password
Password of the user.
Phone Number, Email Address
Phone number or email address for receiving notifications and reports from Huawei Qiankun.
Enable User
This function is enabled by default. If this function is disabled, the user account cannot be used to log in to the console and the assigned permissions do not take effect.
Password Change at Initial Login
Forcibly asks a user to change the password at the initial login. This parameter is available only when Type is set to Third-party. This function is enabled by default.
If this function is disabled, password change is optional upon the initial login.
- Select roles based on the site requirements, and click Finish.
- By default, the role list displays all roles of the current login account.
- To assign other roles, create them in advance by referring to Creating a Role.
Figure 2 Selecting user roles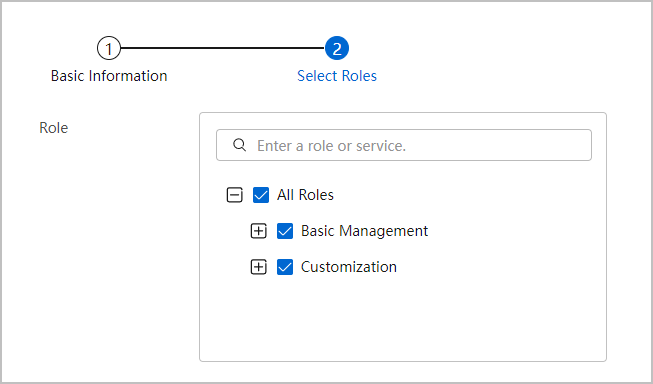
Follow-up Procedure
- Change the initial password. When logging in to the Huawei Qiankun console for the first time, the new user needs to sign website agreements and change the password.
- Edit user information. Workgroup users can be modified, disabled, deleted, and exported, and their passwords can be reset. Table 2 describes these operations in detail.
Table 2 Operations that can be performed on a workgroup user Operation
Description
Modify
Select a user and click
 in the Operation column to modify the phone number, email address, and roles.
Password reset
Select a user and click
 in the Operation column to reset the user password. Once the password is reset, the system logs out all current sessions of the user.
Enable/Disable
- Select a user and click
 in the Operation column to disable the user. If the user is online, the user is logged out.
 - Select a disabled user and click
 in the Operation column to enable the user.
Delete
- Deleting a single user: Select a user and click
 in the Operation column.
 - Deleting users in batches: Select multiple users and click Delete above the user list.
CAUTION:Exercise caution when performing this operation because a user cannot be restored after being deleted.
Export
Select a workgroup in the Workgroups navigation tree, and click Export All above the user list.
NOTE:The exported Excel file contains personal data, such as usernames, user types, enabling states, phone numbers, and email addresses. Therefore, keep the file safe.
- Select a user and click
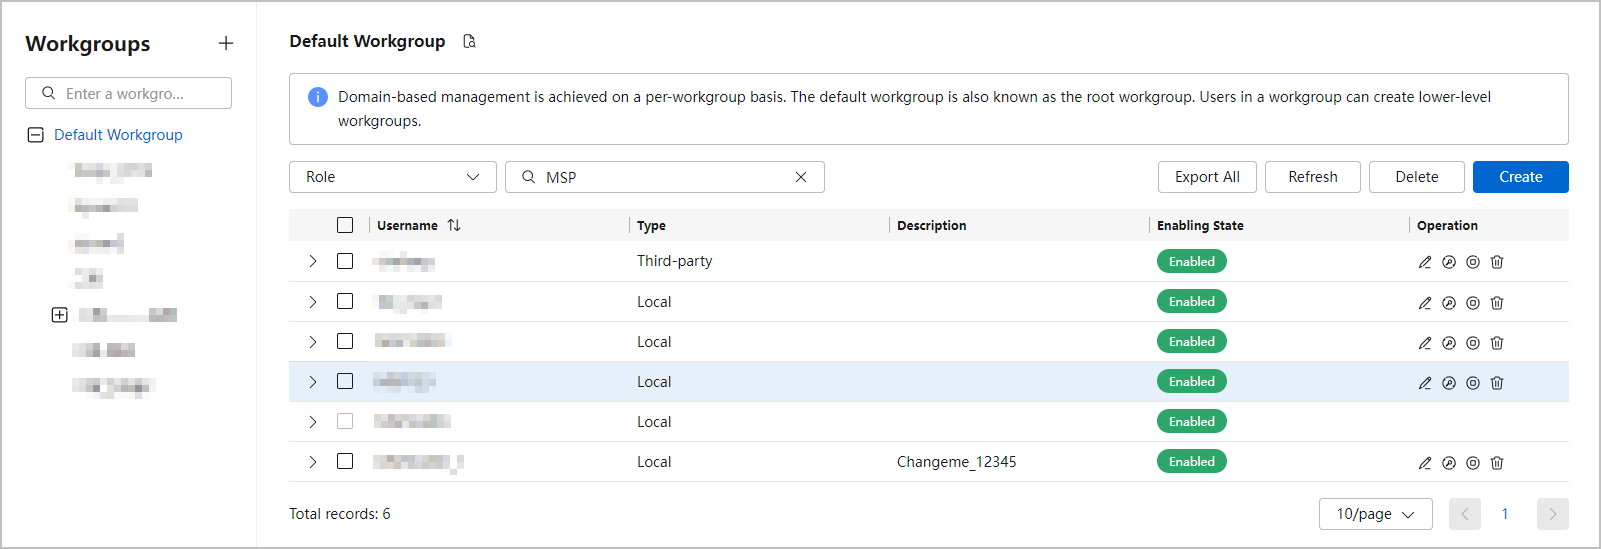
- Search for users.
- On the User Management page, select a workgroup in the Workgroups navigation tree.
- Select Username/Description or Role from the drop-down list box.
- Enter a keyword in the search box and press Enter.
Figure 3 Searching for users by role
Feedback
Was this page helpful?
Provide feedbackThank you very much for your feedback. We will continue working to improve the documentation.See the reply and handling status in My Cloud VOC.
For any further questions, feel free to contact us through the chatbot.
Chatbot


