
Configuring Account Settings
This section describes the operations in Account Settings, including setting project templates and creators and managing projects and members.

All Account Settings is different from the account settings on IAM. In CodeArts Req, the tenant administrator manages and sets all projects of a tenant.
- Accessing Account Settings
- Setting a Requirement Template
- Setting a Project Creator
- Managing Projects and Members
- Setting a Permission Template
- Managing Work Item Fields for IPD Projects
- Managing Work Item Statuses for IPD Projects
Accessing Account Settings
Click the account name and choose All Account Settings on the CodeArts homepage.

Read the instruction displayed on the page before performing .
Requirement Templates
You can modify the customized templates for you to choose when creating a Scrum project. You can also replicate, delete, or create a project based on the templates. For details, see Customizing a Template.
Setting a Project Creator
You can assign permissions for creating projects to any members.
- On the All Account Settings page, choose .
By default, Set some members to be able to create projects (Users with the Tenant Administrator and CodeArts Administrator roles can create projects by default.) is selected.
- In the list of Project Creators, turn off the toggle in the Status column to remove the project creation permissions of a user.
When Status is disabled for a user, the user cannot create a project.
Managing Projects and Members
You can view and modify the joined projects and projects that are not joined. You can also view and delete the project members.
- On the All Account Settings page, choose General > Projects and Members.
The Unjoined Projects tab is displayed by default when accessing the page of Projects and Members.
- Select the target projects and click Join Project in the Projects and Members.
Newly added projects will be displayed on the Joined Projects tab page.
- On the Joined Projects list, click
 in the row of the project you want to delete.

- Click the Project Members tab page to view members in all projects. Click
 in the row that contains the target members to delete them.
Deleted members cannot access the corresponding project.
Setting a Permission Template
A permission template is a tenant-level role permission template generated by saving role permissions in a project. All templates of a tenant are visible and used by all users. However, only users with the Tenant Administrator permission and project administrators can edit and delete role permission templates. Role permission templates can be quickly reused by projects of the same type.
- Saving as a permission template
- Choose . The roles and permissions of the current project are displayed.
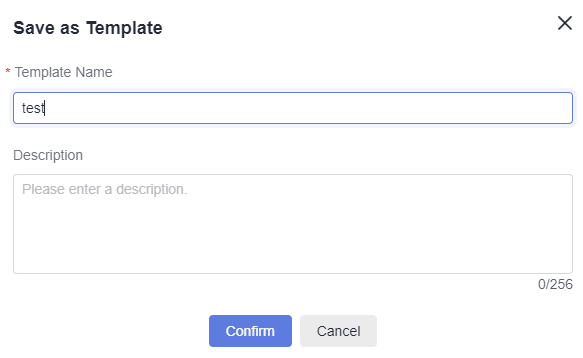
- Click Save as Template. In the dialog box that is displayed, enter the template name and description. Click Confirm. The saved permission template is displayed on the page.
- Modifying, configuring, and deleting a permission template
Choose . The permission template page is displayed.
You can perform the following operations on a permission template.
Table 1 Permission template management Operation
Description
Modify permission template
Click
 to modify the template name and description.
Configure permission template
Click
 to configure role permissions in different services.
Delete permission template
Click
 . Confirm the deletion in the dialog box that is displayed.
 - Using a permission template
- Choose . The permission page is displayed.
- Click the drop-down list next to Select Template and select the permission template to be reused.
Managing Work Item Fields for IPD Projects
This page displays tenant-level common fields. Fields created on this page can be configured in all work items of your IPD projects.
IPD projects are available only in the AP-Singapore region.
- Log in to the CodeArts homepage and click
 .
. - Choose All Account Settings.
- Choose Work > Field. The existing common fields are displayed on the page.
- Click Create Field. In the dialog box that is displayed, enter a field name, select a field type, and click OK. The new field is displayed in the list.
You can perform the following operations on a new field.
Table 2 Field management Operation
Description
Edit a field
Click
 to modify the field name, type, and description.
Delete a field
Click
 . In the dialog box that is displayed, click Delete to delete the field.
Fields created on the Work > Field page are available for all IPD projects and can be configured for the work items in these projects.
- Go to an IPD project and choose Settings > Work.
- Click Work Items and select a work item type.
- On the Field Templates page, click Add Field. In the displayed dialog box, select the new field, configure other options, and click OK.
Managing Work Item Statuses for IPD Projects
This page displays tenant-level common fields. Statuses created on this page can be configured for all work items in your IPD projects.
IPD projects are available only in the AP-Singapore region.
- Log in to the CodeArts homepage and click
 .
. - Choose All Account Settings.
- Choose Work > Status. The existing common statuses are displayed on the page.
- Click Create Status. In the dialog box that is displayed, enter a status name, select a status type, and click OK. The new status is displayed in the list.
You can perform the following operations on a new status.
Table 3 Managing statuses Operation
Description
Edit a status
Click
 to modify the status name, category, and description.
Delete a status
Click
 . In the dialog box that is displayed, click OK to delete the status.
Feedback
Was this page helpful?
Provide feedbackThank you very much for your feedback. We will continue working to improve the documentation.See the reply and handling status in My Cloud VOC.
For any further questions, feel free to contact us through the chatbot.
Chatbot


