bursting from on-premises Plug-in
Introduction
The bursting from on-premises plug-in can communicate with Slurm and Huawei Cloud Auto Scaling (AS), Cloud Eye, and Elastic Cloud Server (ECS) services. This plug-in dynamically adjusts the number of Slurm nodes as needed.
Preparations
- Creating an AS configuration
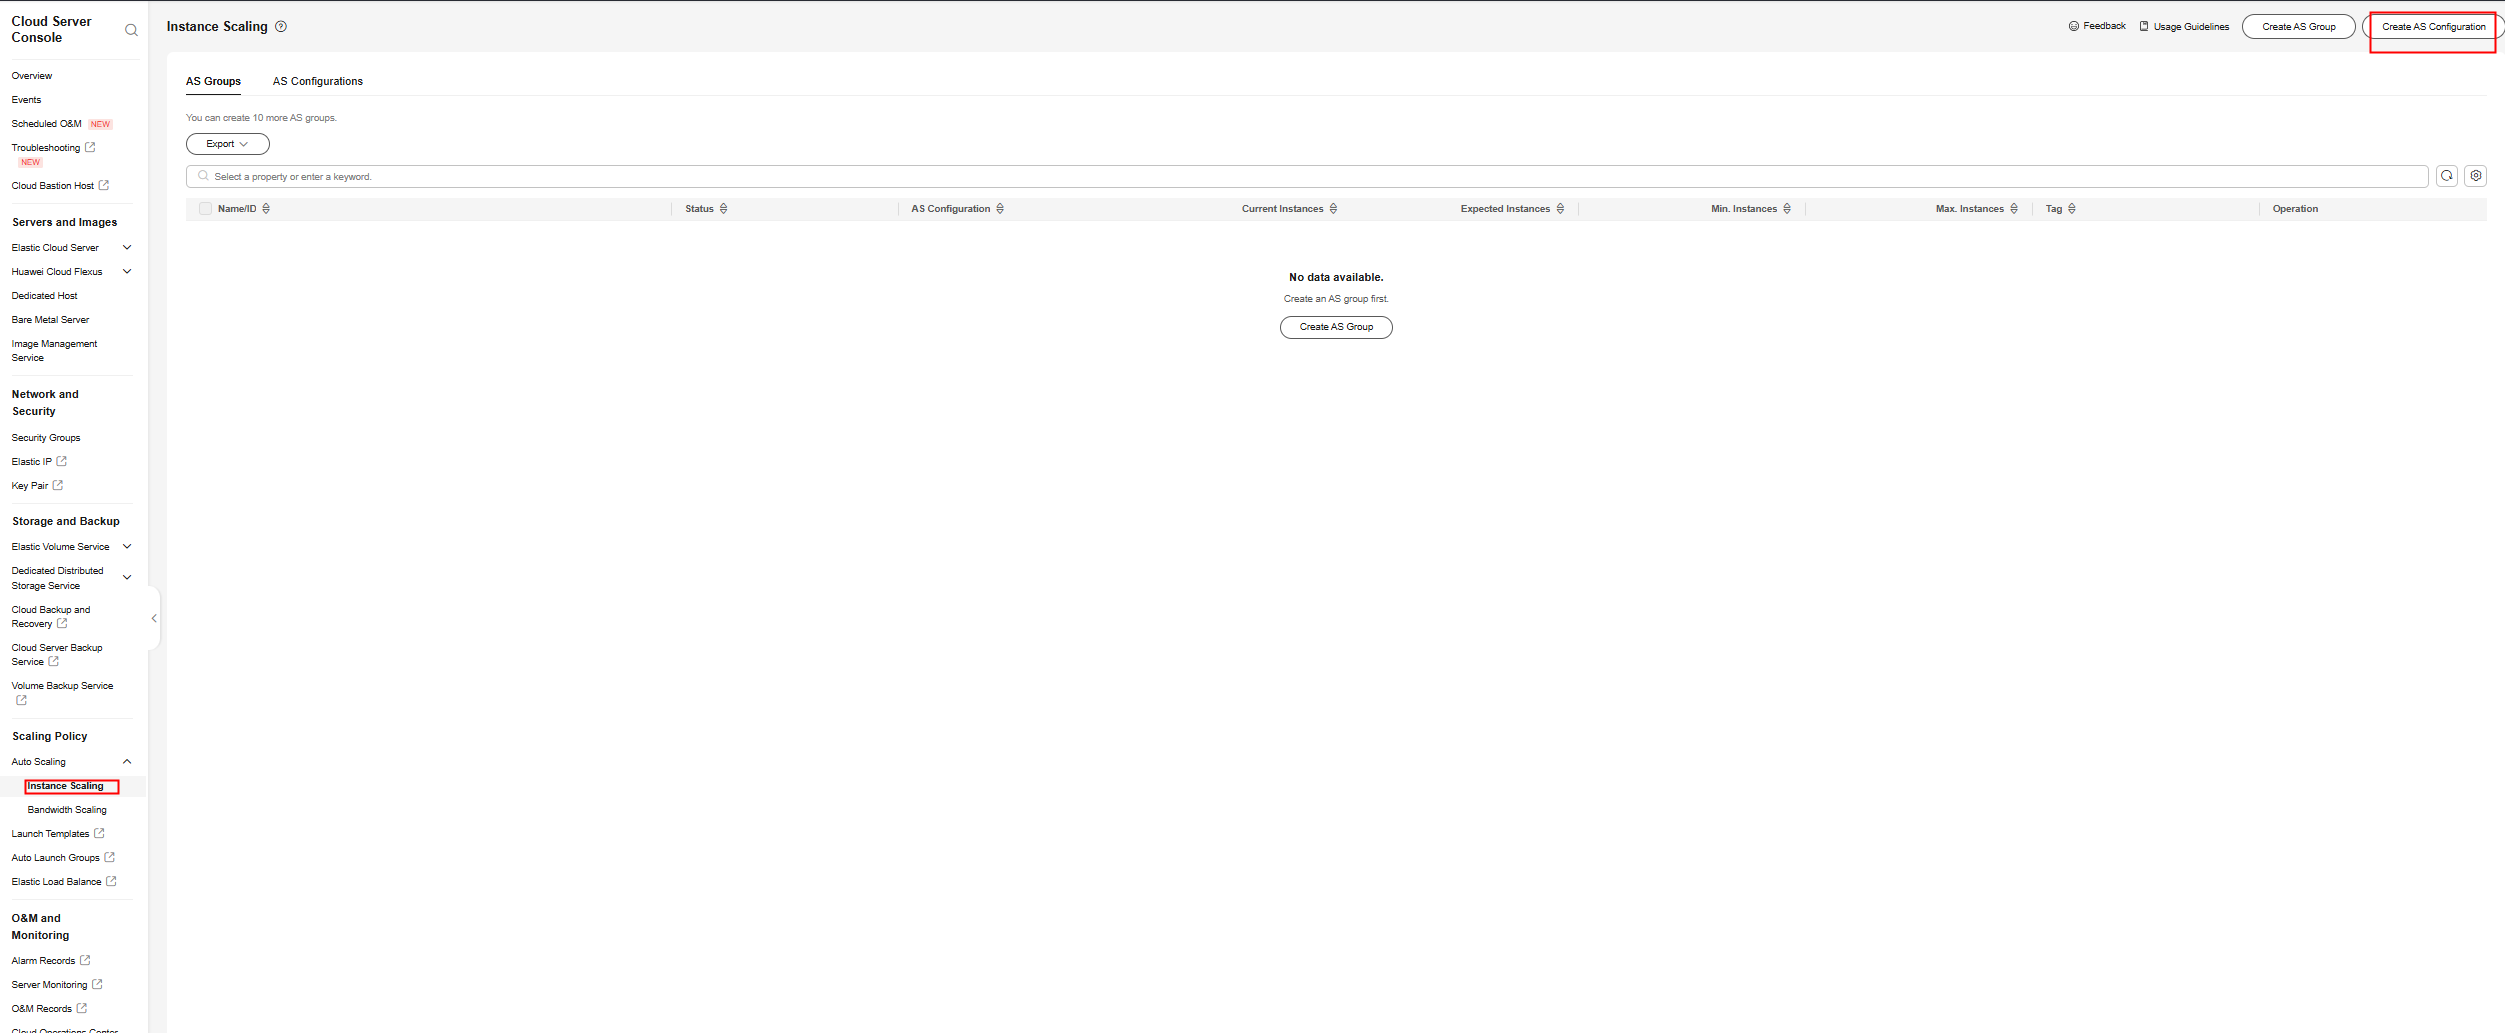
Log in to the AS console, and create an AS configuration based on the required ECS configurations.

- Creating an AS group
Create an AS group using the AS configuration you created.

Record the AS group ID, which will be used in the Scaler configuration file.

- Purchasing a yearly/monthly ECS
Log in to the ECS console, purchase a yearly/monthly ECS as needed, and record the ECS node name in the Slurm cluster. This node will be used as a stable node in the Scaler configuration file.
- Creating an access key pair
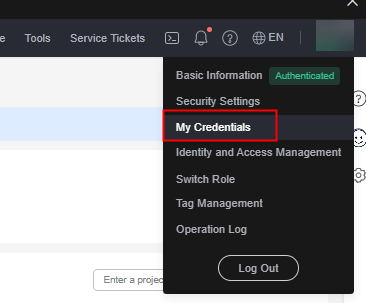
- On the management console, choose My Credentials.

- In the navigation pane, choose Access Keys and click Create Access Key. After the access keys are created, you can download the file that contains the created Access Key ID (AK) and Secret Access Key (SK).


- On the management console, choose My Credentials.
- Determining the region ID and the project ID
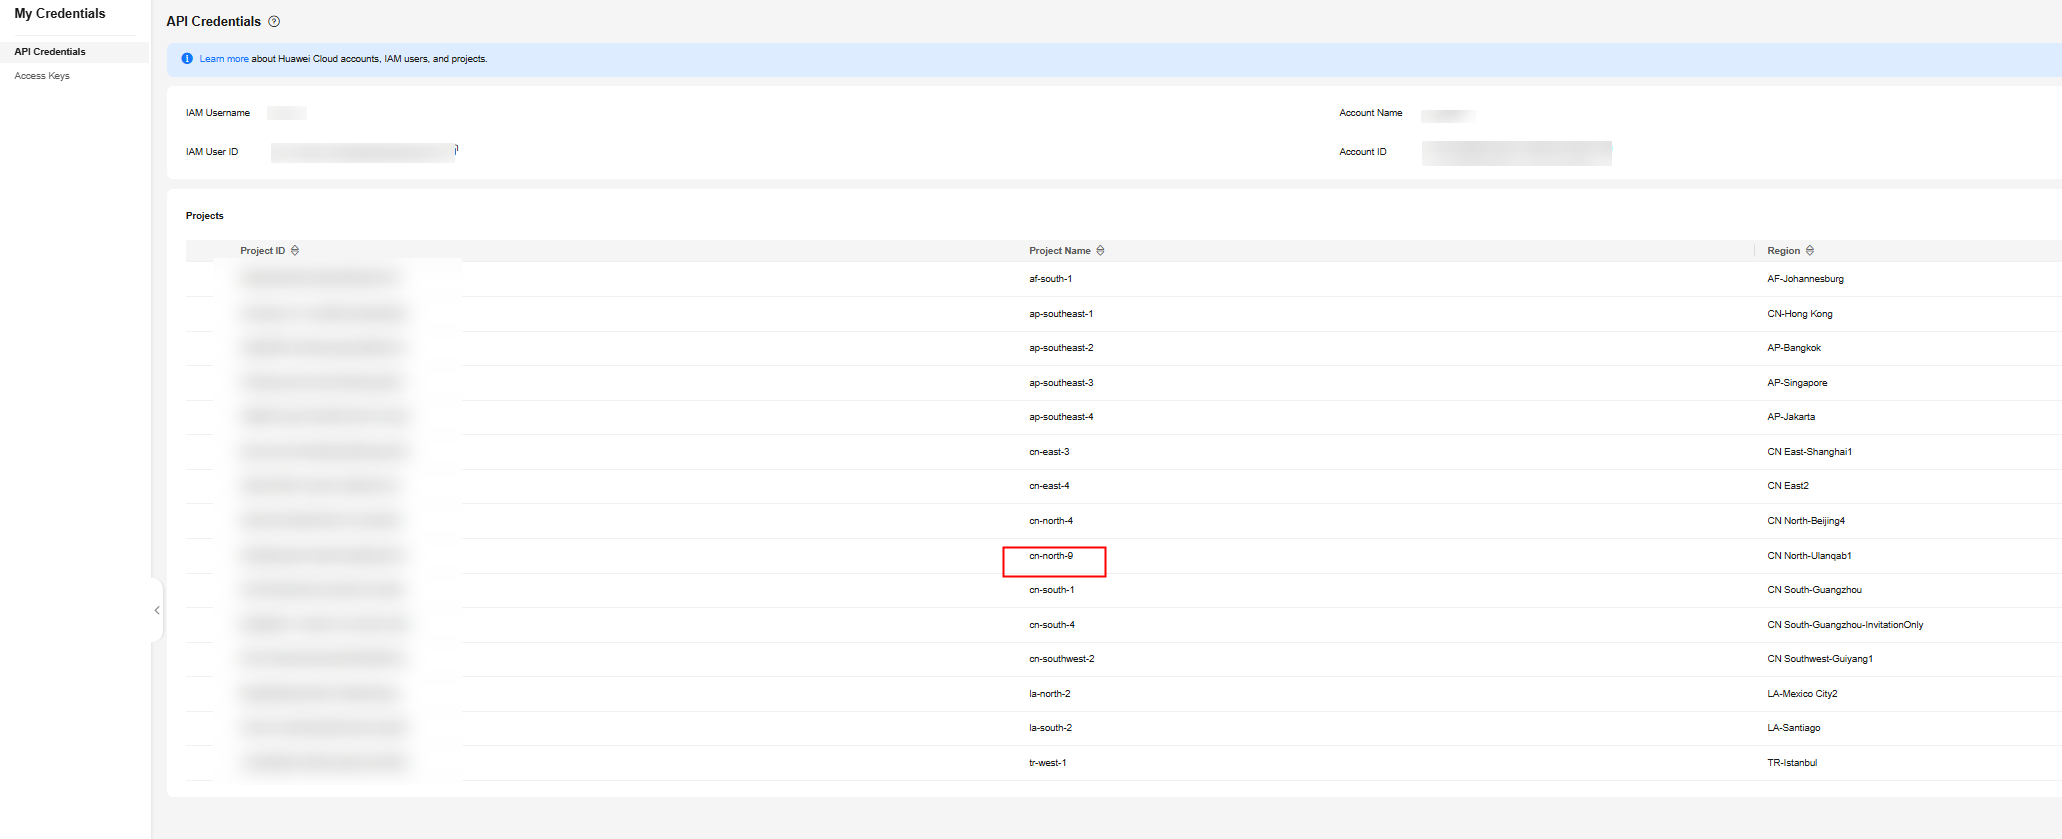
Go to My Credentials page, choose API Credentials in the navigation pane, and find the target region ID and the project ID.

- Determining the endpoints of antecedent services
The Scaler program depends on AS, Cloud Eye, and ECS. The endpoints of each service are as follows:
as.{Region ID}.myhuaweicloud.com
ces.{Region ID}.myhuaweicloud.com
ecs.{Region ID}.myhuaweicloud.com
Replace {Region ID} with the actual region ID, for example, as.cn-north-9.myhuaweicloud.com.
Constraints
- Slurm user quotas can only be configured at the node level.
- Instances cannot be manually added to an AS group.
- To update the stable node information, you need to update the Scaler configuration file, restart the Scaler, and then create an instance.
- A shortened stable node name must be in the format of a prefix followed by a number, like hpc-0001 and slurm-02.
- The Scaler program can run on only one node.
Software Deployment
- Installation node
- Installation directory
- Downloading software
Download scaler-0.0.1-SNAPSHOT.jar.
- Creating a configuration file
Create the scalerConfig.yaml file in the directory that saves scaler-0.0.1-SNAPSHOT.jar, and edit the file. (Ensure that the file complies with the YAML file specifications.)
Configure the file as follows:
user:
  # AK of the account for logging in to the console
  ak:
  # SK of the account for logging in to the console
  sk:
 # Tenant ID of the target region
  project: cc515cbccbc04b78b29a30f5c47fc99a
  # Proxy address, port, username, and password. They are not required if no proxy is needed.
  proxy-address:
  proxy-port:
  proxy-username:
  proxy-password:
as:
  # AS endpoint corresponding to the target region
  endpoint: as.cn-north-9.myhuaweicloud.com
  # ID of the preconfigured AS group
  group: de2aa26c-12f7-4882-824f-6c2886bb91e1
  # Maximum number of instances displayed on a page. The default value is 100. You do not need to change the value.
  list-instance-limit: 100
 # Maximum number of instances that can be deleted. This maximum number in AS is 50. You do not need to change the value.
  delete-instance-limit: 50
ecs:
  # ECS endpoint corresponding to the target region
  endpoint: ecs.cn-north-9.myhuaweicloud.com
metric:
  # Namespace of the custom monitoring metric. You do not need to change the value.
  namespace: HPC.SLURM
  # Name of a custom metric.
  name: workload
 # Name of a custom metric dimension. You do not need to change the value.
  dimension-name: hpcslurm01
  # ID of a custom metric dimension. It can be set to the AS group ID. This value does not affect functions.
  dimension-id: de2aa26c-12f7-4882-824f-6c2886bb91e1
  # Time to live (TTL) reported by the metric. You do not need to change the value.
  report-ttl: 172800
  # Cloud Eye endpoint corresponding to the target region
  endpoint: ces.cn-north-9.myhuaweicloud.com
task:
  # Period for checking the Slurm node status, in seconds
  health-audit-period: 30
  # Period for reporting custom metrics, in seconds
  metric-report-period: 30
  # Period for checking whether scale-in is required, in seconds
  scale-in-period: 120
  # Period for automatically deleting nodes, in seconds
  delete-instance-period: 10
 # Period for automatically discovering new nodes
  discover-instance-period: 20
  # Period for comparing the number of nodes in the AS group with that of nodes in the Slurm cluster, in seconds
  diff-instance-and-node-period: 60
slurm:
  # Name of the stable node. Separate multiple names with commas (,).
  stable-nodes: node-ind07urq,node-or7qht4s
  # Slurm partition where stable nodes are located
  stable-partition: dyn1
  # Slurm partition where variable nodes are located
  variable-partition: dyn1
  # Period of idle time after which idle nodes will be deleted, in seconds
  scale-in-time: 300
  # Job waiting time. If the waiting time of a job is longer than this value, the job is considered to be in a queue and will be counted in related metrics. The recommended value is 0.
  job-wait-time: 0
 # Timeout interval for registering a new node with Slurm. If a new node fails to be registered after the timeout interval expires, the node will be deleted by AS. The recommended value is 10 minutes.
  register-timeout-minutes: 10
  # Number of CPU cores of the elastic node
  cpu: 4
  # Memory size of the elastic node. This is a reserved field. It can be set to any value greater than 0.
  memory: 12600
You should change the values of the parameters in bold as needed. Retain the default values for other parameters.
- Installing JDK
If JDK 8 is not installed on the master node, manually install it.
Software Management
- Starting the software
Run the nohup java -jar scaler-0.0.1-SNAPSHOT.jar --spring.config.name=scalerConfig > /dev/null 2>&1 & command as the root user.
- Stopping the software
- Run the ps –ef | grep java | grep scaler command to query the process ID of the software.
- Run the kill -9 Process ID command.
- Updating the configuration file
After updating the scalerConfig.yaml configuration file, restart Scaler to apply the modification.
Troubleshooting
Log printing warning
node: [Node name] status isn't DOWN
This message indicates that the node is not in the AS group and is not in the down state.
Check whether the node is a stable node. If yes, add the node to the scalerConfig.yaml file.
Relevant Files
scaler-0.0.1-SNAPSHOT.jar: main software of Scaler
scalerConfig.yaml: configuration file
scaler.log/scaler.yyyy-mm-dd.log: program run log
Feedback
Was this page helpful?
Provide feedbackThank you very much for your feedback. We will continue working to improve the documentation.See the reply and handling status in My Cloud VOC.
For any further questions, feel free to contact us through the chatbot.
Chatbot


