
Managing a FlexusX Instance Group
Scenarios
A FlexusX instance group logically groups FlexusX instances. FlexusX instances in a FlexusX instance group comply with the same policy associated with the group.
Only the anti-affinity policy is supported. This policy enables FlexusX instances in the same FlexusX instance group to run on different hosts for improved reliability, high availability, and disaster recovery.
Constraints
- FlexusX instance groups support only the anti-affinity policy. The failure domain policy is not supported.
- A FlexusX instance group can contain FlexusX instances and ECSs in the same region as it.
- A FlexusX instance can be added to only one FlexusX instance group.
- If the maximum number of FlexusX instance groups is reached, you can contact customer service to increase the quota.
Supported Operations
You can perform the following operations to manage a FlexusX instance group.
Create a FlexusX instance group, and you can apply a policy to the entire group. FlexusX instance groups are independent from each other.
- Access the page for creating a FlexusX instance group from the ECS console or the FlexusX console as follows:

Ensure that the FlexusX instance group and the FlexusX instances to be added are in the same region, or the FlexusX instances cannot be added.
- Log in to the ECS console, switch to the ECS Group page, and click
 in the upper left corner to select a region and project.
 - Log in to the FlexusX console, in the upper left corner, click
 , and select a region and project.
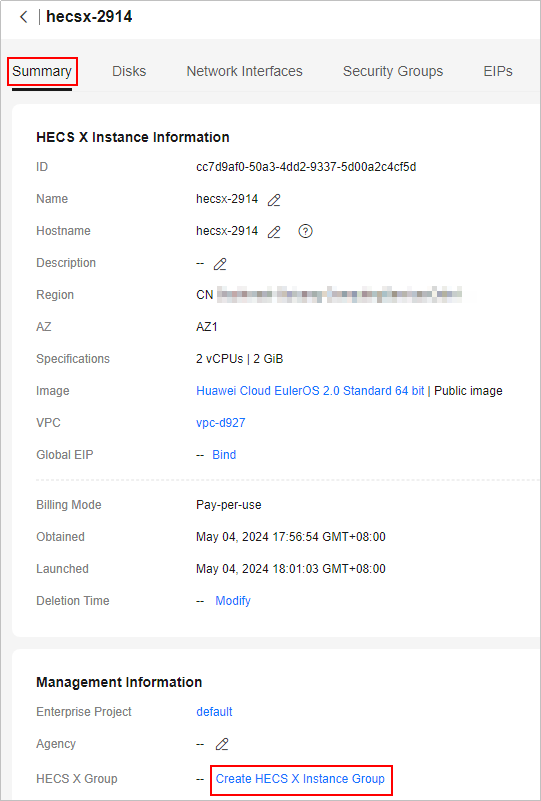
Click the name of a FlexusX instance. On the details page, click Create FlexusX Instance Group.
- Log in to the ECS console, switch to the ECS Group page, and click
- On the ECS Group page, click Create ECS Group and set the ECS group name and policy.
Only the anti-affinity policy is supported.
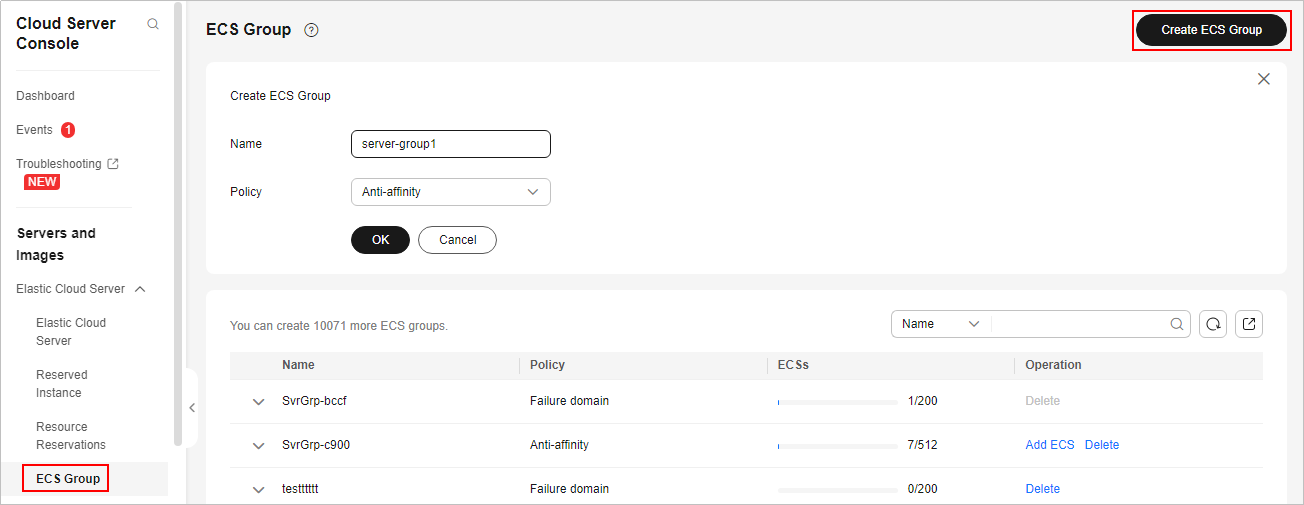
- Click OK.
To improve service reliability, you can add FlexusX instances to a FlexusX instance group to place these FlexusX instances on different hosts.
- You can add a FlexusX instance to a FlexusX instance group when you are creating the instance. For details, see 13.d.
- You can also add a FlexusX instance to a FlexusX instance group after you create the instance, as described in this part.
When a FlexusX instance is added to a FlexusX instance group, the system reallocates a host to run this FlexusX instance to ensure that the FlexusX instances in this group run on different hosts. When the FlexusX instance is being restarted, the startup may fail due to insufficient resources. In such a case, remove the FlexusX instance from its group and try to restart the FlexusX instance again.
- Log in to the ECS console, switch to the ECS Group page, and click
 in the upper left corner to select a region and project.
 - Locate the row that contains the target FlexusX instance group and click Add ECS in the Operation column.
On the Add ECS page, select the FlexusX instance to be added.
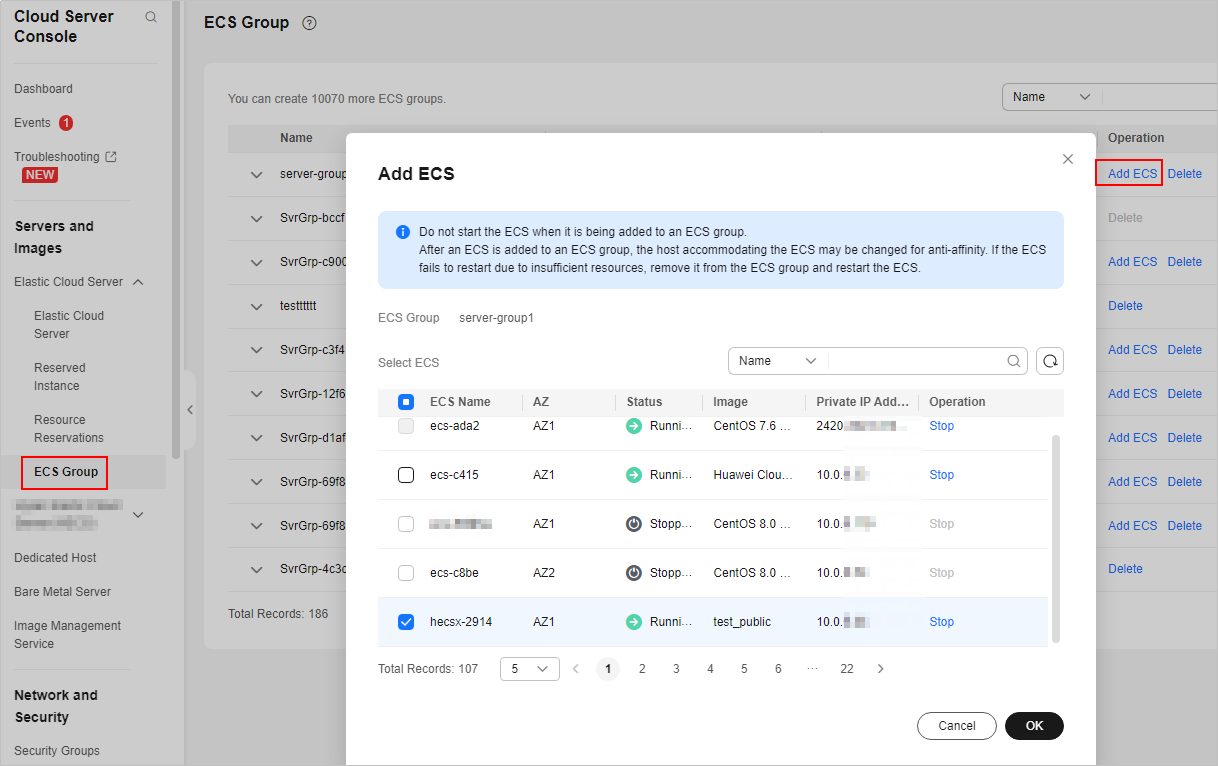
- Click OK.
If a FlexusX instance is removed from a FlexusX instance group, the anti-affinity policy is no longer enforced for that instance.
- Log in to the ECS console, switch to the ECS Group page, and click in the upper left corner to select a region and project.
- Expand the FlexusX instance group information and view the FlexusX instances in it.
- Locate the FlexusX instance to be removed and click Remove in the Operation column.
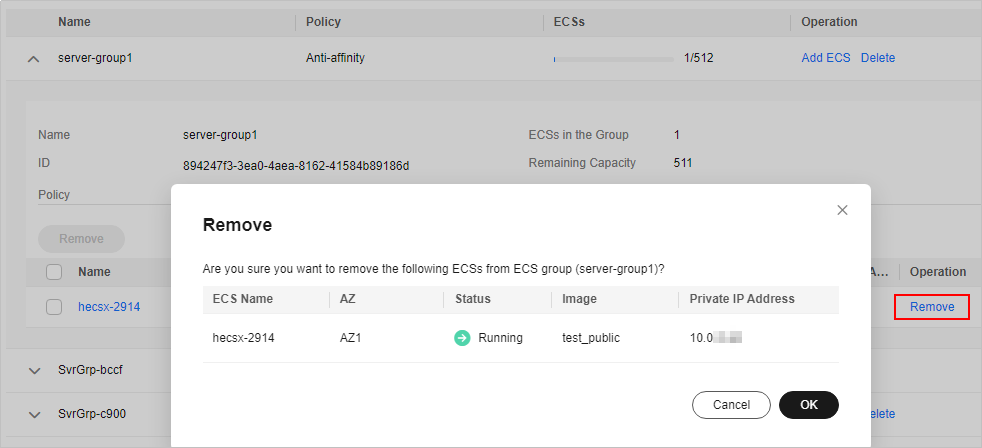
- Click OK.
Deleting a FlexusX instance group will remove the policy constraints on instances in the group.
- Log in to the ECS console, switch to the ECS Group page, and click in the upper left corner to select a region and project.
- Locate the FlexusX instance group to be deleted and click Delete in the Operation column.
- In the displayed dialog box, click Yes.
Feedback
Was this page helpful?
Provide feedbackThank you very much for your feedback. We will continue working to improve the documentation.See the reply and handling status in My Cloud VOC.
For any further questions, feel free to contact us through the chatbot.
Chatbot


