
Help Center/
Huawei Cloud Flexus/
User Guide/
FlexusX/
Managing VPCs/
Attaching Extension Network Interfaces
Updated on 2024-10-08 GMT+08:00
Attaching Extension Network Interfaces
Scenarios
If your FlexusX instance requires multiple network interfaces, you can attach extension network interfaces.
For details, see Elastic Network Interface Overview.
Procedure
- Log in to the FlexusX console, in the upper left corner, click
 , and select a region and project.
 - Locate the FlexusX instance and click its name.
- On the Network Interfaces tab, click Attach Network Interface.
You can use an existing extension network interface or create a new one.Figure 1 Attaching an extension network interface
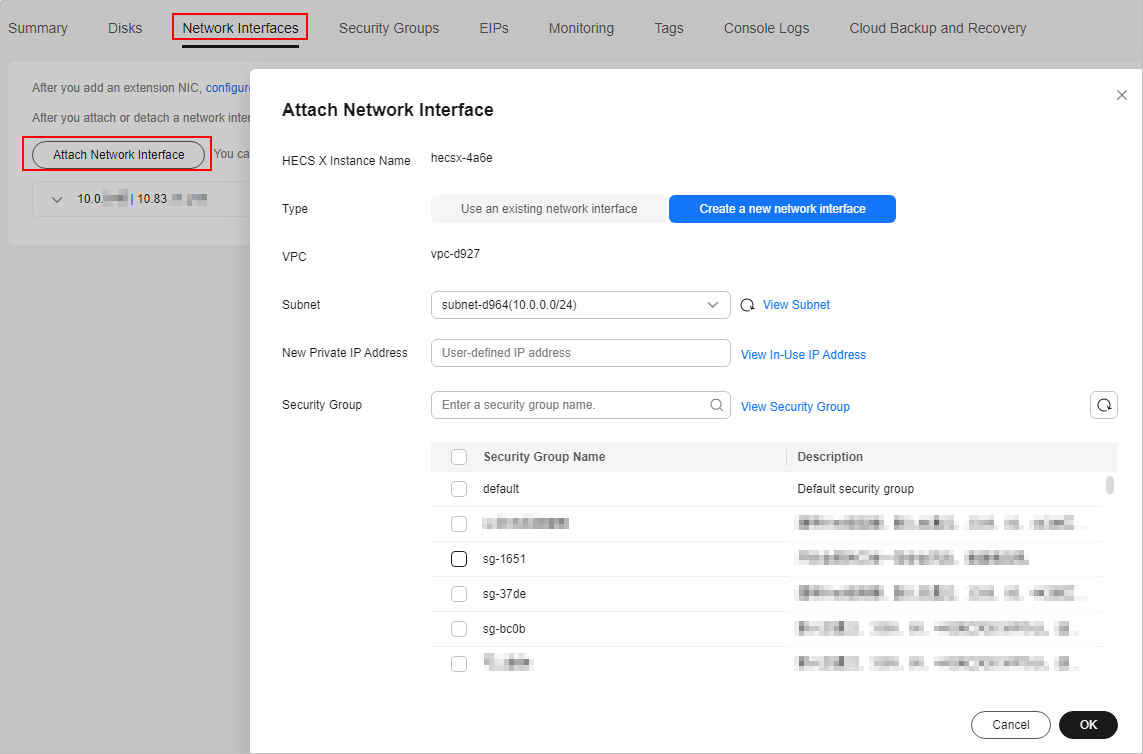
- Subnet: This parameter is mandatory. You need to select a subnet where the network interface will work.
- New Private IP Address: This parameter is optional. You can specify a private IP address for the network interface. If it is not specified, the system assigns a private IP address automatically.
- Security Group: This parameter is mandatory. You can select multiple security groups at a time. In this case, the rules of all the selected security groups are applied to the FlexusX instance.
- Click OK.
Related Operations
After an extension network interface is attached to a FlexusX instance, you are advised to enable NIC multi-queue to improve network performance. For details, see Enabling NIC Multi-Queue.
Feedback
Was this page helpful?
Provide feedbackThank you very much for your feedback. We will continue working to improve the documentation.See the reply and handling status in My Cloud VOC.
The system is busy. Please try again later.
For any further questions, feel free to contact us through the chatbot.
Chatbot


