
API Automation Test Cases
In an API automation test, requests are directly sent to the application and the response content is verified to ensure that the API is normal and can receive response.
Creating an API Automation Test Case
Test case designers can create API automation test cases.
- On the Case Management page, click API Automation and then click Create.
Figure 1 Creating an API automation test case
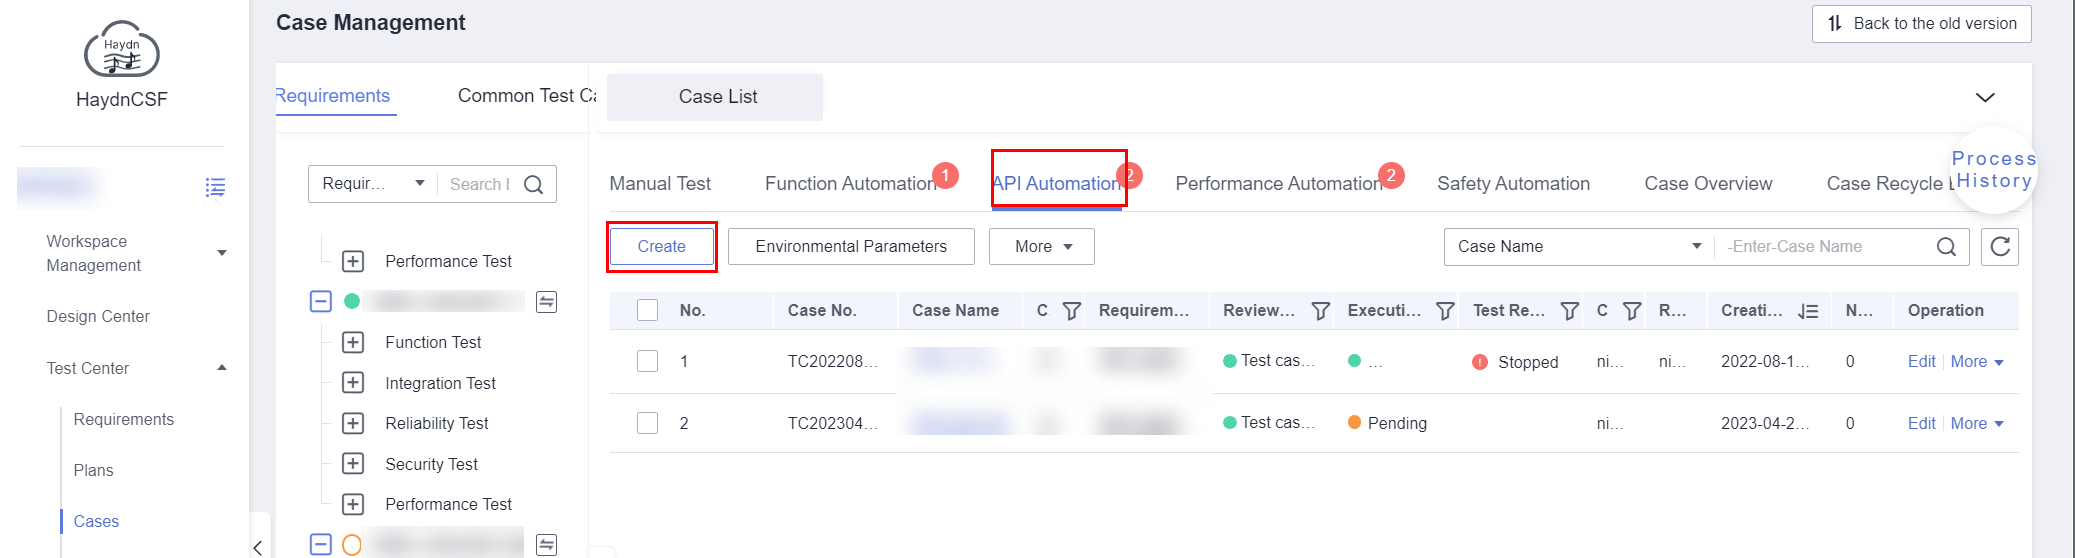
- Enter the test case information and click Confirm and Compile Script. Parameters marked with a red asterisk (*) are mandatory.
Table 1 Parameters for creating an API automation test case Parameter
Description
Requirement Description
(Mandatory) Select the requirement that the test case belongs to from the drop-down list.
Case Name
(Mandatory) Enter a name for the test case. It is recommended that you standardize the test case name so that the function can be reflected in the test case name.
Deployment Environments
(Mandatory) Select the environment for deploying the test case from the drop-down list based on the associated requirement.
Priority
(Mandatory) Select the importance level of the test case from the drop-down list.
Description
Describe the test case.
Prerequisites
Enter the prerequisites for executing the test case.
Expected Result
Enter the expected result of each step.
Attachments
Upload the associated files required by the test case.
- Add a request. On the Test Script tab page, click URL Request in the New Step area, select the request type and protocol, and enter the URL, URL parameters, request headers, and request body.
Figure 2 Adding a request
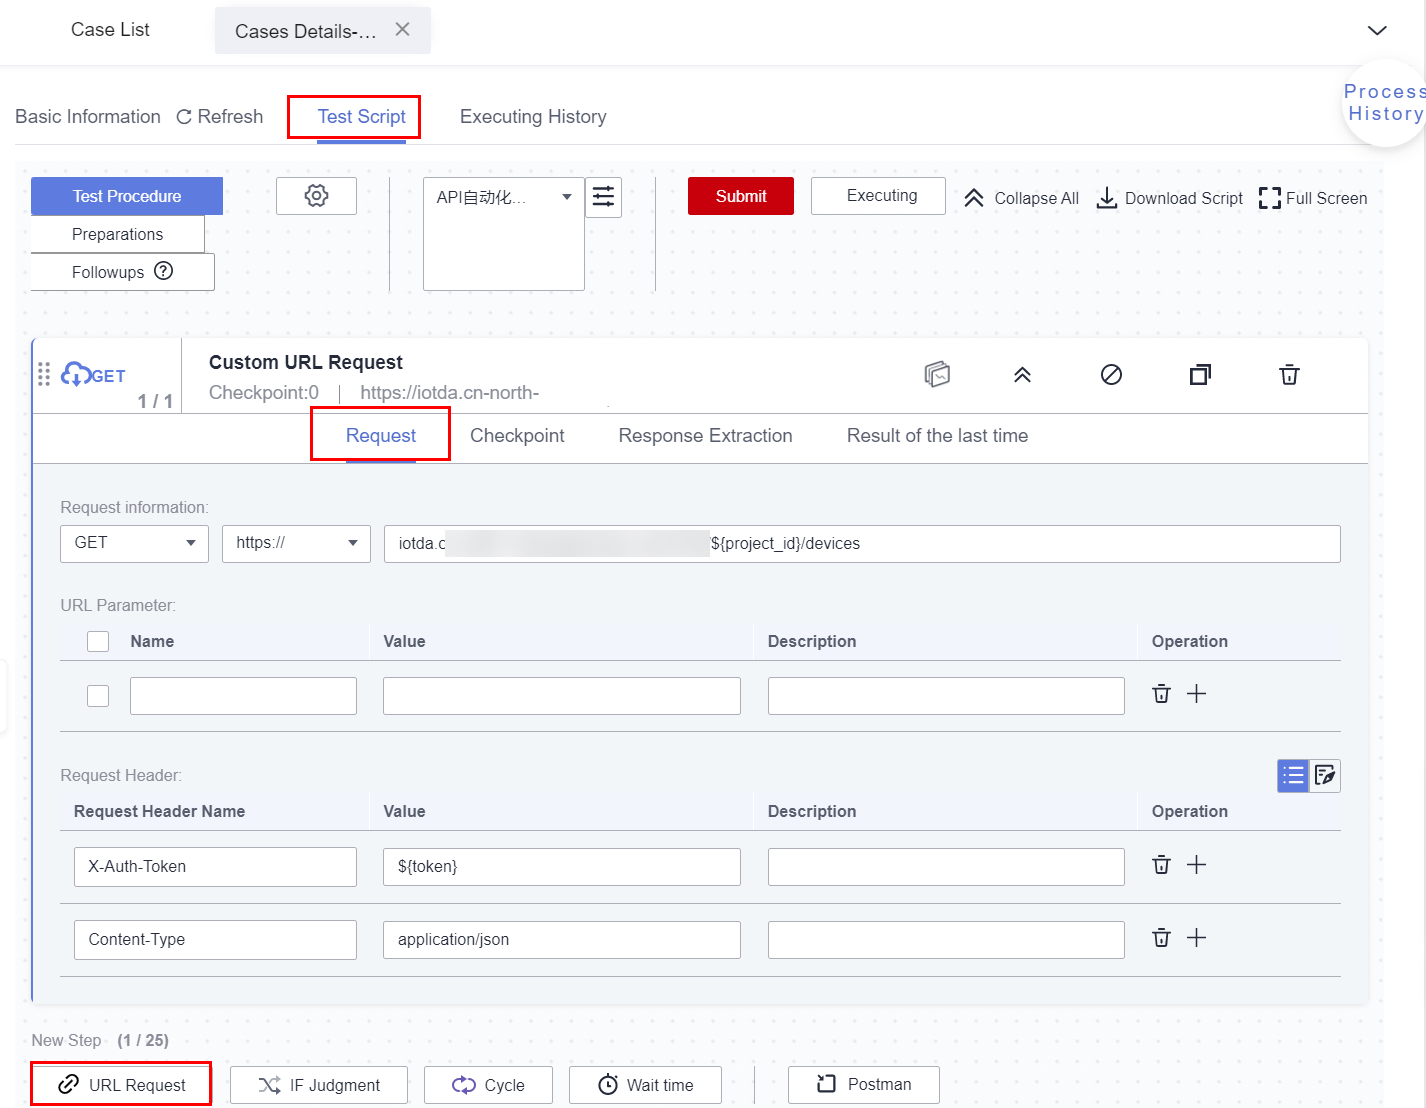
- (Optional) Add a checkpoint: Check whether the response body meets the expectation and set the source, properties, comparison operator, and target value of the checkpoint.
- (Optional) Add response extraction: Extract some values from the response body as parameters of other requests, select the source and properties of the response body, and set the output parameters.
URL requests in subsequent steps can use the response body extracted in the previous step by adding request parameters.
Figure 3 Extracting response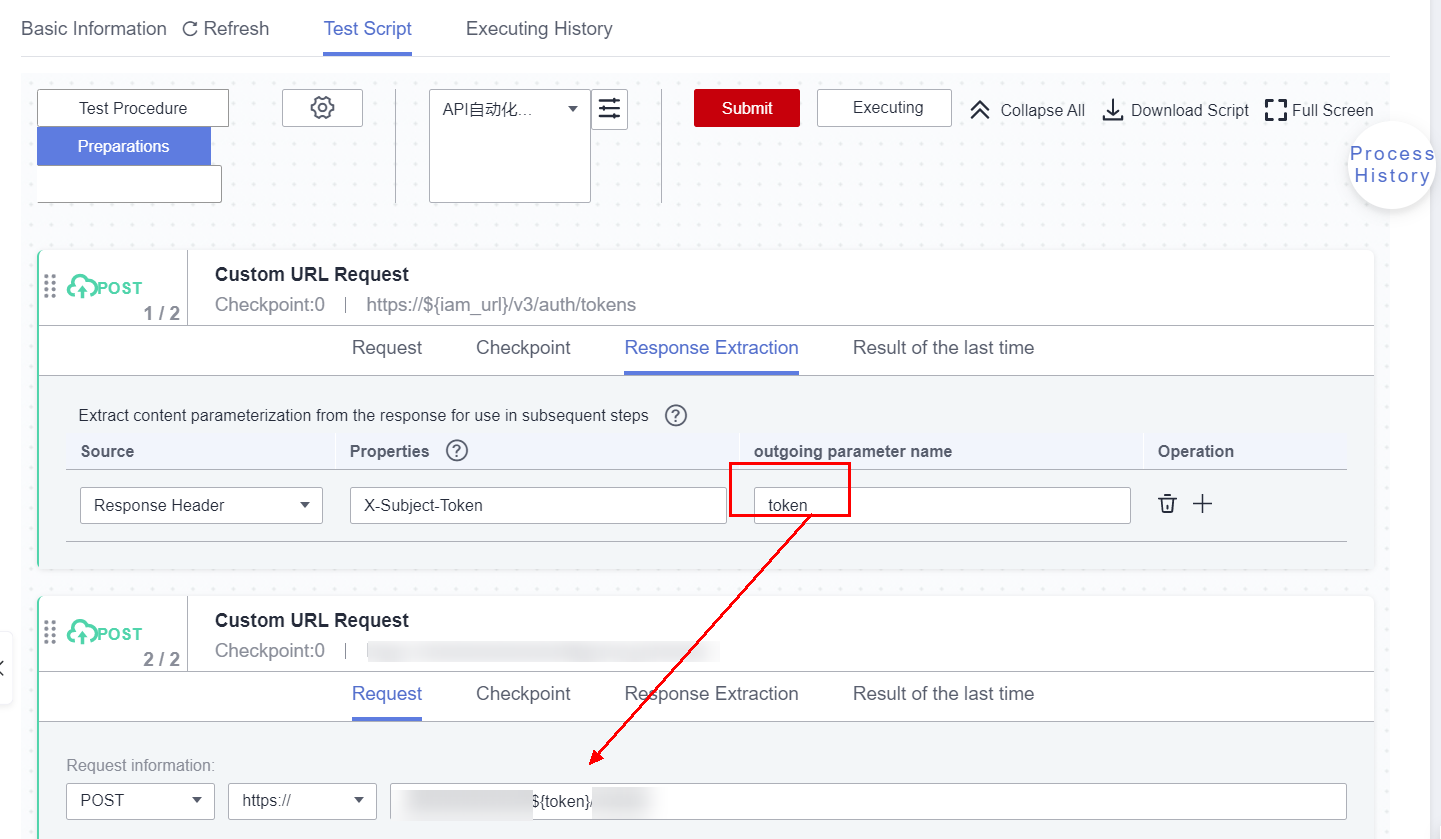
- Choose to insert an IF judgment and a cycle.
- IF judgment: determines the next step based on the result of a parameter.
- Cycle: runs a step cyclically for n times.
- Wait Time: waits for n seconds.
Figure 4 Script editing page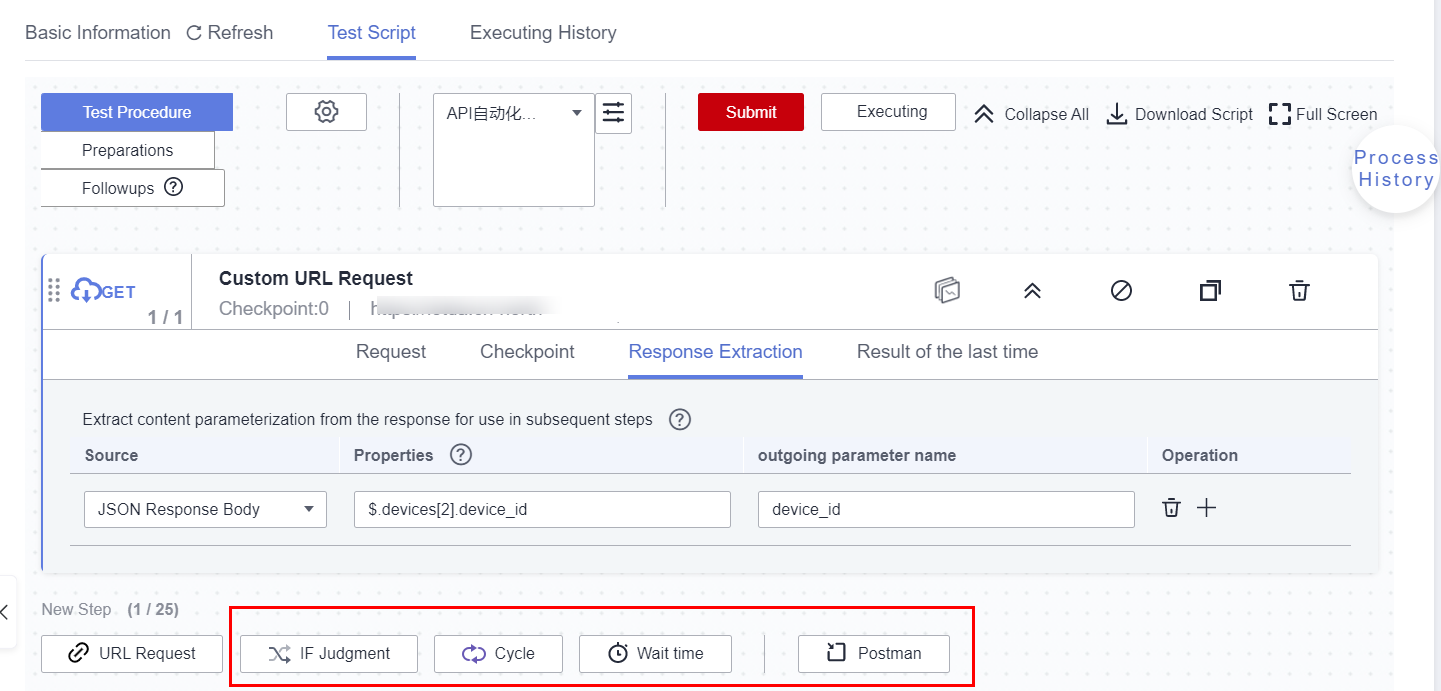
Importing a Postman Script
Collection files of Postman can be imported for API automation tests.
- Go to Postman, select Collections, click the setting icon, and select Export.
Figure 5 Postman (1)
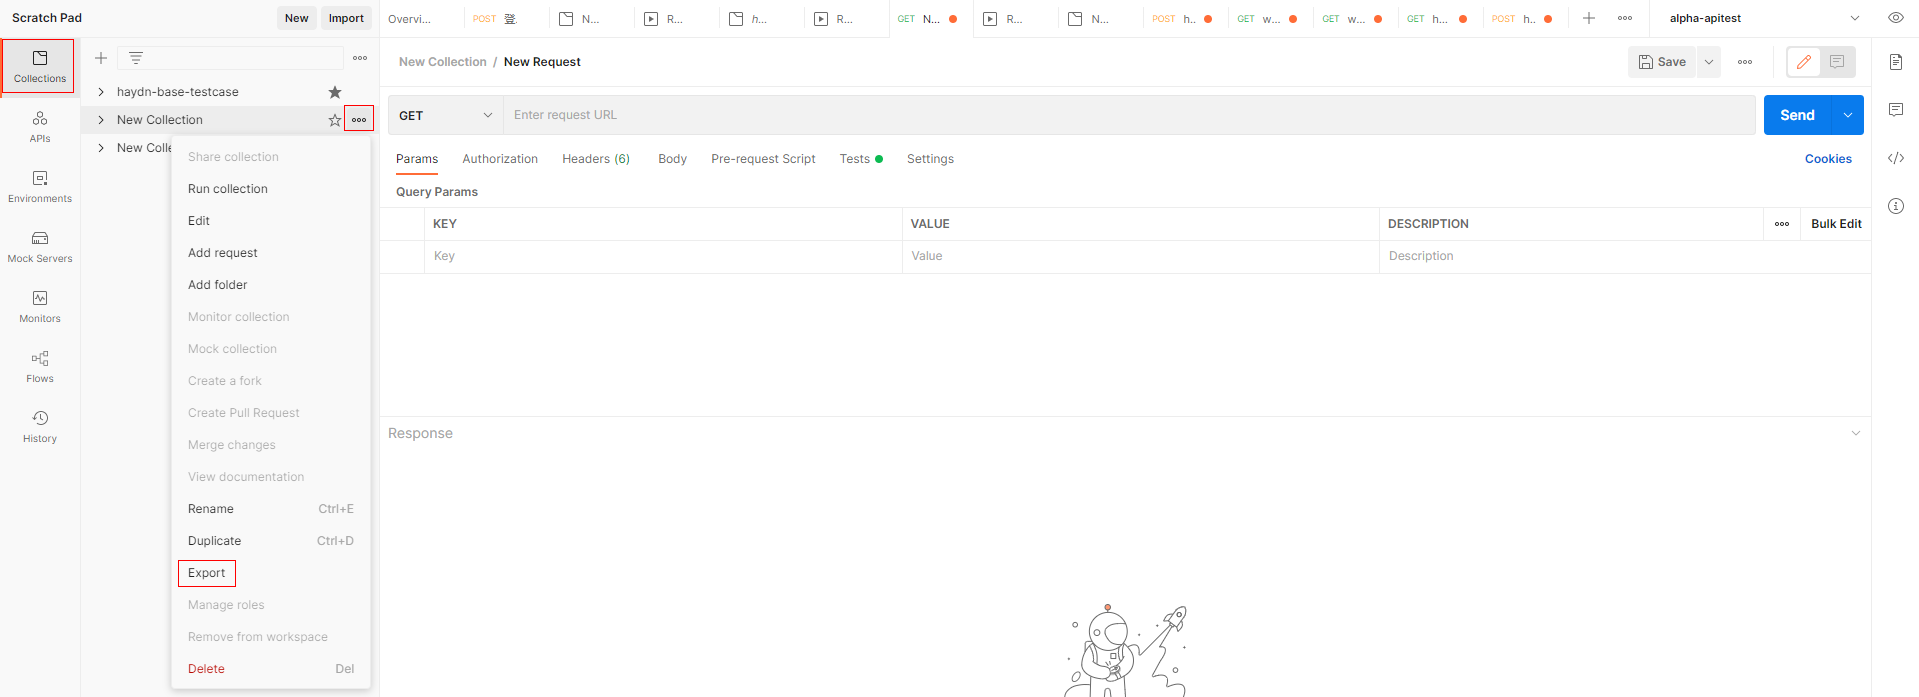 Figure 6 Postman (2)
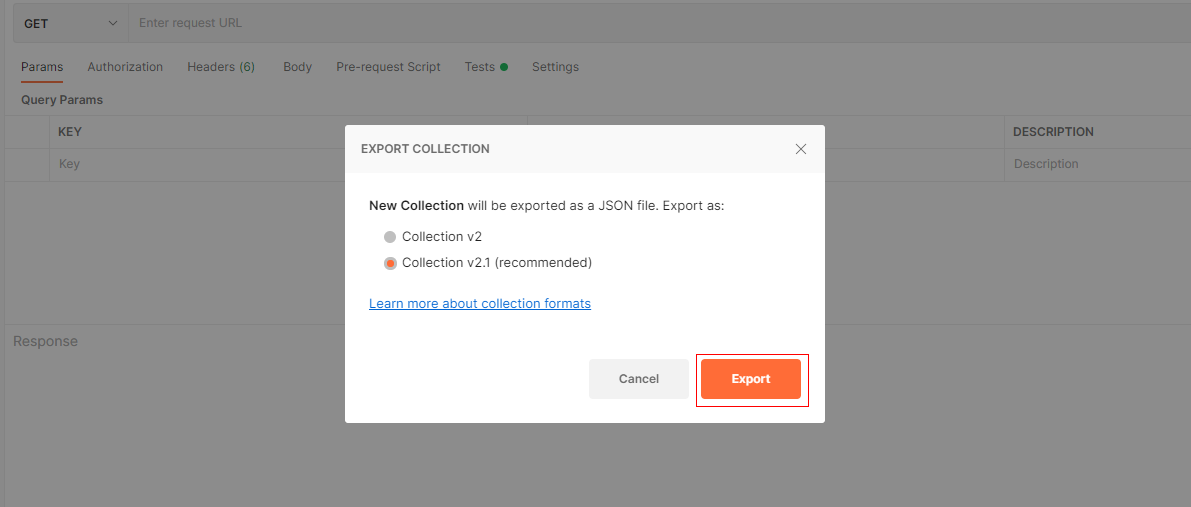
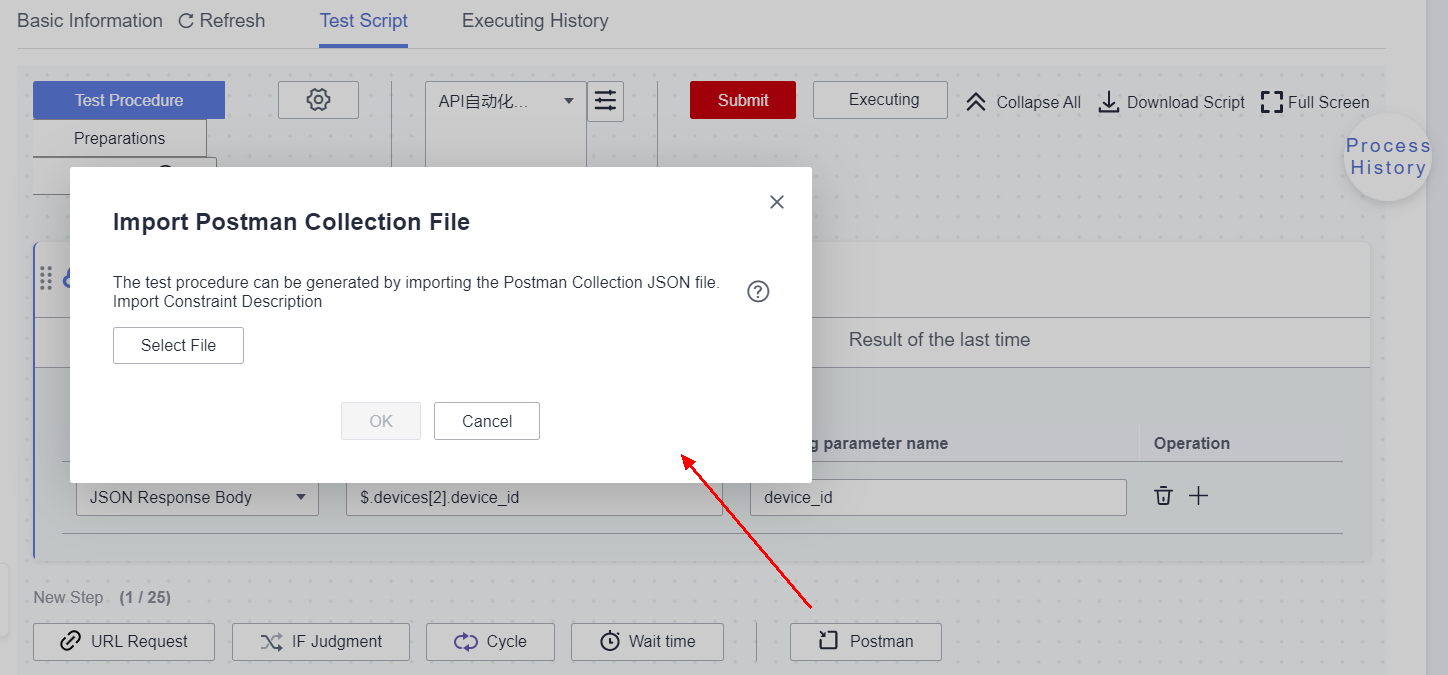
- Go to the Test Script tab page by referring to Creating an API Automation Test Case, click Postman in the New Step area near the bottom of the page, select the file exported from Postman in the previous step, import the file to HaydnCSF, and click Submit.
Figure 7 Importing a Postman file
Adding Environment Parameters
You can add parameters required for executing test cases. To reference environment parameters, enter $.
- Click View Environment Parameters. In the displayed dialog box, click Add Environment Parameter. In the displayed dialog box, enter the environment name and description, and click OK.
Figure 8 Adding environment parameters
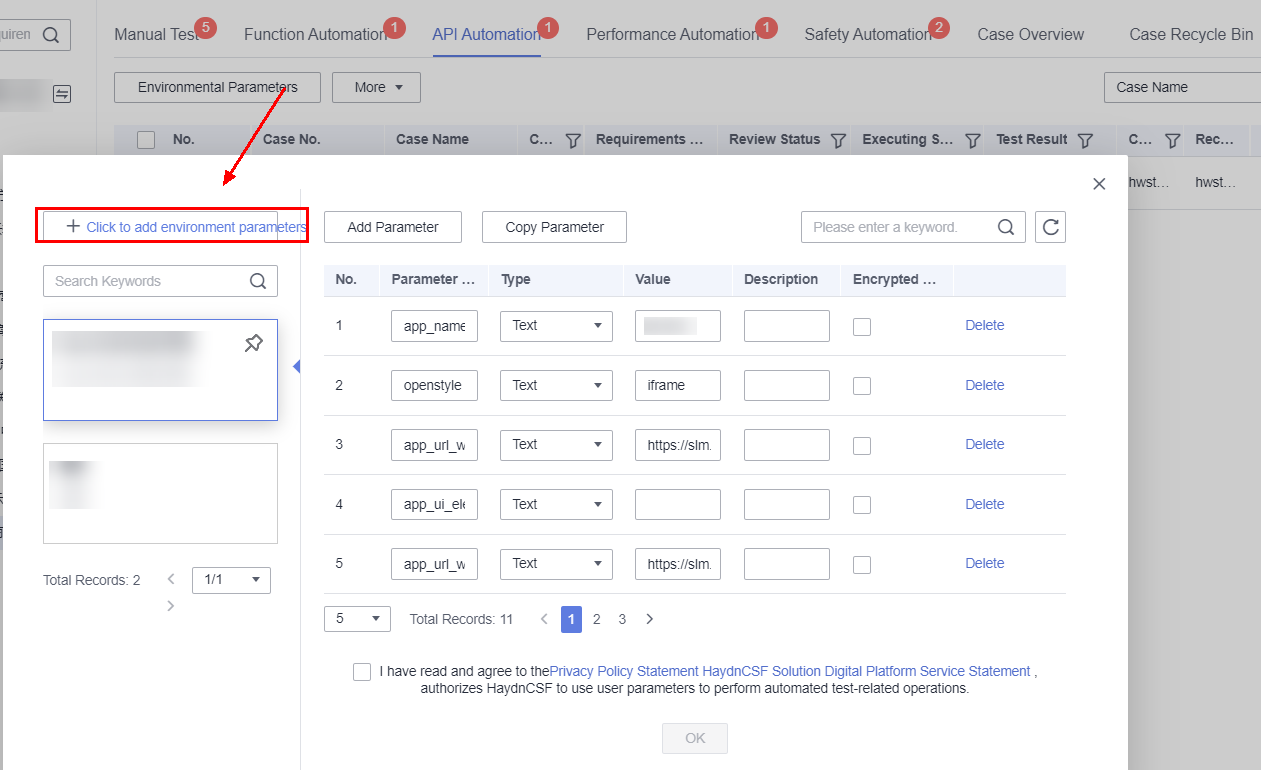
- Click Add, enter the parameter name and value, read and agree to the agreements, and click OK.

If a parameter needs to be encrypted, select the encryption icon next to the Description column. In the displayed dialog box, click OK.
Figure 9 Environment parameters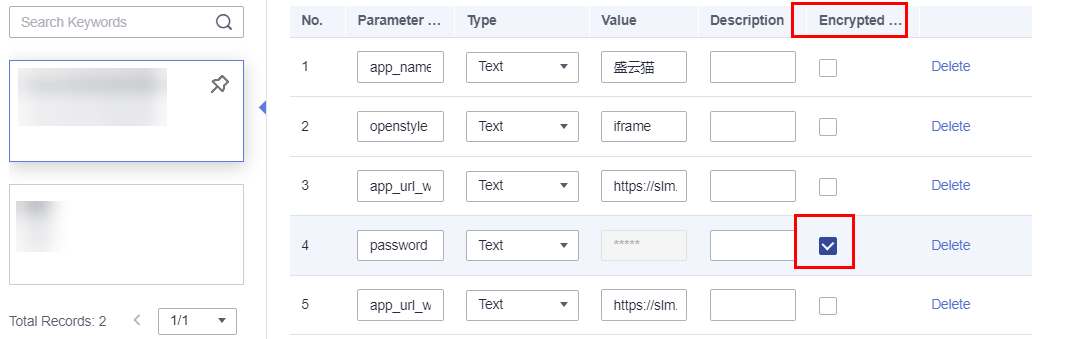
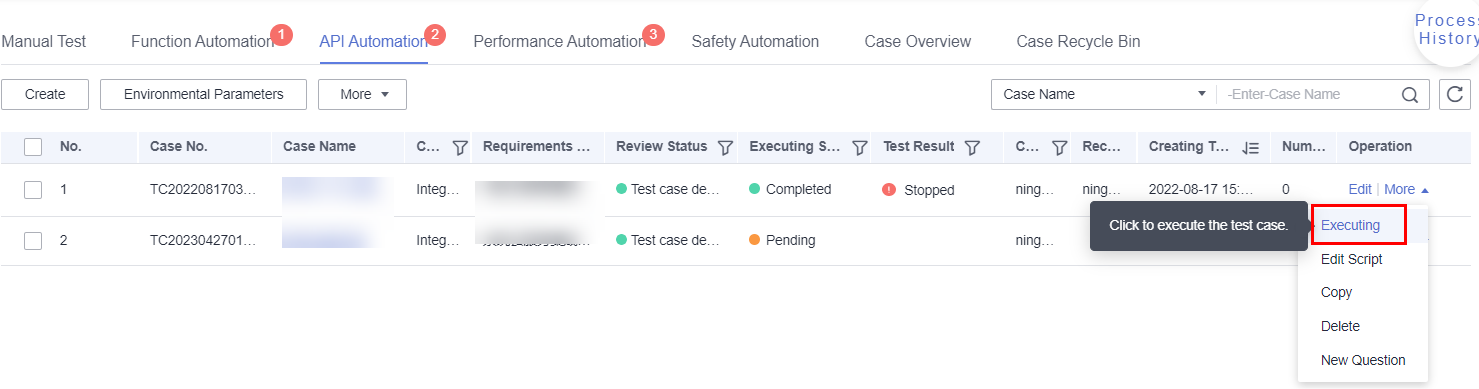
Executing an API Automation Test Case
After an API automation test case is created, the test case executor can directly execute the test case without submitting the case design.
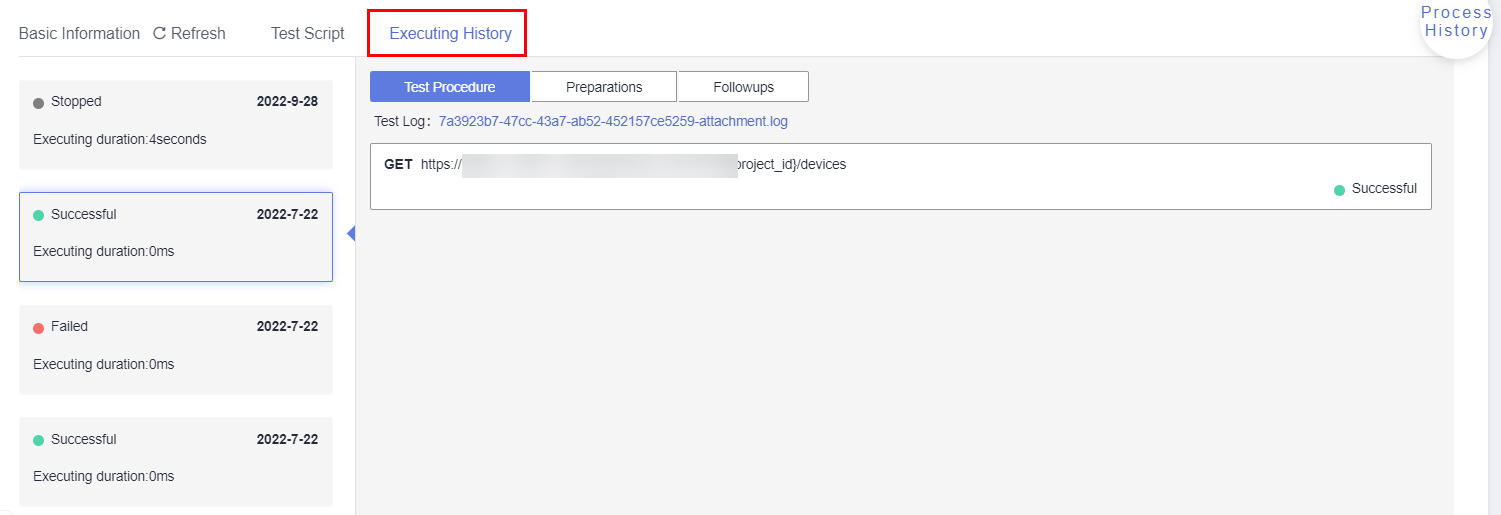
Viewing Execution Results
Click the test case name to go to the test case details page and view the execution results on the Execution History tab page.
Feedback
Was this page helpful?
Provide feedbackThank you very much for your feedback. We will continue working to improve the documentation.See the reply and handling status in My Cloud VOC.
For any further questions, feel free to contact us through the chatbot.
Chatbot


