
Mutual Authentication
Scenarios
In common HTTPS service scenarios, only the server certificate is required for authentication. For some mission-critical services, such as financial transactions, you need to deploy both the server certificate and the client certificate for mutual authentication.
Self-signed certificates are used as an example to describe how to configure mutual authentication. Self-signed certificates do not provide all the security properties provided by certificates signed by a CA. It is recommended that you purchase certificates from SSL Certificate Manager (SCM) or CAs.
Creating a CA Certificate Using OpenSSL
- Log in to a Linux server with OpenSSL installed.
- Create the server directory and switch to the directory:
mkdir ca
cd ca
- Create the certificate configuration file ca_cert.conf. The file content is as follows:
[ req ]
distinguished_name     = req_distinguished_name
prompt                 = no

[ req_distinguished_name ]
 O                      = ELB
- Create the CA certificate private key ca.key.
openssl genrsa -out ca.key 2048
Figure 1 Private key of the CA certificate
- Create the certificate signing request (CSR) file ca.csr for the CA certificate.
openssl req -out ca.csr -key ca.key -new -config ./ca_cert.conf
- Create the self-signed CA certificate ca.crt.
openssl x509 -req -in ca.csr -out ca.crt -sha1 -days 5000 -signkey ca.key
Figure 2 Creating a self-signed CA certificate
Issuing a Server Certificate Using the CA Certificate
The server certificate can be a CA signed certificate or a self-signed one. In the following steps, a self-signed certificate is used as an example to describe how to create a server certificate.
- Log in to the server where the CA certificate is generated.
- Create a directory at the same level as the directory of the CA certificate and switch to the directory.
cd server
- Create the certificate configuration file server_cert.conf. The file content is as follows:
[ req ]
distinguished_name     = req_distinguished_name
prompt                 = no

[ req_distinguished_name ]
 O                      = ELB
 CN                     = www.test.com

Set the CN field to the domain name or IP address of the Linux server.
- Create the server certificate private key server.key.
openssl genrsa -out server.key 2048
- Create the CSR file server.csr for the server certificate.
openssl req -out server.csr -key server.key -new -config ./server_cert.conf
- Use the CA certificate to issue the server certificate server.crt.
openssl x509 -req -in server.csr -out server.crt -sha1 -CAcreateserial -days 5000 -CA ../ca/ca.crt -CAkey ../ca/ca.key
Figure 3 Issuing a server certificate
Issuing a Client Certificate Using the CA Certificate
- Log in to the server where the CA certificate is generated.
- Create a directory at the same level as the directory of the CA certificate and switch to the directory.
cd client
- Create the certificate configuration file client_cert.conf. The file content is as follows:
[ req ]
distinguished_name     = req_distinguished_name
prompt                 = no

[ req_distinguished_name ]
 O                      = ELB
 CN                     = www.test.com
Set the CN field to the domain name or IP address of the Linux server.
- Create the client certificate private key client.key.
openssl genrsa -out client.key 2048
Figure 4 Creating a client certificate private key
- Create the CSR file client.csr for the client certificate.
openssl req -out client.csr -key client.key -new -config ./client_cert.conf
Figure 5 Creating a client certificate CSR file
- Use the CA certificate to issue the client certificate client.crt.
openssl x509 -req -in client.csr -out client.crt -sha1 -CAcreateserial -days 5000 -CA ../ca/ca.crt -CAkey ../ca/ca.key
Figure 6 Issuing a client certificate
- Convert the client certificate to a .p12 file that can be identified by the browser.
openssl pkcs12 -export -clcerts -in client.crt -inkey client.key -out client.p12
A password is required during command execution. Save this password, which will be required when you import the certificate using the browser.
Configuring the Server Certificate and Private Key
- Log in to the load balancer management console.
- In the navigation pane on the left, choose Certificates.
- In the navigation pane on the left, choose Certificates. On the displayed page, click Add Certificate. In the Add Certificate dialog box, select Server certificate, copy the content of server certificate server.crt to the Certificate Content area and the content of private key file server.key to the Private Key area, and click OK.
Delete the last newline character before you copy the content.
The certificate and private key must be PEM-encoded.
Configuring the CA Certificate
- Log in to the load balancer management console.
- In the navigation pane on the left, choose Certificates.
- Click Add Certificate. In the Add Certificate dialog box, select CA certificate, copy the content of CA certificate ca.crt created in Creating a CA Certificate Using OpenSSL to the Certificate Content area, and click OK.
Delete the last newline character before you copy the content.
The certificate must be PEM-encoded.
Configuring Mutual Authentication
- Log in to the load balancer management console.
- Locate the load balancer and click its name. Under Listeners, click Add Listener. Select HTTPS for Frontend Protocol and Mutual authentication for SSL Authentication, and select a CA certificate and server certificate.
Add backend servers.
For detailed operations, see Overview.
Importing and Testing the Client Certificate
Method 1: Using a browser
- Import the client certificate using a browser (Internet Explorer 11 is used as an example).
- Export client.p12 from the Linux server.
- Open the browser, choose Settings > Internet Options and click Content.
- Click Certificates and then Import to import the client.p12 certificate.
Figure 7 Importing the client.p12 certificate

- Verify the import.
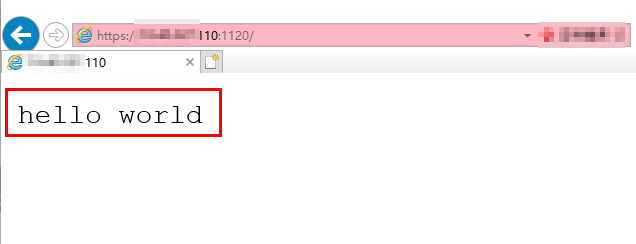
Method 2: Using cURL
- Import the client certificate.
Copy client certificate client.crt and private key client.key to a new directory, for example, /home/client_cert.
- Verify the import.
On the Shell screen, run the following command:
curl -k --cert /home/client_cert/client.crt --key /home/client_cert/client.key https://XXX.XXX.XXX.XXX:XXX/ -I
Ensure that the certificate address, private key address, IP address and listening port of the load balancer are correct. Replace https://XXX.XXX.XXX.XXX:XXX with the actual IP address and port number. If the expected response code is returned, the certificate is successfully imported.
Figure 9 Example of a correct response code
Feedback
Was this page helpful?
Provide feedbackThank you very much for your feedback. We will continue working to improve the documentation.See the reply and handling status in My Cloud VOC.
For any further questions, feel free to contact us through the chatbot.
Chatbot


