
Developing a Hive SQL Script
This section introduces how to develop a Hive SQL script on Data Development.
Scenario Description
As a one-stop big data development platform, Data Development supports development of multiple big data tools. Hive is a data warehouse tool running on Hadoop. It can map structured data files to a database table and provides a simple SQL search function that converts SQL statements into MapReduce tasks.
Preparations
- MapReduce Service (MRS) has been enabled and the MRS cluster MRS_1009 has been created for providing an operating environment for Hive SQL.
When creating an MRS cluster, note the following:
- Kerberos authentication is disabled for the cluster.
- Hive is available.
- Cloud Data Migration (CDM) has been enabled and the CDM cluster cdm-7357 has been created for providing a proxy for communication between Data Development and MRS.
When creating a CDM cluster, note the following:
- The virtual private cloud (VPC), subnet, and security group can communicate with the MRS cluster MRS_1009.
Creating a Hive Data Connection
Before developing a Hive SQL script, create a connection to MRS Hive on Data Development. In this example, the data connection is named hive1009.

Description of key parameters:
- Cluster Name: Name of the MRS cluster created in MapReduce Preparations.
- CDM Cluster: Name of the CDM cluster created in CDM Preparations.
Developing a Hive SQL Script
Create a Hive SQL script named hive_sql on Data Development. Then enter SQL statements in the editor to fulfill business requirements.
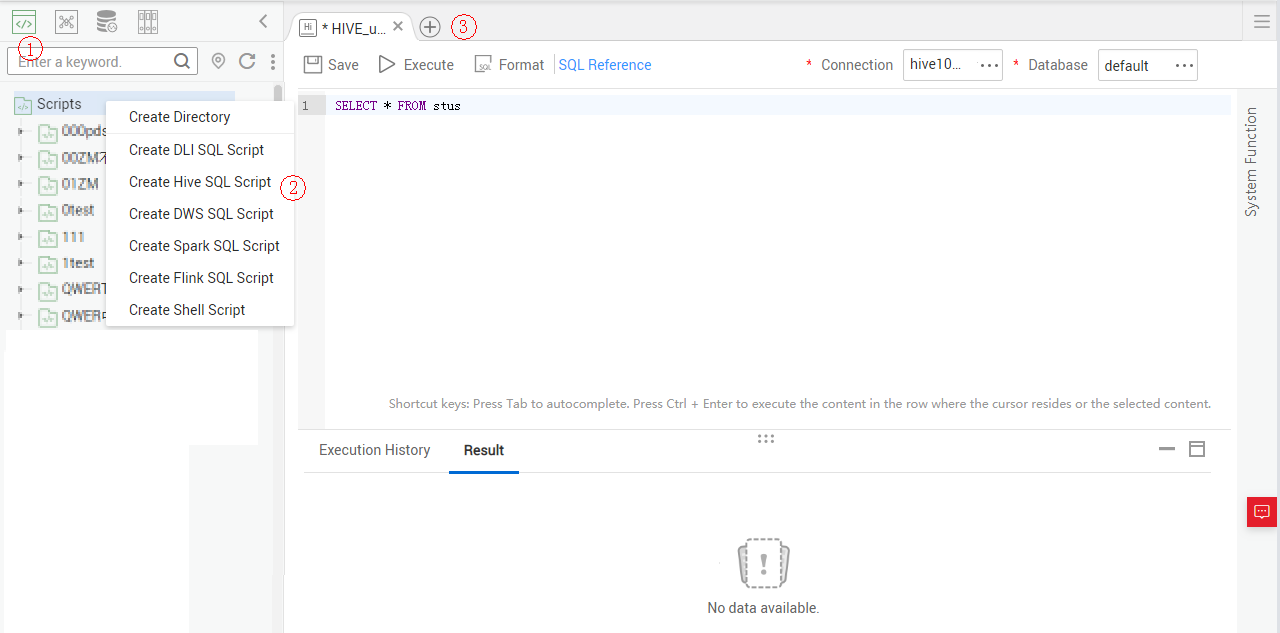
Notes:
- The script development area in Figure 2 is a temporary debugging area. After you close the tab page, the development area will be cleared. Click
 to save the script to a specified directory.
 - Data Connection: Connection created in Creating a Hive Data Connection.
Developing a Hive SQL Job
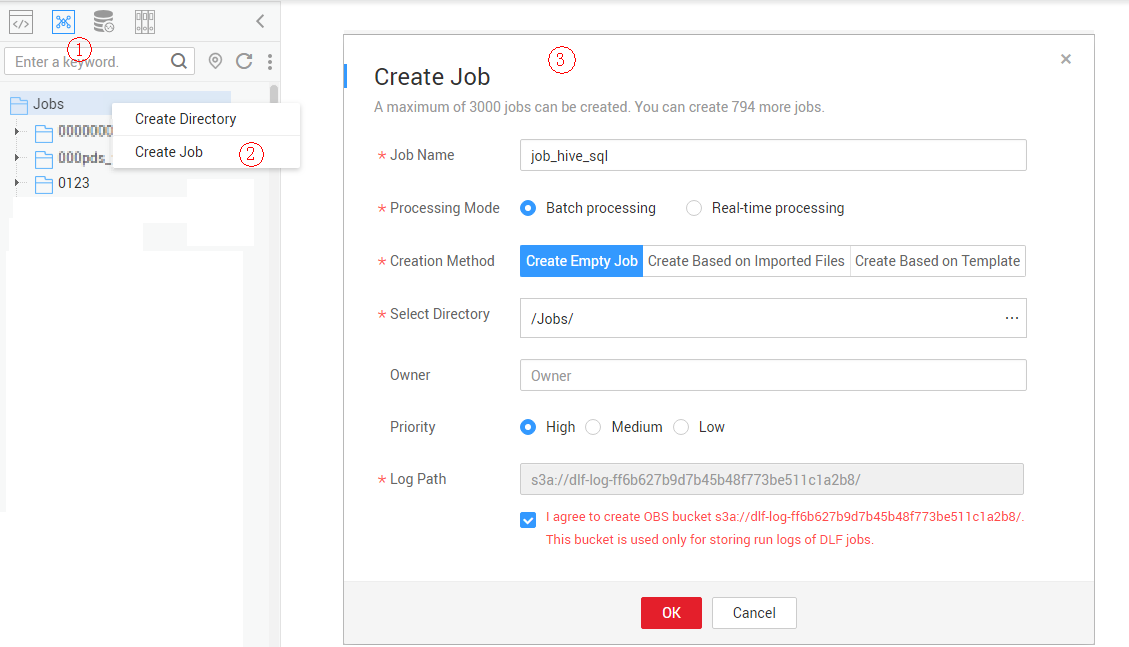
After the Hive SQL script is developed, build a periodically deducted job for the Hive SQL script so that the script can be executed periodically.
- Create an empty Data Development job named job_hive_sql. Figure 3 Creating a job named job_hive_sql
- Go to the job development page, drag the MRS Hive SQL node to the canvas, and click the node to configure node properties. Figure 4 Configuring properties for an MRS Hive SQL node

Description of key properties:
- SQL Script: Hive SQL script hive_sql that is developed in Developing a Hive SQL Script.
- Data Connection: Data connection that is configured in the SQL script hive_sql is selected by default. The value can be changed.
- Database: Database that is configured in the SQL script hive_sql and is selected by default. The value can be changed.
- Node Name: Name of the SQL script hive_sql by default. The value can be changed.
- After the job orchestration is complete, click
 to test the job.
 - If logs do not record any errors, click the blank area on the canvas and configure the job scheduling policy on the scheduling configuration page on the right. Figure 5 Configuring the scheduling mode
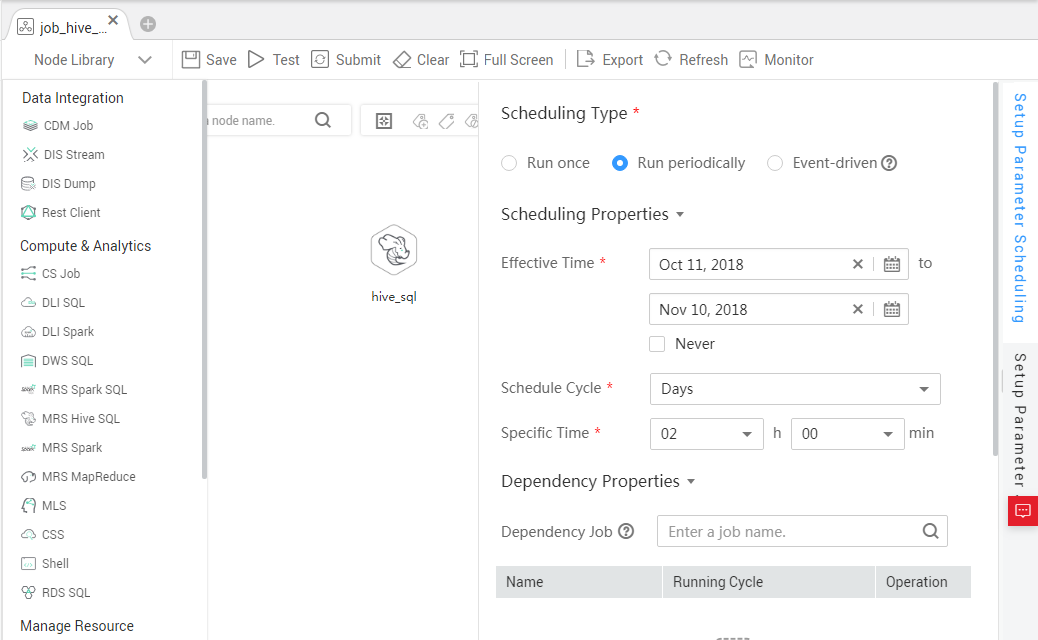
Note:
- 2018/10/11 to 2018/11/10: The job is executed at 02:00 a.m. every day.
- Click
 to save the job and click
  to schedule the job to enable the job to run automatically every day.
Feedback
Was this page helpful?
Provide feedbackThank you very much for your feedback. We will continue working to improve the documentation.See the reply and handling status in My Cloud VOC.
For any further questions, feel free to contact us through the chatbot.
Chatbot


