Help Center/
Data Encryption Workshop/
User Guide/
Permissions Management/
Sharing/
Activating a Dedicated HSM Instance Using a Shared VPC
Updated on 2025-07-30 GMT+08:00
Activating a Dedicated HSM Instance Using a Shared VPC
After a Dedicated HSM instance is created, you need to activate it before using it. To do so, you need to bind it to a VPC. You can apply for a VPC or use a shared VPC.
Creating Shared VPC Resources
- Log in to the DEW console.
- Click
 in the upper left corner, choose .
 - In the navigation pane on the left, choose .
- Click Create Resource Share in the upper right corner.
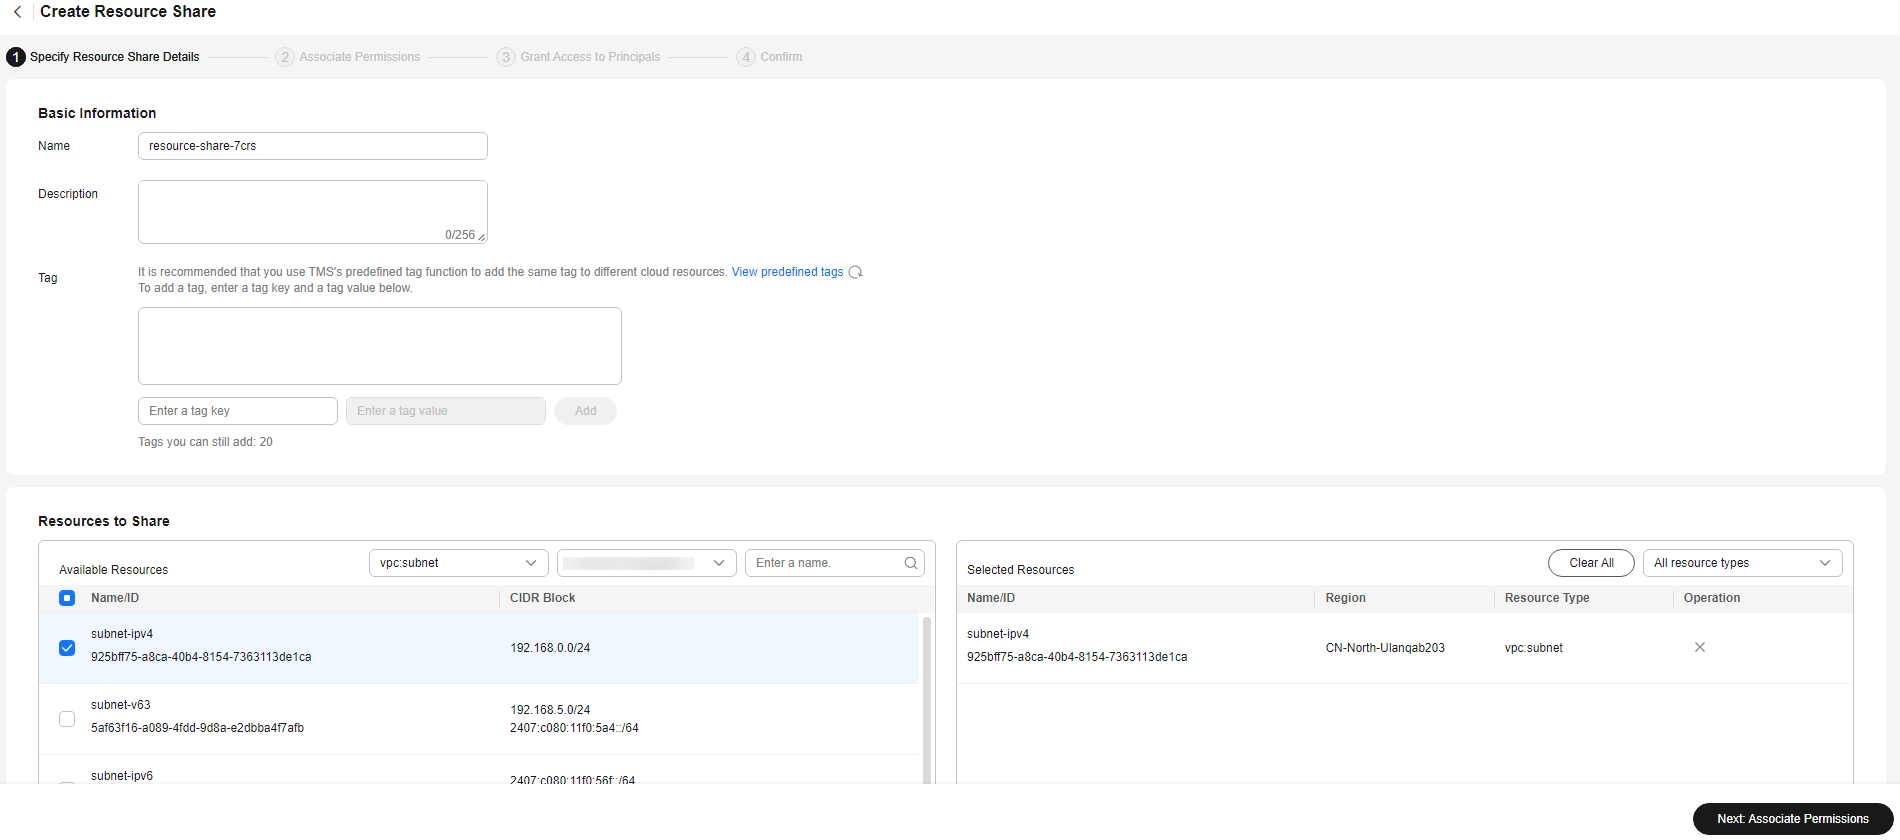
Figure 1 Specifying shared resources

- Set resource type to vpc:subnet, choose the corresponding region, and select the VPC to be shared. Click Next: Associate Permissions.
- Associate a RAM managed permission with each resource type on the displayed page. Then, click Next: Specify Principals in the lower right corner.
- Specify the target principals and click Next: Confirm in the lower right corner.
- Check the configurations and click Submit in the lower right corner.
Using Shared VPC Resources
- Log in to the DEW console.
- Click
 in the upper left corner and select a region or project.
 - In the navigation pane on the left, choose Dedicated HSM > Instances.
- Locate the target Dedicated HSM, click Activate in the Operation column.
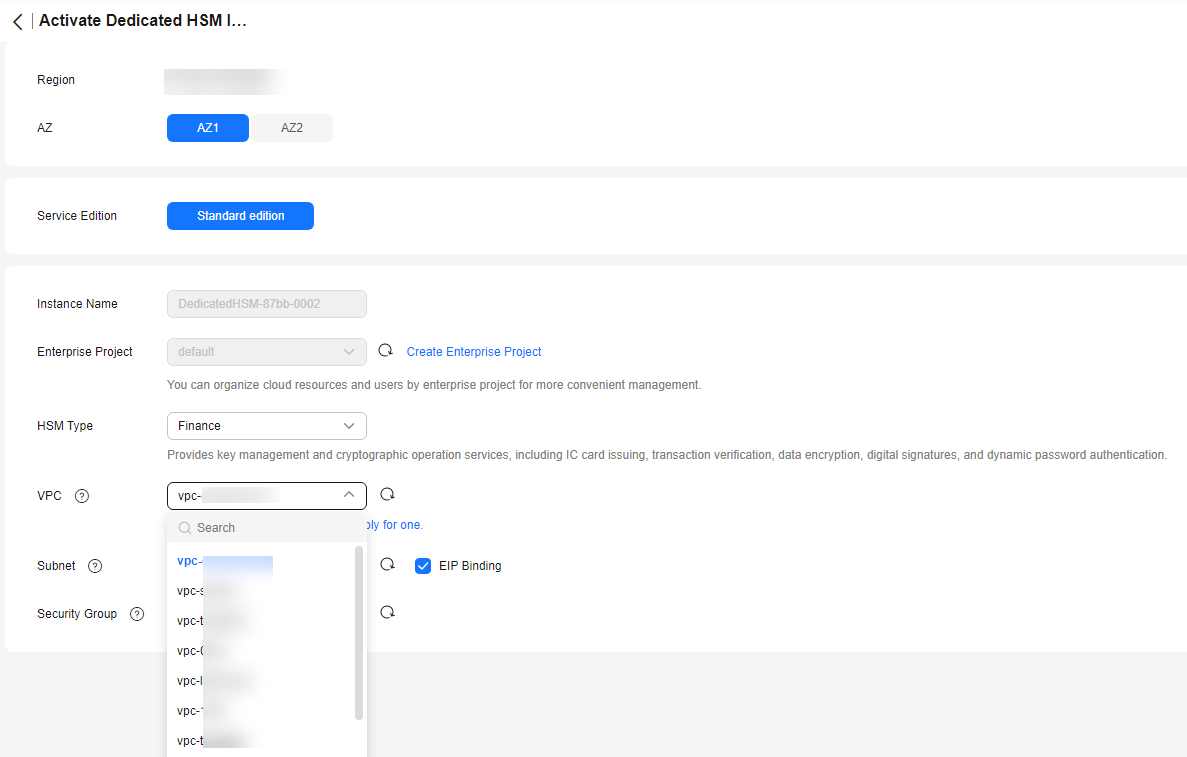
- In the VPC drop-down list, choose a shared VPC instance, configure the parameters, and click Activate.
Figure 2 Selecting a shared VPC

Feedback
Was this page helpful?
Provide feedbackThank you very much for your feedback. We will continue working to improve the documentation.See the reply and handling status in My Cloud VOC.
The system is busy. Please try again later.
For any further questions, feel free to contact us through the chatbot.
Chatbot


