
Restoring Metadata
The metadata backup policy requires DDM to automatically back up DDM instance metadata from 02:00 to 03:00 every day and retain the backup data for up to 30 days. Metadata backup is also triggered by key operations, such as deleting a schema, deleting source data after shard configuration, and deleting instances.
When you delete a schema by mistake or your RDS for MySQL instance becomes abnormal, metadata restoration allows you to restore your DDM instance metadata and match the metadata with the RDS instance that has PITR completed to re-establish the relationship between your DDM instance and RDS instance. The metadata restoration supports only RDS for MySQL.
To restore metadata of a DDM instance, you can specify a point in time by referring to Restoring Metadata to a Point in Time, or using an available backup by referring to Restoring Metadata Using Backups.
Precautions
- Metadata restoration mainly restores the metadata of your DDM instance to a new DDM instance. It starts after a point-in-time recovery (PITR) for the associated data nodes is complete.

PITR indicates that a data node has been restored to a specified point in time.
- The destination DDM instance is not associated with any RDS for MySQL instance and has no schemas and accounts.
- Restoration is not supported if the destination DDM instance is in the primary network and its associated RDS for MySQL instance is in the extended network.
- The source DDM instance must be of the version 2.3.2.11 or later, and the destination DDM instance must be of the version 3.0.8 or later.
- Time points that data can be restored to depend on the backup policy set on original data nodes.
Prerequisites
- There is a source DDM instance available and associated with an RDS for MySQL instance. This DB instance is the source data node.
- The source data node has been restored to a specified time point.
Restoring Metadata to a Point in Time
- Log in to the DDM console.
- Create a new DDM instance and use it as the destination DDM instance. For details, see Buying a DDM instance.
- In the DDM instance list, locate the source instance and click its name.
- In the navigation pane on the left, choose Backups & Restorations.
- Click Restore Metadata.
- On the displayed page, specify a time point. DDM will select an appropriate DDM metadata backup closest to the time point.
Figure 1 Configuring required parameters

Table 1 Parameter description Parameter
Description
Restore To
Select a time point to restore metadata. After you specify a point in time, DDM selects the most recent backup and uses it to restore metadata.
Destination DDM instance
Select the DDM instance created in 2.
Destination Data Nodes
Select the RDS for MySQL instance that has PITR completed. You can search for the instance by name or ID. DDM will match the selected data nodes with shard information in the selected metadata backup to restore metadata.
- Click OK. If a message is displayed indicating that the metadata is restored successfully, the restoration is complete.
Restoring Metadata Using Backups
- Log in to the DDM console.
- Create a new DDM instance and use it as the destination DDM instance. For details, see Buying a DDM instance.
- In the navigation pane on the left, choose Backups. Alternatively, go to the instance details page and choose Backups from the navigation pane.
- Locate the required backup based on the instance name and backup time and click Restore in the Operation column.
Figure 2 Restoring metadata

- On the displayed page, configure required parameters.
Figure 3 Configuring required parameters
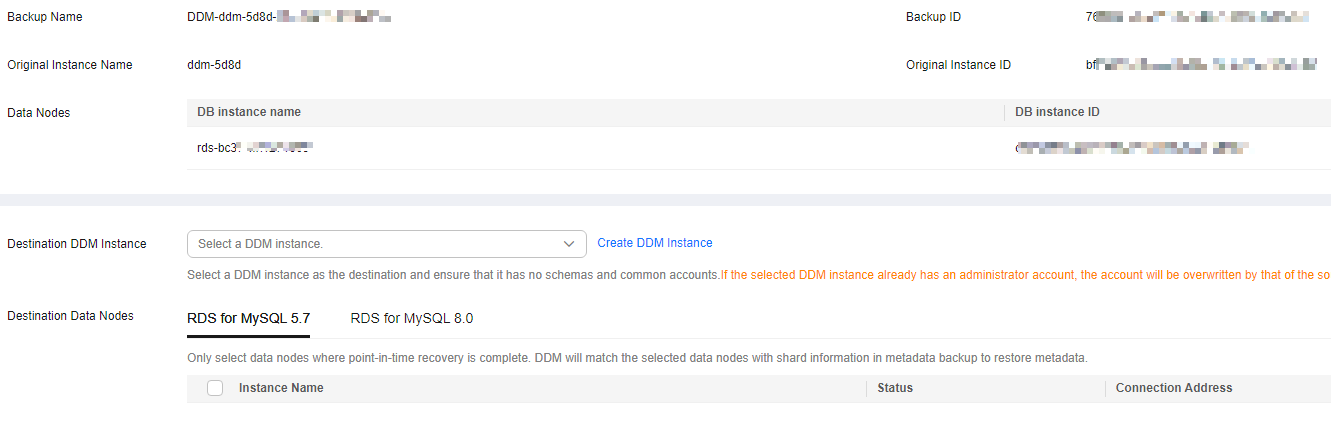
Table 2 Parameter description Parameter
Description
Backup Name
Name of the backup to be restored.
Destination DDM instance
Select the DDM instance created in 2.
Destination Data Nodes
Select the RDS for MySQL instance that has PITR completed. DDM will match the selected data nodes with shard information in the selected metadata backup to restore metadata.
- Click OK. If a message is displayed indicating that the metadata is restored successfully, the restoration is complete.
Feedback
Was this page helpful?
Provide feedbackThank you very much for your feedback. We will continue working to improve the documentation.See the reply and handling status in My Cloud VOC.
For any further questions, feel free to contact us through the chatbot.
Chatbot


