
Exporting Data
DAS allows you to export a large amount of data at a time to facilitate data query or to back up data for migration. This section describes how to export data.
DAS allows you to export an entire keyspace, some data tables, or result sets of SQL statements.
Usage Notes
- If you do not select Generate a file for each table when exporting data, the exported data file is in .zip format. Data files in this format cannot be directly imported. You need to decompress the file before importing it again.
- If Generate a file for each table is selected during data export, the exported data file is in .sql or .csv format. In this case, the exported data file can be directly imported again.
- Only OBS buckets of the current IAM account can be exported.
Prerequisites
You have created a user keyspace on the DAS console.
Exporting a Keyspace
- Log in to the console.
- Click
 in the upper left corner and select a region and project.
 - Click
 in the upper left corner, and under Databases, click Data Admin Service.
 - In the navigation pane on the left, choose Development Tool.
You can also click Go to Development Tool on the overview page.
- Locate the DB instance that you want to log in to and click Log In in the Operation column.
- On the top menu bar, choose Import and Export > Export.
- In the upper left corner of the page, click Create Task and choose Export Keyspace.
- In the displayed dialog box, configure basic information and advanced settings as required.
Figure 1 Creating a task for exporting a keyspace

- If you select Export all tables, data in an entire keyspace or in some tables will be exported.
- DAS does not store any user data. The exported data files are stored in the OBS bucket that you have created.
- You can click Bucket ACL Info in the Create Task dialog box to check whether a public OBS bucket is selected.
- Creating OBS buckets is free of charge, but saving files will incur certain costs.
- After settings are complete, click OK.
- In the task list, locate the created task and view the task ID, type, status, and progress.
- Click Details in the Operation column to view task details.
Exporting SQL Results
- Log in to the console.
- Click in the upper left corner and select a region and project.
- Click in the upper left corner, and under Databases, click Data Admin Service.
- In the navigation pane on the left, choose Development Tool.
You can also click Go to Development Tool on the overview page.
- Locate the DB instance that you want to log in to and click Log In in the Operation column.
- On the top menu bar, choose Import and Export > Export.
- In the upper left corner of the page, click Create Task and choose Export SQL Result.
- In the displayed dialog box, configure basic information and advanced settings.
- DAS does not store any user data. The exported data files are stored in the OBS bucket that you have created.
- You can click Bucket ACL Info in the Create Task dialog box to check whether a public OBS bucket is selected.
- Creating OBS buckets is free of charge, but saving files will incur certain costs.
- After settings are complete, click OK.
- In the task list, locate the created task and view the task ID, type, status, and progress.
- Click Details in the Operation column to view task details.
Download Data File
- Download on the DAS Console.
- Download on the OBS management console.
Quick Export (Not Promoted)

This feature is no longer promoted. It is only available to existing users.
- Log in to the console.
- Click in the upper left corner and select a region and project.
- Click in the upper left corner, and under Databases, click Data Admin Service.
- In the navigation pane on the left, choose Development Tool.
You can also click Go to Development Tool on the overview page.
- Locate the DB instance that you want to log in to and click Log In in the Operation column.
- On the top menu bar, choose Import and Export > Export.
- In the upper left corner of the page, click Quick Export and select the keyspace that you want to export data from.
Figure 2 Quick export

A maximum of 200,000 rows can be quickly exported from a single table. To export more data, choose Create Task > Export Database.
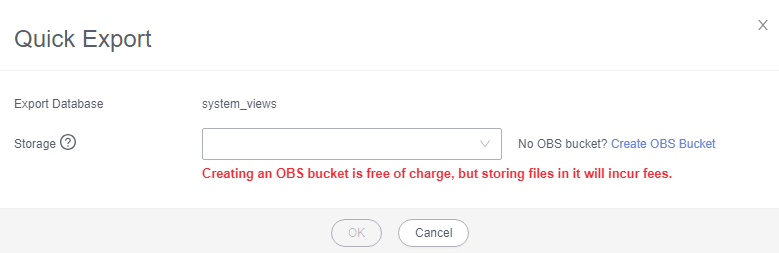
- On the Quick Export page, select a storage path and click OK.
Figure 3 Quick export
- In the task list, view the export task you created.
In the row that contains the export task, you can click Details in the Operation column to view execution details of the task and information about exported tables.
Feedback
Was this page helpful?
Provide feedbackThank you very much for your feedback. We will continue working to improve the documentation.See the reply and handling status in My Cloud VOC.
For any further questions, feel free to contact us through the chatbot.
Chatbot


