

Configuring Webhook Settings
Overview
Developers can configure URLs of third-party systems on the Webhook page and subscribe to events such as branch push and tag push of CodeArts Repo based on project requirements.
When a subscribed event occurs, you can use a webhook to send a POST request to the URL of a third-party system to trigger corresponding operations (in the third-party system), such as popping up a notification window, building or updating images, or performing deployment.
Constraints
| Item | Description |
|---|---|
| Permission settings | Users with the project manager or project administrator role can set project-level webhooks. For details, see Configuring Project-Level Permissions. |
| Function constraint | A maximum of 20 webhooks can be created for a repository. |
Configuring Webhook Settings
- Go to the CodeArts Repo page of the project to be configured and choose .
- Click Add Webhook and set parameters by referring to Table 2.

Table 2 Parameters for creating a webhook Parameter
Description
Example Value
Name
Custom name with up to 200 characters.
Webhook_Test
Description
Optional. Used to describe the webhook with up to 200 characters.
Test
URL
The URL and its response cannot contain sensitive data or the sensitive data must be encrypted and decrypted for security. The webhook URL must be provided by a third-party CI/CD system.
https://example.com
Token Type
Optional. Used for authentication of third-party services' webhook APIs. The authentication information should be placed in the HTTP request header as the key and used together with the token. Three options are available:
- X-Repo-Token
- X-Gitlab-Token
- X-Auth-Token
You can also enter a custom token type.
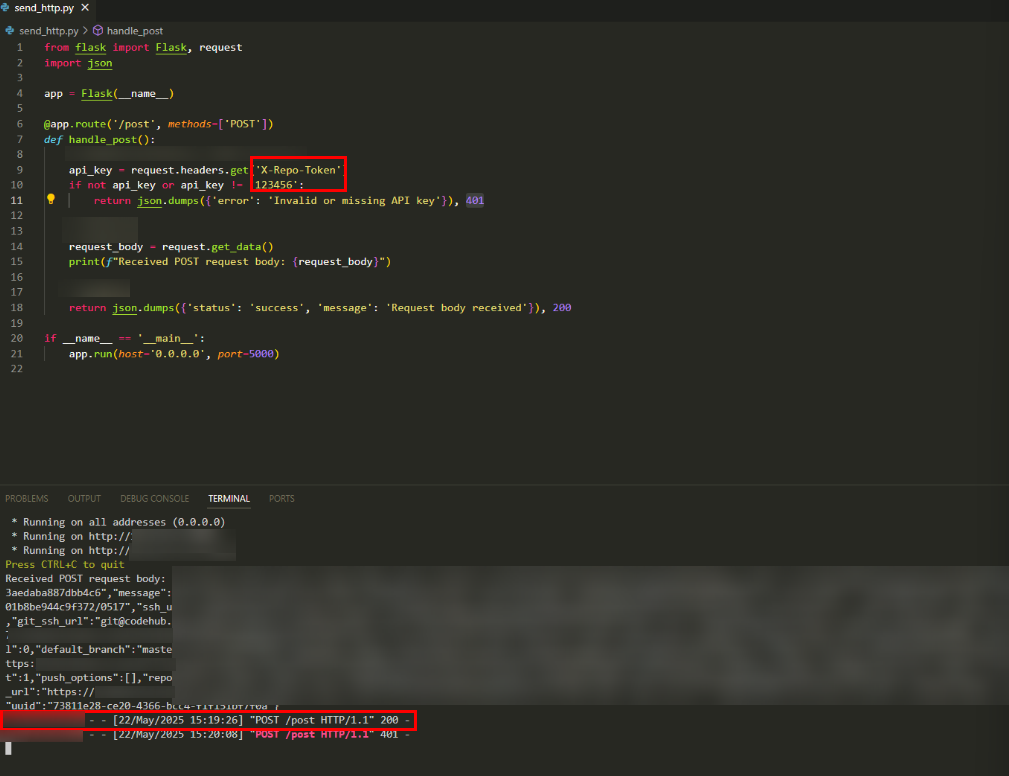
You can configure a token when setting up a webhook. The token will be associated with the webhook URL and sent to you in the X-Repo-Token header.
X-Repo-Token
Token
Optional. After you set Token Type, this parameter is used as the value and is used together with the token type.
Enter a custom value, with max. 2,000 characters. Used for third-party CI/CD system authentication. The authentication information is stored in the HTTP request header.
Token_Test
Trigger Events
You can subscribe to the following events:
- Code push: triggered when code is updated via Git or online.
After this option is selected, you need to specify Regular Expression for Branch Filtering. The value must not exceed 500 characters. .* indicates that all branches are matched. If the branch name matches the configured regular expression, this event will be triggered by code updates within the repository, such as updating code in submodules, or pushing code online or via a local Git client.
- Merge requests: triggered when a merge request is created, or when its code, status, or configuration is updated.
After this option is selected, this event will be triggered upon changes to a merge request, including code updates, status changes (closing/re-opening), field updates (title, description, merger, or work items), source branch deletion, or squash merge adjustments.
- Tag push: triggered when a tag is created or deleted.
After this option is selected, this event will be triggered when a protected tag is created or deleted.
- Comments: triggered when a review or comment is added.
After this option is selected, this event will be triggered when a review is added to a code file, a file change in a code commit, or a merge request, or when a comment is added to a repository's commit details or merge request details.
- Select Code Push and set Regular Expression for Branch Filtering to Branch_*. This indicates that the push of all branches starting with Branch_ will trigger this event.
- Select Merge requests.
- Select Tag push.
Setting Repository Event Triggers
For example, to interconnect with CodeArts Pipeline, perform the following steps:
- Create a pipeline by referring to Creating a Pipeline.
- Edit the pipeline. Click Trigger Settings, enable Webhook, and configure the event triggers by referring to Configuring Event Triggers.

- Go to the code repository of the pipeline and choose Settings > Service Integration > Webhooks.
- Check the system webhook registered by CodeArts Pipeline. System webhooks cannot be edited or deleted. You can only test them and view their execution logs.

What is your overall rating for this page?
Thank you very much for your feedback. We will continue working to improve the documentation.See the reply and handling status in My Cloud VOC.
For any further questions, feel free to contact us through the chatbot.
Chatbot


