
Configuring the Lite Cluster Network
Elastic IP (EIP) provides independent public IP addresses and bandwidth for Internet access.
After purchasing a Lite Cluster resource pool, create an EIP and configure the network. Once the network is set up, you can access Lite Cluster resources through the EIP.
Apply for an EIP and bind it to a Lite Cluster to enable the ECS to access the Internet.
Billing
After an EIP is bound to a Lite Cluster, bandwidth fees may be generated. For details, see EIP Billing Overview.
Prerequisites
- You have purchased and enabled Lite Cluster resources. For details, see Enabling Lite Cluster Resources.
- You have obtained the EIP to be bound. For details, see Assigning an EIP.
Binding an EIP to Configure Lite Cluster Network
- Log in to the ModelArts console. In the navigation pane on the left, choose Lite Cluster under Resource Management.
- Click the target Lite Cluster name to access its details page.
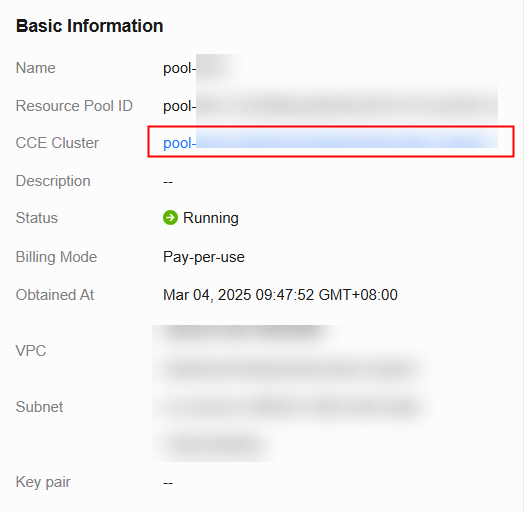
- In the Basic Information tab, click the CCE cluster name to access the CCE console.
Figure 1 Lite Cluster resource pool basic information
- Locate the CCE cluster selected during Lite Cluster purchase, click its name to access the details page.
- In the navigation pane on the left, choose Nodes, and then switch to the Nodes tab. Click the node to be logged in to. The ECS details page is displayed.
Figure 2 Node management

- On the ECS details page, switch to the EIPs tab.
- Click Bind EIP, select an unbound EIP, and click OK.
Figure 3 EIP
 Figure 4 Binding an EIP
If no EIP is available, purchase one. To do so, click Buy EIP.
Refresh the list on the ECS page after completing the purchase. Select the created EIP and click OK.
For details about how to buy an EIP, see Assigning an EIP.
Figure 5 Purchasing an EIP Figure 6 Binding an EIP
- Access cluster resources remotely using SSH with a password or key pair.
- To use a key pair, see Logging In to a Linux ECS Using an SSH Key Pair.
- To use a key pair, see Logging In to a Linux ECS Using an SSH Password.
Follow-Up Operation
Configuring kubectl: With kubectl configured, you can use the CLI tool to manage your Kubernetes clusters by running kubectl commands.
Feedback
Was this page helpful?
Provide feedbackThank you very much for your feedback. We will continue working to improve the documentation.See the reply and handling status in My Cloud VOC.
For any further questions, feel free to contact us through the chatbot.
Chatbot


