Using Snt9B for Inference in a Lite Cluster Resource Pool
Description
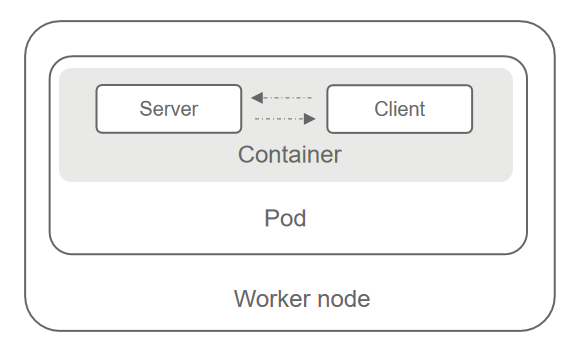
This case outlines the process of using the Deployment mechanism to deploy a real-time inference service in the Snt9B environment. Create a pod to host the service, log in to the pod container to deploy the real-time service, and create a terminal as the client to access the service to test its functions.

Procedure
- Pulls the image. The test image is bert_pretrain_mindspore:v1, which contains the test data and code.
docker pull swr.cn-southwest-2.myhuaweicloud.com/os-public-repo/bert_pretrain_mindspore:v1
docker tag swr.cn-southwest-2.myhuaweicloud.com/os-public-repo/bert_pretrain_mindspore:v1 bert_pretrain_mindspore:v1
- Create the config.yaml file on the host.
Configure Pods using this file. For debugging, start a Pod with the sleep command. Alternatively, replace the command with the boot command for your job (for example, python inference.py). The job will run once the container starts.
The file content is as follows:apiVersion: apps/v1 kind: Deployment metadata: name: yourapp labels: app: infers spec: replicas: 1 selector: matchLabels: app: infers template: metadata: labels: app: infers spec: schedulerName: volcano nodeSelector: accelerator/huawei-npu: ascend-1980 containers: - image: bert_pretrain_mindspore:v1 # Inference image name imagePullPolicy: IfNotPresent name: mindspore command: - "sleep" - "1000000000000000000" resources: requests: huawei.com/ascend-1980: "1" # Number of required NPUs. The maximum value is 16. You can add lines below to configure resources such as memory and CPU. The key remains unchanged. limits: huawei.com/ascend-1980: "1" # Limits the number of cards. The key remains unchanged. The value must be consistent with that in requests. volumeMounts: - name: ascend-driver # Mount driver. Retain the settings. mountPath: /usr/local/Ascend/driver - name: ascend-add-ons # Mount driver. Retain the settings. mountPath: /usr/local/Ascend/add-ons - name: hccn # HCCN configuration of the driver. Retain the settings. mountPath: /etc/hccn.conf - name: npu-smi #npu-smi mountPath: /usr/local/sbin/npu-smi - name: localtime #The container time must be the same as the host time. mountPath: /etc/localtime volumes: - name: ascend-driver hostPath: path: /usr/local/Ascend/driver - name: ascend-add-ons hostPath: path: /usr/local/Ascend/add-ons - name: hccn hostPath: path: /etc/hccn.conf - name: npu-smi hostPath: path: /usr/local/sbin/npu-smi - name: localtime hostPath: path: /etc/localtime - Create a pod based on the config.yaml file.
kubectl apply -f config.yaml
- Run the following command to check the pod startup status. If 1/1 running is displayed, the startup is successful.
kubectl get pod -A
- Go to the container, replace {pod_name} with your pod name (displayed by the get pod command), and replace {namespace} with your namespace (default).
kubectl exec -it {pod_name} bash -n {namespace} - Activate the conda mode.
su - ma-user //Switch the user identity.
conda activate MindSpore //Activate the MindSpore environment.
- Create test code test.py.
from flask import Flask, request
import json
app = Flask(__name__)

@app.route('/greet', methods=['POST'])
def say_hello_func():
    print("----------- in hello func ----------")
    data = json.loads(request.get_data(as_text=True))
    print(data)
    username = data['name']
    rsp_msg = 'Hello, {}!'.format(username)
    return json.dumps({"response":rsp_msg}, indent=4)

@app.route('/goodbye', methods=['GET'])
def say_goodbye_func():
    print("----------- in goodbye func ----------")
    return '\nGoodbye!\n'


@app.route('/', methods=['POST'])
def default_func():
    print("----------- in default func ----------")
    data = json.loads(request.get_data(as_text=True))
    return '\n called default func !\n {} \n'.format(str(data))

# host must be "0.0.0.0", port must be 8080
if __name__ == '__main__':
    app.run(host="0.0.0.0", port=8080)
Execute the code. After the code is executed, a real-time service is deployed. The container is the server.python test.py
Figure 2 Deploying a real-time service
- Open a terminal in XShell and access the container (client) by referring to steps 5 to 7. Run the following commands to test the functions of the three APIs of the custom image. If the following information is displayed, the service is successfully invoked.
curl -X POST -H "Content-Type: application/json" --data '{"name":"Tom"}'  127.0.0.1:8080/
curl -X POST -H "Content-Type: application/json" --data '{"name":"Tom"}' 127.0.0.1:8080/greet
curl -X GET 127.0.0.1:8080/goodbye
Figure 3 Accessing a real-time service

Set limit and request to proper values to restrict the number of CPUs and memory size. A single Snt9B node is equipped with eight Snt9B cards and 192u1536g. Properly plan the CPU and memory allocations to avoid task failures due to insufficient CPU and memory limits.
Feedback
Was this page helpful?
Provide feedbackThank you very much for your feedback. We will continue working to improve the documentation.See the reply and handling status in My Cloud VOC.
For any further questions, feel free to contact us through the chatbot.
Chatbot


