Help Center/
CloudTable Service/
User Guide/
ClickHouse User Guide/
ClickHouse Cluster Management/
Application of ClickHouse Cold and Hot Data Separation/
Using ClickHouse Cold and Hot Data Separation
Updated on 2024-12-24 GMT+08:00
Using ClickHouse Cold and Hot Data Separation
Enable the cold and hot separation feature on the CloudTable management plane.
Procedure
- Log in to the CloudTable console.
- Select a region in the upper left corner.
- In the navigation pane on the left, choose Cluster Management.
- Click Buy Cluster in the upper right corner.
- On the Create Cluster page, select ClickHouse on the cluster purchase page and enable the cold and hot data separation feature. After the cluster is created, the cold and hot separation feature will enabled.

- For details about how to create a cluster, see Creating a ClickHouse Cluster.
- If the cold and hot data separation feature is not enabled during cluster creation, you can enable it on the cluster details page or in the cluster list.
- If the used capacity of a node surpasses the threshold defined in the cold and hot storage policy, data will be automatically transferred to the cold storage volume. For instance, as in figure 1, the hot storage volume usage reaches 80%, data migration to the cold storage is initiated automatically.
- In the cold and hot data separation scenario, hot disks do not support scale-in.
Figure 1 Enabling cold and hot data separation
Modifying the Cold and Hot Data Separation Policy
- Log in to the CloudTable console.
- Select a region in the upper left corner.
- In the navigation pane on the left, choose Cluster Management.
- Click a ClickHouse cluster name to go to the cluster details page.
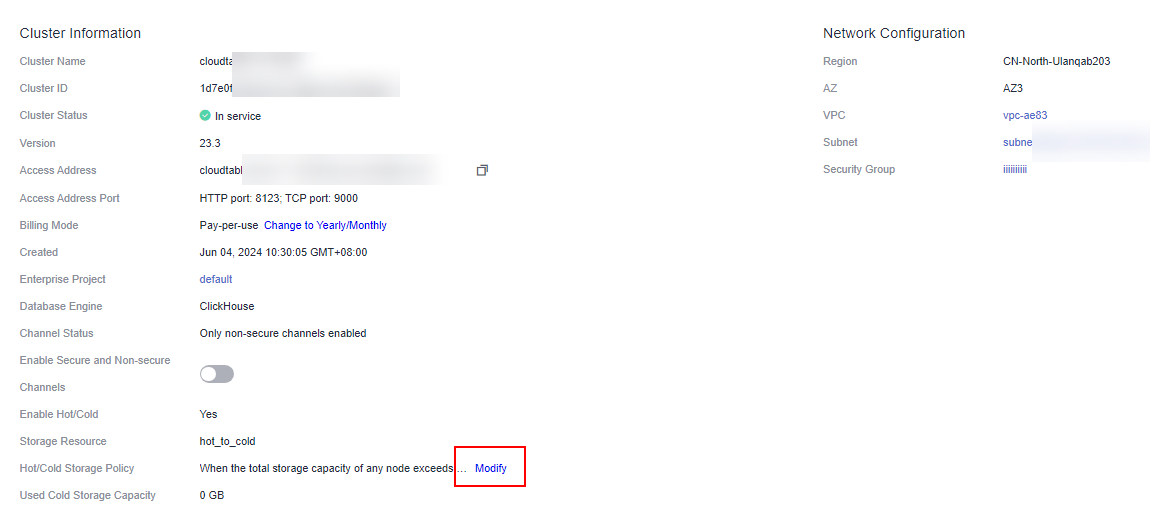
- Choose Cluster Information > Hot/Cold Storage Policy > Modify. On the displayed page, modify the policy and click OK. The policy is modified.

You can also create a hot/cold storage policy when creating a cluster. Once a policy is created, it cannot be deleted.
Parent topic: Application of ClickHouse Cold and Hot Data Separation
Feedback
Was this page helpful?
Provide feedbackThank you very much for your feedback. We will continue working to improve the documentation.See the reply and handling status in My Cloud VOC.
The system is busy. Please try again later.
For any further questions, feel free to contact us through the chatbot.
Chatbot


