Adding a Loop Diagram Element for a Flow
Functions
This diagram element is for extracting elements from an array sequentially and executing loop operations, akin to a "for each" loop.
Using the Loop Diagram Element
For example, if the array variables TestList1 and TestList2 exist, add the elements in TestList1 one by one to the end of the TestList2 array.
- Create array variables TestList1 and TestList2 and common variable test_var.
- In the right pane of the flow editing page, click
 .
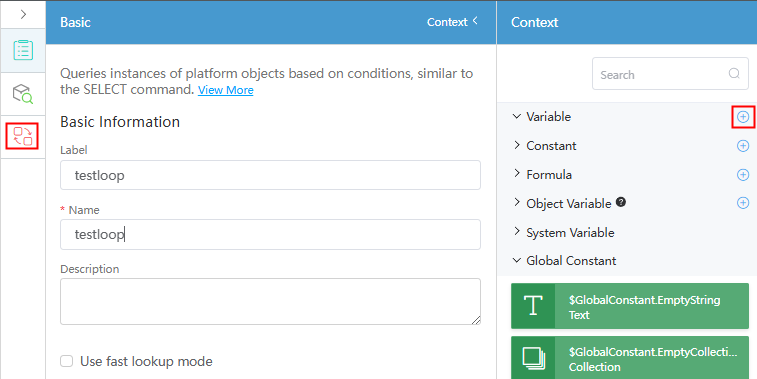
. - On the Context panel, click the plus sign (+) next to Variable.
Figure 1 Creating a variable
- Click ... next to the new variable and choose Set.
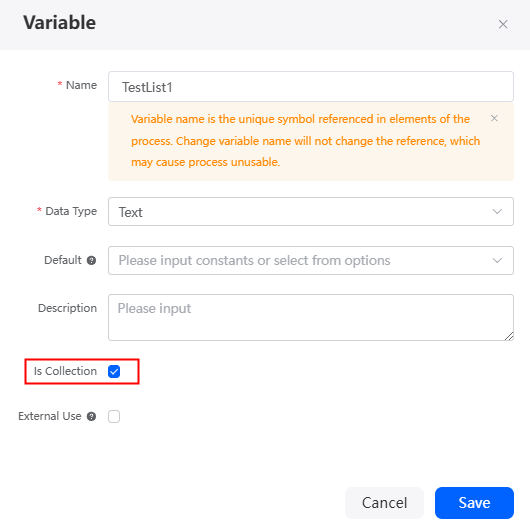
- Set the array variable TestList1 to the text type.
Figure 2 Array variable TestList1
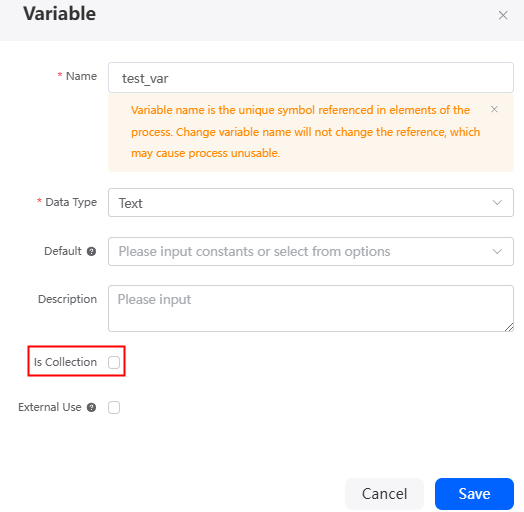
- Repeat the preceding steps to set TestList2 and test_var. You do not need to select Is Collection for test_var.
Figure 3 Array variable TestList2
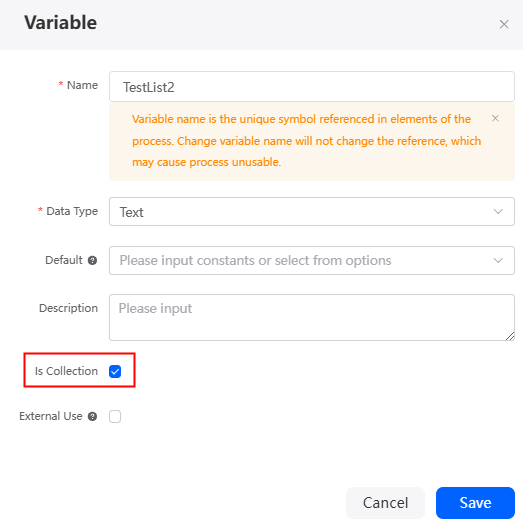 Figure 4 Common variable test_var
- In the right pane of the flow editing page, click
- On the flow designer, choose Logic and drag the Loop diagram element to the canvas.
- Click the loop diagram element, click
 , and set basic information.
Figure 5 Setting basic information
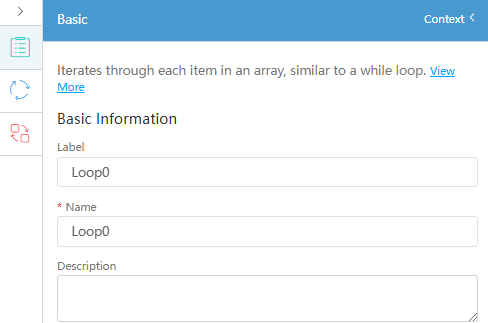
Table 1 Parameter description Parameter
Description
Label
Label of the diagram element, which is displayed on the flow design page. The system automatically assigns a value in a specific Loopsequence number format, with the sequence number starting at 0 for each type of diagram element.
Name
Diagram element name, which must be unique in the current flow. The naming requirements are as follows:
- Value: 1–80 characters.
- Start with a letter and can contain letters, digits, and underscores (_). It cannot end with an underscore (_).
Description
Description of the diagram element.
Value: 1–255 characters.
- Click
 and complete the configuration.
Figure 6 Configuring the loop diagram element
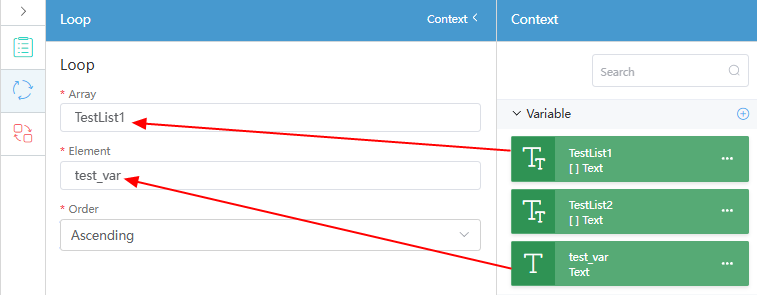
Table 2 Parameters for configuring a loop diagram element Parameter
Description
Array
Specific array for looping. You can drag the array from Context or enter a collection variable.
In this example, the TestList1 is dragged from Context, indicating that TestList1 is looped.
Element
Assign the obtained element in each loop to the variable. You can drag the element from Context or enter a variable.
In this example, drag the common variable test_var from Context, indicating that the element obtained in each loop is assigned to the variable test_var.
Order
Sequence of cyclic extraction. Ascending and Descending are available.
- Add the value of test_var to the end of the TestList2.
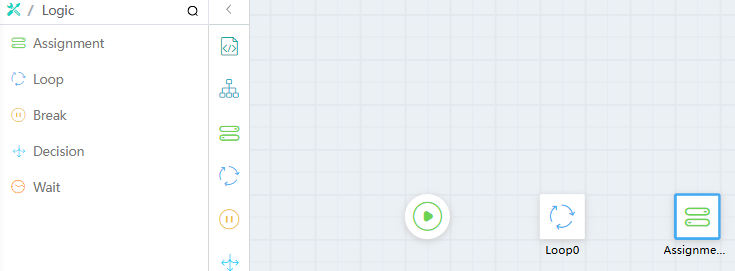
- In the navigation pane of the flow designer, choose Logic, drag the Assignment diagram element to the canvas and put it at the end of the Loop diagram element.
Figure 7 Dragging the Assignment diagram element
- Click
 and set Label and Name to AddToList2.
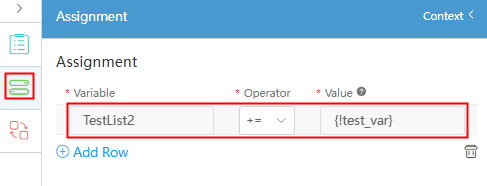
 - Set page parameters, drag TestList2 from Context to Variable, and drag test_var from Context to Value, as shown in the following figure. Add the value of test_var to the end of TestList2.
Figure 8 Defining the Assignment diagram element
- In the navigation pane of the flow designer, choose Logic, drag the Assignment diagram element to the canvas and put it at the end of the Loop diagram element.
- Connect the Loop and Assignment diagram elements, and set Link Type to Next Value.
Figure 9 Adding a connection

- Clear test_var and close the loop.
- On the flow designer, choose Logic and drag the Assignment diagram element to the canvas.
- Click
 and set Label and Name to testvar_Tonull.
 - Click
 and set parameters.
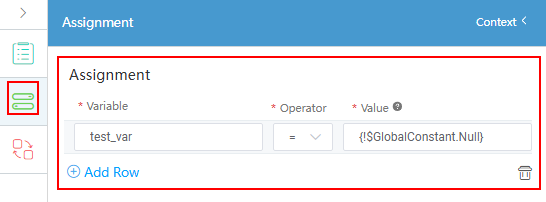
Drag test_var from Context to Variable, and drag the global constant $GlobalConstant.Null from Context to Value. Clear test_var.Figure 10 Parameters for clearing test_var
- On the right of the flow editor page, choose
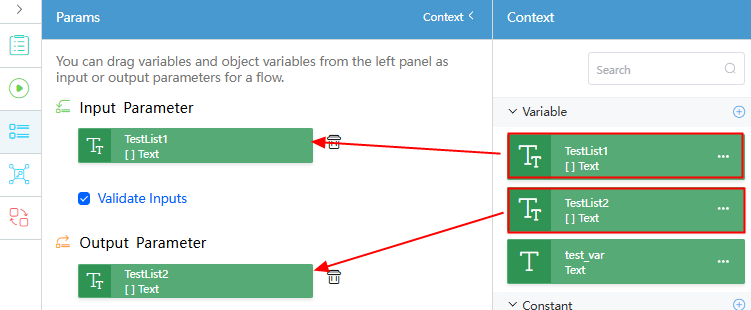
 , drag parameters from Context to specify the input and output parameters.
Figure 11 Setting the input and output parameters of the flow
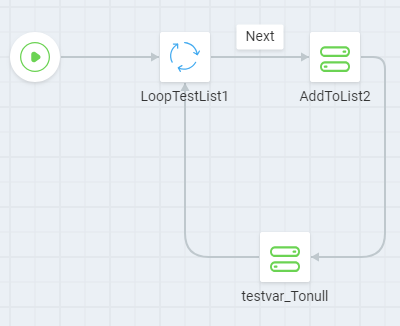
- Connect the diagram elements based on the following figure. Click
 in the upper part of the page to save the flow.
Figure 12 Connecting diagram elements
- Click
 , set parameters in the input parameter area, and run the flow.
In the input parameter area, set the following parameters:
, set parameters in the input parameter area, and run the flow.
In the input parameter area, set the following parameters:{ "TestList1": [ "1", "2", "3" ] } - Check whether the result on the output tab page meets the expectation.
{
  "interviewId": "002N000000YfbbgBStmq",
  "outputs": {
    "TestList2": [
      "1",
      "2",
      "3"
    ]
  }
}
Feedback
Was this page helpful?
Provide feedbackThank you very much for your feedback. We will continue working to improve the documentation.See the reply and handling status in My Cloud VOC.
For any further questions, feel free to contact us through the chatbot.
Chatbot


