Operations on the Solr Admin UI
Log in to Manager choose Cluster > Name of the desired cluster > Service > Solr, and ensure that all Solr instances are working properly. Click SolrServerAdmin (select one from the two options) on the Solr WebUI to go to the Solr Admin page.
- Creating a collection
On the Solr Admin page, choose Collections > Add Collection, enter a name, select a config set, and set NumShards (number of shards) and replicationFactor (number of replicas).
You are advised to limit the alias name and collection name at 255 characters while creating a collection, otherwise it might affect the performance of ZooKeeper and Solr. For more information please refer to Solr service configuration SOLR_COLLECTION_CORE_MAX_LENGTH.
Figure 1 Creating a collection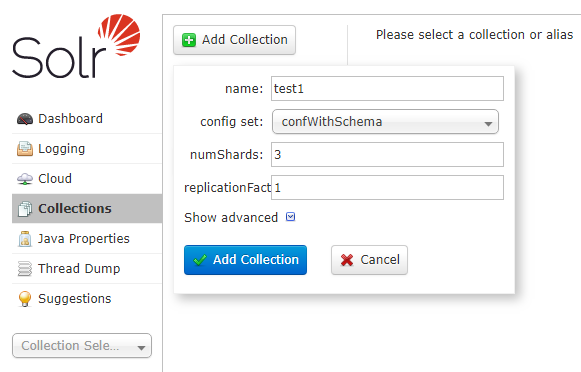
Click Add Collection. The created collection is displayed on the Cloud page,
- Add a document using the following URL:
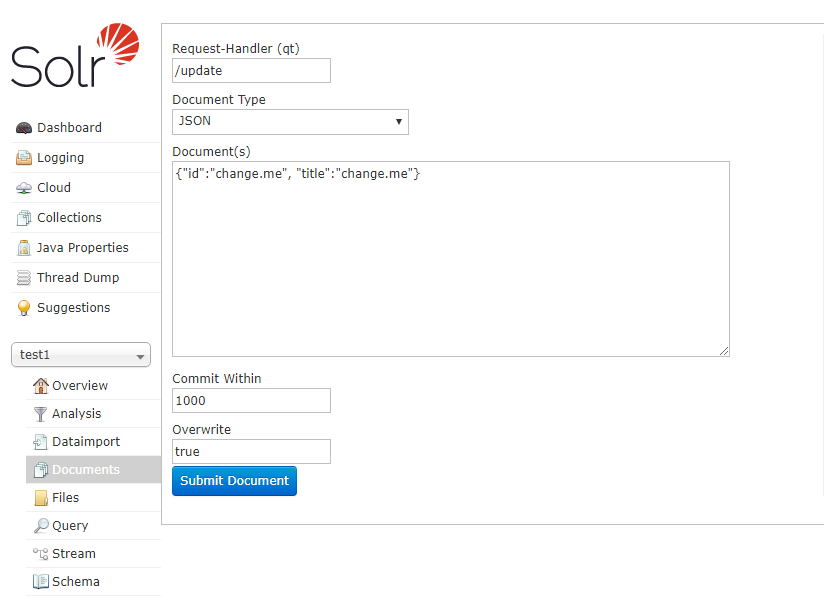
Switch to the Solr Admin page, select a desired collection from Collection Selector, click Documents, and specify the fields that need to be added, as shown in Figure 2.
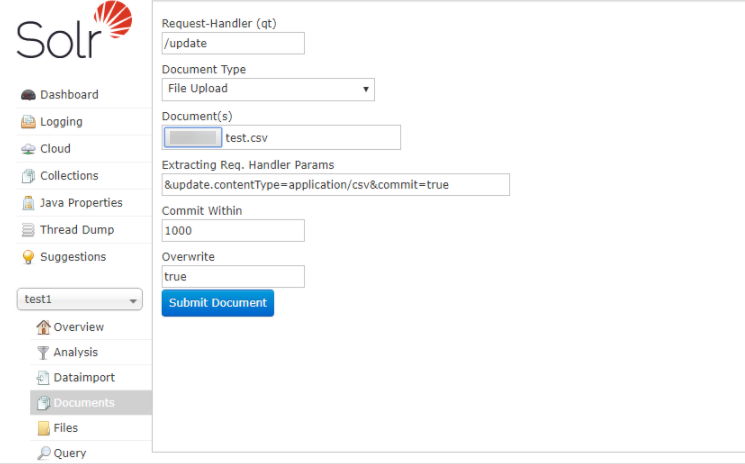
You can also create collection by uploading a file on the page. The ID fields included in the file for uploading need to be defined in the Solr configuration file schema.xml. You also need to enter the update type of the file to be uploaded in the Extracting Req. Handler Params text box. (The maximum size of the file to be uploaded is 2 GB.) For example, to upload a CSV file to create an index, set Document type to File Upload. Enter &update.contentType=application/csv&commit=true in the Extracting Req. Handler Params text box, as shown in Figure 3.
- Querying indexes
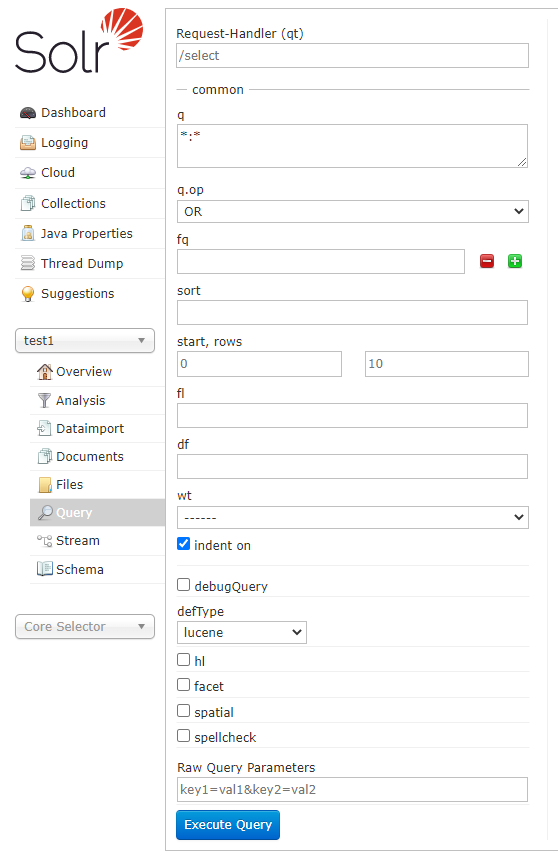
On the Solr Admin page, select a desired collection from Collection Selector, click Query, and click Execute Query to view the added data, as shown in Figure 4.
- Run the following command to delete collection data:
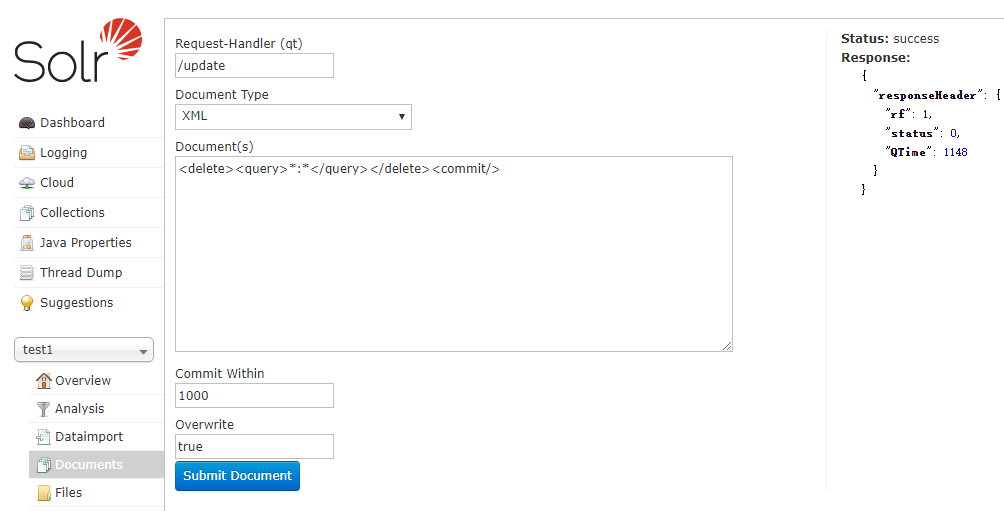
On the Solr Admin page, select a desired collection from Collection Selector, click Documents, select the XML format, and enter the following information in Document(s): <delete><query>*:*</query></delete><commit/>. Then you can delete all collection data to which the core belongs. After the deletion, you can query the collection data and find that it does not exist, as shown in Figure 5.
- Deleting a Collection
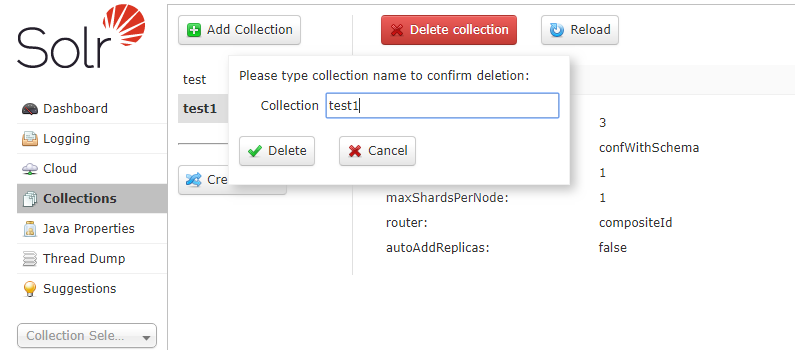
On the Solr Admin page, click Collections, select the collection to be deleted, click Delete collection, enter the collection to be deleted, and click Delete again. The collection is deleted, as shown in Figure 6.
Feedback
Was this page helpful?
Provide feedbackThank you very much for your feedback. We will continue working to improve the documentation.See the reply and handling status in My Cloud VOC.
For any further questions, feel free to contact us through the chatbot.
Chatbot

