
Setting up an IPv6 Network
Scenarios
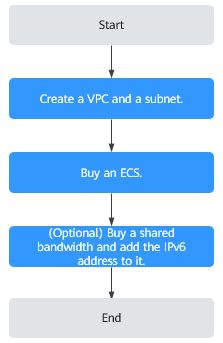
This topic describes how to create a VPC with an IPv6 CIDR block and create an ECS with an IPv6 address in the VPC, so that the ECS can access the Internet using the IPv6 address. Figure 1 shows the configuration process.

If you already have a shared bandwidth, you can configure Internet access using an IPv6 address when purchasing an ECS.
Prerequisites
The IPv6 function is now available for open beta test in regions list on Function Overview. You can experience the IPv6 function only after obtaining the OBT permission. For details about IPv6 functions, see IPv4 and IPv6 Dual-Stack Network.
Notes and Constraints
- The IPv4/IPv6 dual-stack function is free for now, but will be billed at a later date (price yet to be determined).
- Only certain ECS specifications support IPv6 networks and can use IPv4/IPv6 dual-stack networks. You need to select such ECSs in supported regions.
To check which ECSs support IPv6:
- On the ECS console: Click Buy ECS. On the displayed page, view the ECS specifications.
If there is the IPv6 parameter with the value of Yes, the ECS specifications support IPv6.
- On the ECS Specifications page.
For example, if you want to check whether general computing-plus ECSs support IPv6:
- Open the ECS Specifications page.
- Under General Computing-Plus, click the link for detailed information, as shown in Figure 2.
- On the General Computing-plus ECSs page, check whether IPv6 is supported in Network column in the table of ECS features, as shown in Figure 3.
- On the ECS console: Click Buy ECS. On the displayed page, view the ECS specifications.


Application Scenarios of IPv4/IPv6 Dual Stack
Application Scenario |
Description |
Subnet |
ECS |
|---|---|---|---|
Private communication using IPv6 addresses |
Your applications deployed on ECSs need to communicate with other systems (such as databases) through private networks using IPv6 addresses. |
|
|
Public communication using IPv6 addresses |
Your applications deployed on ECSs need to provide services accessible from the Internet using IPv6 addresses. |
|
|
Your applications deployed on ECSs need to both provide services accessible from the Internet and analyze the access request data using IPv6 addresses. |
Step 1: Create a VPC
Before creating your VPCs, determine how many VPCs, the number of subnets, and what IP address ranges you will need. For details, see Network Planning.
Perform the following operations to create a VPC named vpc-ipv6 and its default subnet named subnet-ipv6.
- Log in to the management console.
- Click
 in the upper left corner and choose Networking > Virtual Private Cloud.
The Virtual Private Cloud page is displayed.
- Click Create VPC.
- Set the VPC and subnet parameters.
When configuring a subnet, select Enable for IPv6 CIDR Block so that the system will automatically allocate an IPv6 CIDR block to the subnet. IPv6 cannot be disabled after the subnet is created. Currently, customizing IPv6 CIDR block is not supported.
Table 2 VPC parameter descriptions Parameter
Description
Example Value
Region
Select the region nearest to you to ensure the lowest latency possible.
CN-Hong Kong
Name
The VPC name.
The name can contain a maximum of 64 characters, which may consist of letters, digits, underscores (_), hyphens (-), and periods (.). The name cannot contain spaces.
VPC-test
IPv4 CIDR Block
The CIDR block of the VPC. The CIDR block of a subnet can be the same as the CIDR block for the VPC (for a single subnet in the VPC) or a subset of the CIDR block for the VPC (for multiple subnets in the VPC).
The following CIDR blocks are supported:
- 10.0.0.0/8-24
- 172.16.0.0/12-24
- 192.168.0.0/16-24
This parameter will be CIDR Block in regions where IPv4/IPv6 dual stack is not supported, and IPv4 CIDR Block if IPv4/IPv6 dual stack is supported.
192.168.0.0/16
Enterprise Project
The enterprise project to which the VPC belongs.
An enterprise project facilitates project-level management and grouping of cloud resources and users. The name of the default project is default.
For details about creating and managing enterprise projects, see the Enterprise Management User Guide.
default
Tag
The VPC tag, which consists of a key and value pair. You can add a maximum of 10 tags to each VPC.
NOTE:If your organization has configured tag policies for VPCs, you need to add tags to your VPCs based on the policies. If you add a tag that does not comply with the tag policies, VPCs may fail to be created. Contact your administrator to learn more about tag policies.
- Key: vpc_key1
- Value: vpc-01
Description
Supplementary information about the VPC. This parameter is optional.
The VPC description can contain a maximum of 255 characters and cannot contain angle brackets (< or >).
N/A
Table 3 Subnet parameter descriptions Parameter
Description
Example Value
Name
The subnet name.
The name can contain a maximum of 64 characters, which may consist of letters, digits, underscores (_), hyphens (-), and periods (.). The name cannot contain spaces.
subnet-01
CIDR Block
The CIDR block for the subnet. This value must be within the VPC CIDR block.
This parameter is displayed only in regions where IPv4/IPv6 dual stack is not supported.
192.168.0.0/24
IPv4 CIDR Block
The CIDR block for the subnet. This value must be within the VPC CIDR block.
This parameter is displayed only in regions where IPv4/IPv6 dual stack is supported.
192.168.0.0/24
IPv6 CIDR Block
Specifies whether to set IPv6 CIDR Block to Enable.
After the IPv6 function is enabled, the system automatically assigns an IPv6 CIDR block to the created subnet. Currently, the IPv6 CIDR block cannot be customized. IPv6 cannot be disabled after the subnet is created.
This parameter is displayed only in regions where IPv4/IPv6 dual stack is supported.
-
Associated Route Table
The default route table to which the subnet will be associated. You can change the route table to a custom route table on the Subnets page.
Default
Advanced Settings
Click the drop-down arrow to set advanced settings for the subnet, including Gateway and DNS Server Address.
Retain the default settings.
Gateway
The gateway address of the subnet.
This IP address is used to communicate with other subnets.
192.168.0.1
DNS Server Address
Huawei Cloud private DNS server addresses are entered by default. This allows ECSs in a VPC to communicate with each other and also access other cloud services using private domain names without exposing their IP addresses to the Internet.
You can change the default DNS server addresses if needed. This may interrupt your access to cloud services.
You can also click Reset on the right to restore the DNS server addresses to the default value.
A maximum of two DNS server IP addresses can be configured. Multiple IP addresses must be separated using commas (,).
100.125.x.x
Domain Name
Enter domain names (), separated with spaces. A maximum of 254 characters are allowed. A domain name can consist of multiple labels (max. 63 characters each).
To access a domain name, you only need to enter the domain name prefix. ECSs in the subnet automatically match the configured domain name suffix.
If the domain names are changed, ECSs newly added to this subnet will use the new domain names.
If an existing ECS in this subnet needs to use the new domain names, restart the ECS or run a command to restart the DHCP Client service or network service.
NOTE:The command for updating the DHCP configuration depends on the ECS OS. The following commands are for your reference.- Restart the DHCP Client service: service dhcpd restart
- Restart the network service: service network restart
test.com
DHCP Lease Time
The period during which a client can use an IP address automatically assigned by the DHCP server. After the lease time expires, a new IP address will be assigned to the client.- Limited: Set the DHCP lease time. The unit can be day or hour.
- Unlimited: The DHCP lease time does not expire.
After you change the DHCP lease time on the console, the change is applied automatically when the DHCP lease of an instance (such as ECS) is renewed. You can wait for the system to renew the lease or manually renew the lease. Renewing lease will not change the IP address used by the instance. If you want the new lease time to take effect immediately, manually renew the lease or restart the ECS.
For details, see How Do I Make the Changed DHCP Lease Time of a Subnet Take Effect Immediately?
-
NTP Server Address
The IP address of the NTP server. This parameter is optional.
You can configure the NTP server IP addresses to be added to the subnet as required. The IP addresses are added in addition to the default NTP server addresses.
If you do not specify this parameter, no additional NTP server IP addresses will be added.
Enter a maximum of four valid IP addresses, and separate multiple IP addresses with commas. Each IP address must be unique. If you add or change the NTP server addresses of a subnet, you need to renew the DHCP lease for or restart all the ECSs in the subnet to make the change take effect immediately. If the NTP server addresses have been cleared out, restarting the ECSs will not help. You must renew the DHCP lease for all ECSs to make the change take effect immediately.
192.168.2.1
Tag
The subnet tag, which consists of a key and value pair. You can add a maximum of 10 tags to each subnet.
NOTE:If you have configured tag policies for subnets, you need to add tags to your subnets based on the tag policies. If you add a tag that does not comply with the tag policies, subnets may fail to be created. Contact the administrator to learn more about tag policies.
- Key: subnet_key1
- Value: subnet-01
Description
Supplementary information about the subnet. This parameter is optional.
The subnet description can contain a maximum of 255 characters and cannot contain angle brackets (< or >).
N/A
Table 4 VPC tag key and value requirements Parameter
Requirements
Example Value
Key
- Cannot be left blank.
- Must be unique for each VPC and can be the same for different VPCs.
- Can contain a maximum of 36 characters.
- Can contain letters, digits, underscores (_), and hyphens (-).
vpc_key1
Value
- Can contain a maximum of 43 characters.
- Can contain letters, digits, underscores (_), periods (.), and hyphens (-).
vpc-01
Table 5 Subnet tag key and value requirements Parameter
Requirements
Example Value
Key
- Cannot be left blank.
- Must be unique for each subnet.
- Can contain a maximum of 36 characters.
- Can contain letters, digits, underscores (_), and hyphens (-).
subnet_key1
Value
- Can contain a maximum of 43 characters.
- Can contain letters, digits, underscores (_), periods (.), and hyphens (-).
subnet-01
- Click Create Now.
Step 2: Buy an ECS
On the management console, under Compute, click Elastic Cloud Server, and then click Buy ECS.
Configure the network for the ECS as follows:

- Network:
- Select the created VPC vpc-ipv6.
- Select the created subnet subnet-ipv6.
- Select Self-assigned IPv6 address.

Select Self-assigned IPv6 address during ECS creation to assign an IPv6 address to the ECS. Otherwise, the IPv4/IPv6 dual-stack network cannot be used.
- Shared Bandwidth
- If you select Do not configure, only IPv6 communication in a VPC is supported. If you want to enable Internet access, you need to perform operations in (Optional) Step 3: Buy a Shared Bandwidth and Add the IPv6 Address to It.
- If you assign a shared bandwidth or select an existing shared bandwidth, the ECS can use the IPv6 address to access the Internet after the configuration is complete.
- Security Group: Select the default security group Sys-default. The default security group rule allows all outgoing IPv4 and IPv6 data packets and denies all inbound data packets. ECSs in the same security group can access each other without the need to add rules. You can also create a security group and add rules to it. For details, see Creating a Security Group and Adding a Security Group Rule.
- EIP: Select Not required.
After the ECS is created, you can view the assigned IPv6 address on the ECS details page. You can also log in to the ECS and run the ifconfig command to view the assigned IPv6 address.
(Optional) Dynamically Assigning IPv6 Addresses
If an IPv6 address fails to be automatically assigned or the selected image does not support the function of automatic IPv6 address assignment, manually obtain the IPv6 address by referring to Dynamically Assigning IPv6 Addresses.
If an ECS is created from a public image:
Before enabling dynamic IPv6 address assignment for a Linux public image, check whether IPv6 is supported and then check whether dynamic IPv6 address assignment has been enabled. Currently, all Linux public images support IPv6, and dynamic IPv6 address assignment is enabled for Ubuntu 16 by default. You do not need to configure dynamic IPv6 address assignment for the Ubuntu 16 OS. For other Linux public images, you need to enable this function.
(Optional) Step 3: Buy a Shared Bandwidth and Add the IPv6 Address to It
By default, an IPv6 address can only be used for private network communication. If you want to use this IPv6 address to access the Internet or want it to be accessed by IPv6 clients on the Internet, you need to buy a shared bandwidth and add the IPv6 address to it.
If you already have a shared bandwidth, add the IPv6 address to the shared bandwidth.
Buying a Shared Bandwidth
- Log in to the management console.
- Click
 in the upper left corner and select the desired region and project.
 - Click
 in the upper left corner and choose Networking > Elastic IP.
 - In the navigation pane on the left, choose Elastic IP and Bandwidth > Shared Bandwidths.
- In the upper right corner, click Buy Shared Bandwidth. On the displayed page, configure parameters as prompted.
Table 6 Parameter descriptions Parameter
Description
Example Value
Billing Mode
A shared bandwidth can be billed on a yearly/monthly or pay-per-use basis.
- Yearly/Monthly: You pay for the bandwidth by year or month before using it. No other charges apply during the validity period of the bandwidth.
- Pay-per-use: You pay for the bandwidth based on the amount of time you use the bandwidth.
Yearly/Monthly
Region
Regions are geographic areas that are physically isolated from each other. The networks inside different regions are not connected to each other, so resources cannot be shared across different regions. For lower network latency and faster access to your resources, select the region nearest you.
CN-Hong Kong
Bandwidth Type
Select a type of the shared bandwidth based on your EIP type.
- Standard: Dynamic BGP and premium BGP EIPs can be added to a shared bandwidth of this type.
- Premium BGP: Premium BGP EIPs can be added to a shared bandwidth of this type.
NOTE:In the CN-Hong Kong region, only dynamic BGP EIPs can be added to standard shared bandwidths.
Standard
Billed By
The billing method for the shared bandwidth.
You can specify a shared bandwidth to be billed by bandwidth.
Bandwidth
Bandwidth
The bandwidth size in Mbit/s. The minimum value is 5 Mbit/s.
10
Enterprise Project
The enterprise project that the EIP belongs to.
An enterprise project facilitates project-level management and grouping of cloud resources and users. The name of the default project is default.
default
Name
The name of the shared bandwidth.
Bandwidth-001
Required Duration
The duration for which the purchased EIP will use. The duration must be specified if the Billing Mode is set to Yearly/Monthly.
2 months
- Click Next.
Adding the IPv6 Address to a Shared Bandwidth
- On the Shared Bandwidths page, click Add Public IP Address in the Operation column.
Figure 5 Adding an IPv6 address to a shared bandwidth

- Add the IPv6 address to the shared bandwidth.
Figure 6 Adding an IPv6 address to a shared bandwidth

- Click OK.
Verifying the Result
Log in to the ECS and ping an IPv6 address on the Internet to verify network connectivity. For example, run ping6 huawei.com. Figure 7 shows an example command output.
Log in to the ECS using SSH or the RDP file through the EIP. For details, see Logging In to an ECS.

Feedback
Was this page helpful?
Provide feedbackThank you very much for your feedback. We will continue working to improve the documentation.See the reply and handling status in My Cloud VOC.
For any further questions, feel free to contact us through the chatbot.
Chatbot


