
Step 5: Create a Security Report
Security reports can be sent by SecMaster automatically. You will see security scores, baseline check results, security vulnerabilities, and policy coverage in a security report. This helps you learn about asset security status in a timely manner.
This topic describes how to create a daily security operations report.
Procedure
- Log in to the management console.
- Click
 in the upper left corner of the management console and select a region or project.
 - Click
 in the upper left corner of the page and choose Security & Compliance > SecMaster.
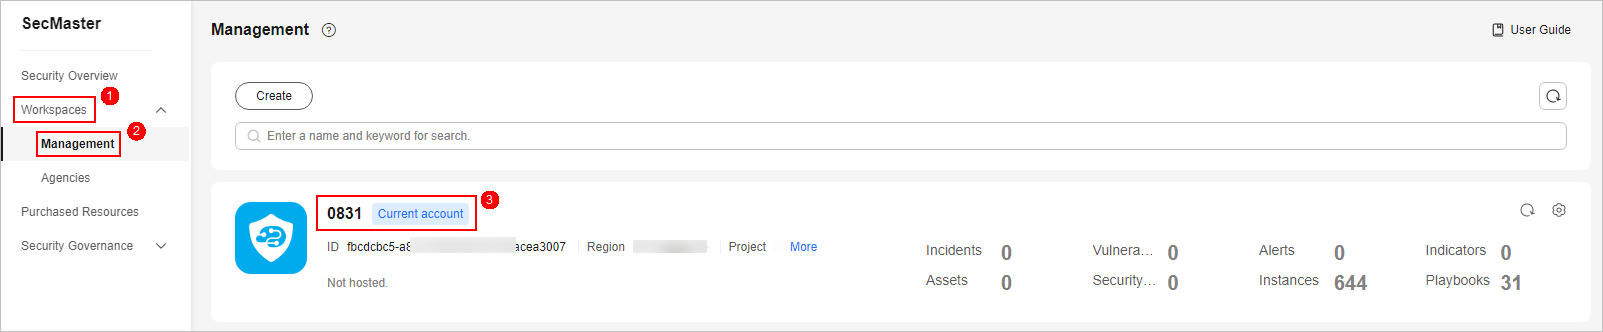
 - In the navigation pane on the left, choose Workspaces > Management. In the workspace list, click the name of the target workspace.
Figure 1 Workspace management page
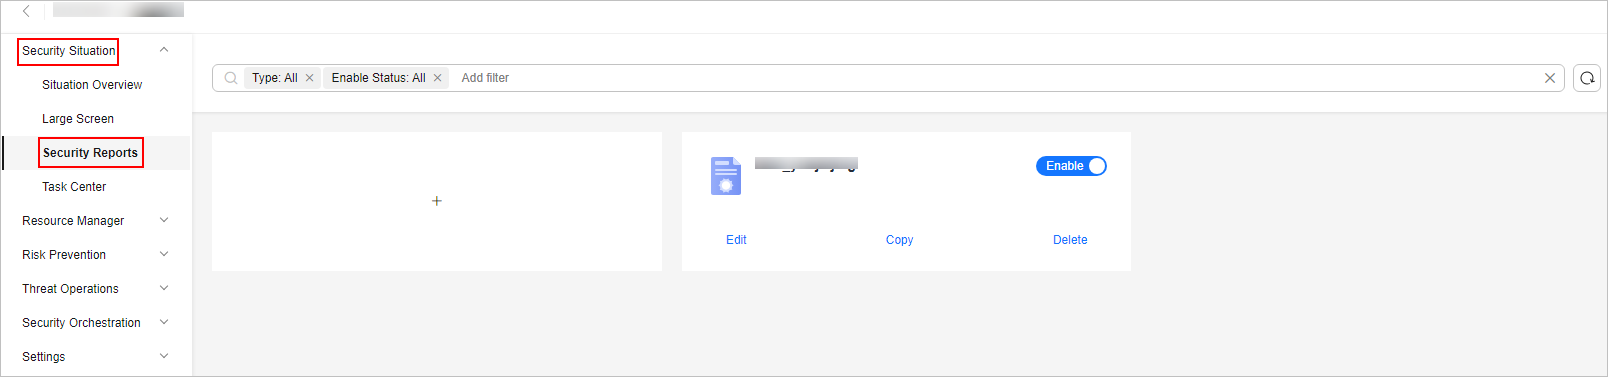
- In the navigation pane on the left, choose .
Figure 2 Security Reports
- On the security report page, click
 . On the displayed page, configure basic report information.
Table 1 Report parameters Parameter
Example Value
Description
Report Name
Security situation report - Daily report
Name of the report you want to create.
Schedule
Daily
Select the type of the security situation report.
Data Scope
--
This field displays the data scope based on Schedule you specified. No manual actions are required.
Report Schedule
--
Set the time when you want SecMaster to send the security report.
For daily reports, the security data from 00:00:00 to 23:59:59 on the previous day will be sent by default.
Email Subject
SecMaster Security Situation Daily Report
Set the subject of the email for sending the report.
Recipient Email
test01@example.com
Add the email address of each recipient.
- You can add up to 100 email addresses.
- Separate multiple email addresses with semicolons (;). Example: test01@example.com;test02@example.com
(Optional) Copy To
test03@example.com
Add the email address of each recipient you want to copy the report to.
- You can add up to 100 email addresses.
- Separate multiple email addresses with semicolons (;). Example: test03@example.com;test04@example.com
(Optional) Remarks
--
Remarks for the security report.
- Click Next: Report Choose in the upper right corner.
- In the existing report layout area on the left, select a report layout. Then, you can preview the report layout in the right pane.
In this example, a Daily report is selected.
- Click Complete in the lower right corner. Go back to the Security Reports page, view the created security report.
Feedback
Was this page helpful?
Provide feedbackThank you very much for your feedback. We will continue working to improve the documentation.See the reply and handling status in My Cloud VOC.
For any further questions, feel free to contact us through the chatbot.
Chatbot


