
Moderation (Image)
This section provides an example of how to use a Java SDK to call Moderation (Image). You can directly call APIs to use SDK functions. The procedure is as follows:
- Subscribe to the service. In the left navigation pane, choose Service List or Service Management, and subscribe to Moderation (Image).
- (Optional) Configure allowlist and blocklist dictionaries.
- Configure the Java development environment and development tools.
- Obtain the sample code, SDK, and sample project, and import them to the development environment.
- Perform authentication using AK/SK.
- Call the service API and view the status code and error code whenever necessary.
Subscribing to the Service
Subscribe to Moderation (Image) by following the instructions in Subscribing to the Service.
(Optional) Configuring Custom Dictionaries
You can configure allowlist and blocklist dictionaries for image moderation.
For details, see
Configuring an Environment
You can compile code to call the API of Moderation (Text) based on the SDK. You need to configure the environment when using the SDK and calling APIs. The procedure is as follows:
- Obtain the latest Content Moderation SDK software package and document from the SDK Center.
- For details about how to configure the environment, see Preparing a Java Development Environment.
-
Obtain the SDK. For details, see Obtaining and Installing the Java SDK.
Obtaining Sample Code
Obtain the Java SDK sample of Text Moderation V3.
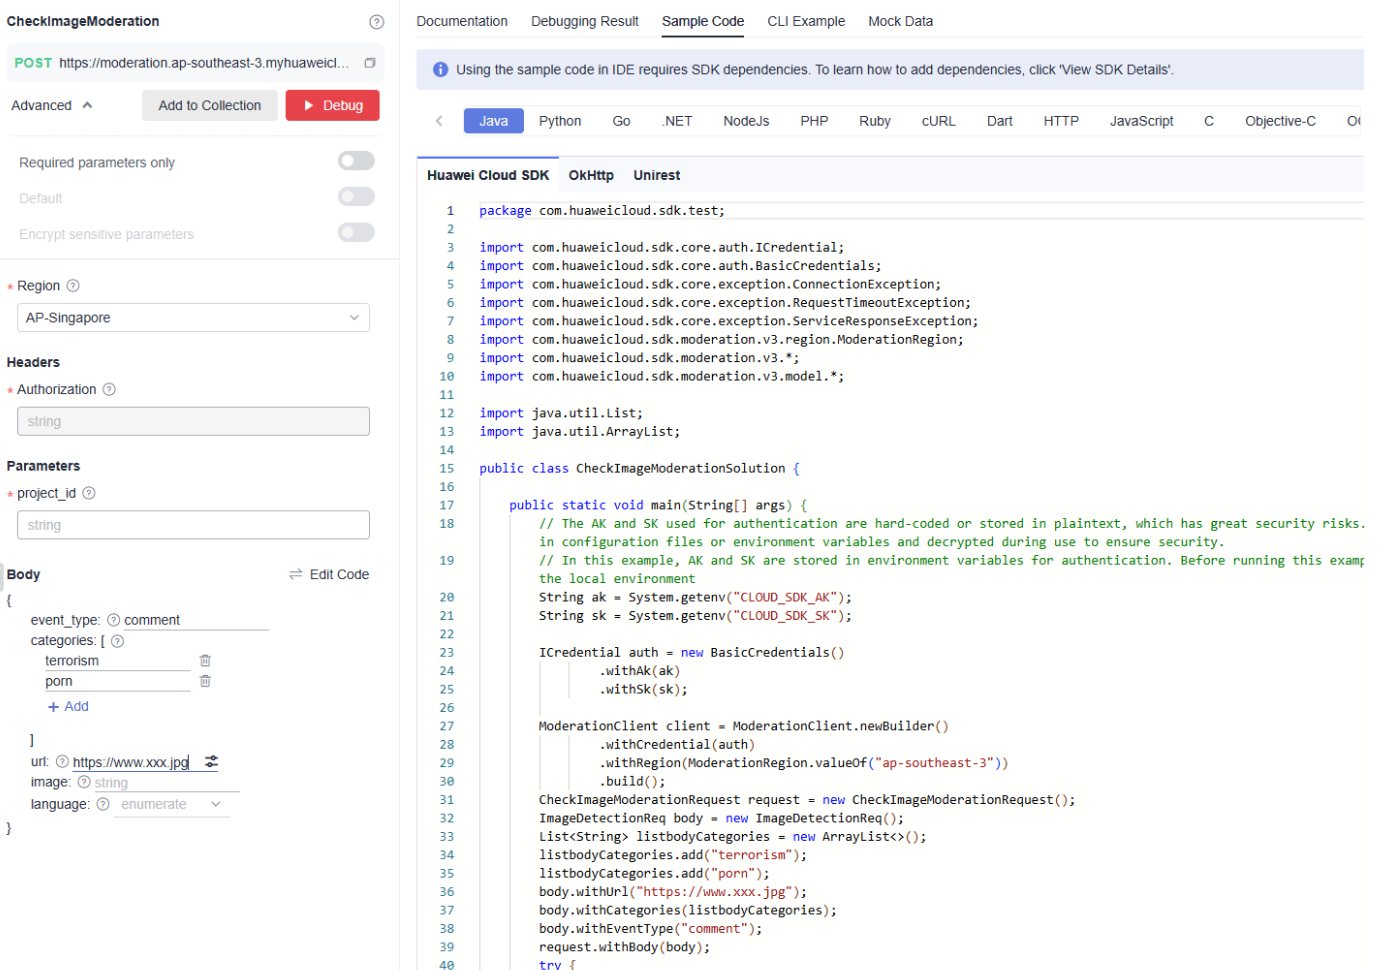
- Log in to the API Explorer and click Java on the Sample Code tab page, as shown in the following figure. Figure 1 Obtaining the Java SDK

- Set request body parameters, including event_type and data.text, as shown in the following figure. Figure 2 Request body parameters
- Copy the sample code to the Maven project.
Performing Authentication
Content Moderation supports token-based and AK/SK-based authentication. This section uses AK/SK-based authentication as an example.
- Obtain an AK/SK.
The AK/SK is the access key. To obtain the AK/SK, log in to the My Credentials page, choose Access Keys in the left navigation pane, and click Create Access Key in the right pane.
Figure 3 Creating an access key
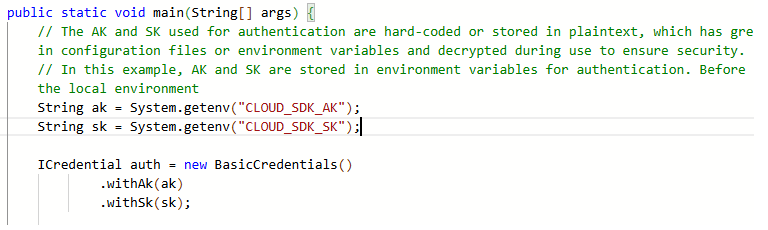
- Configure the AK/SK in the Java SDK for AK/SK authentication.
Replace the AK/SK parameters in the following figure.
Calling a Service
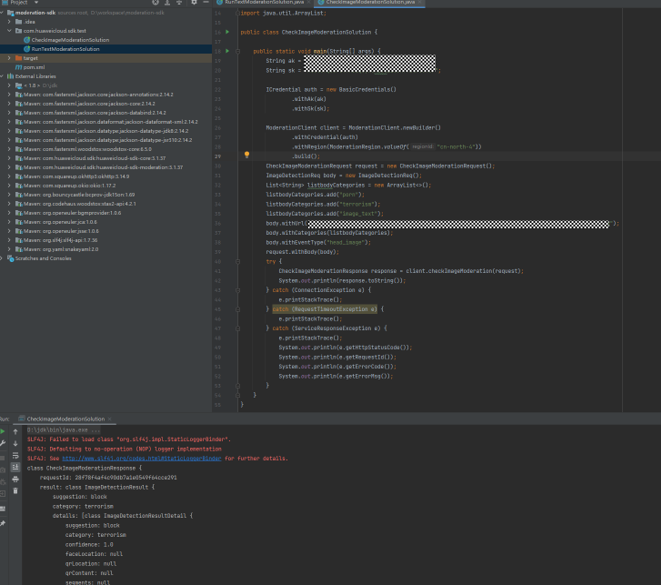
- Run the sample code to obtain the recognition result, as shown in the following figure.
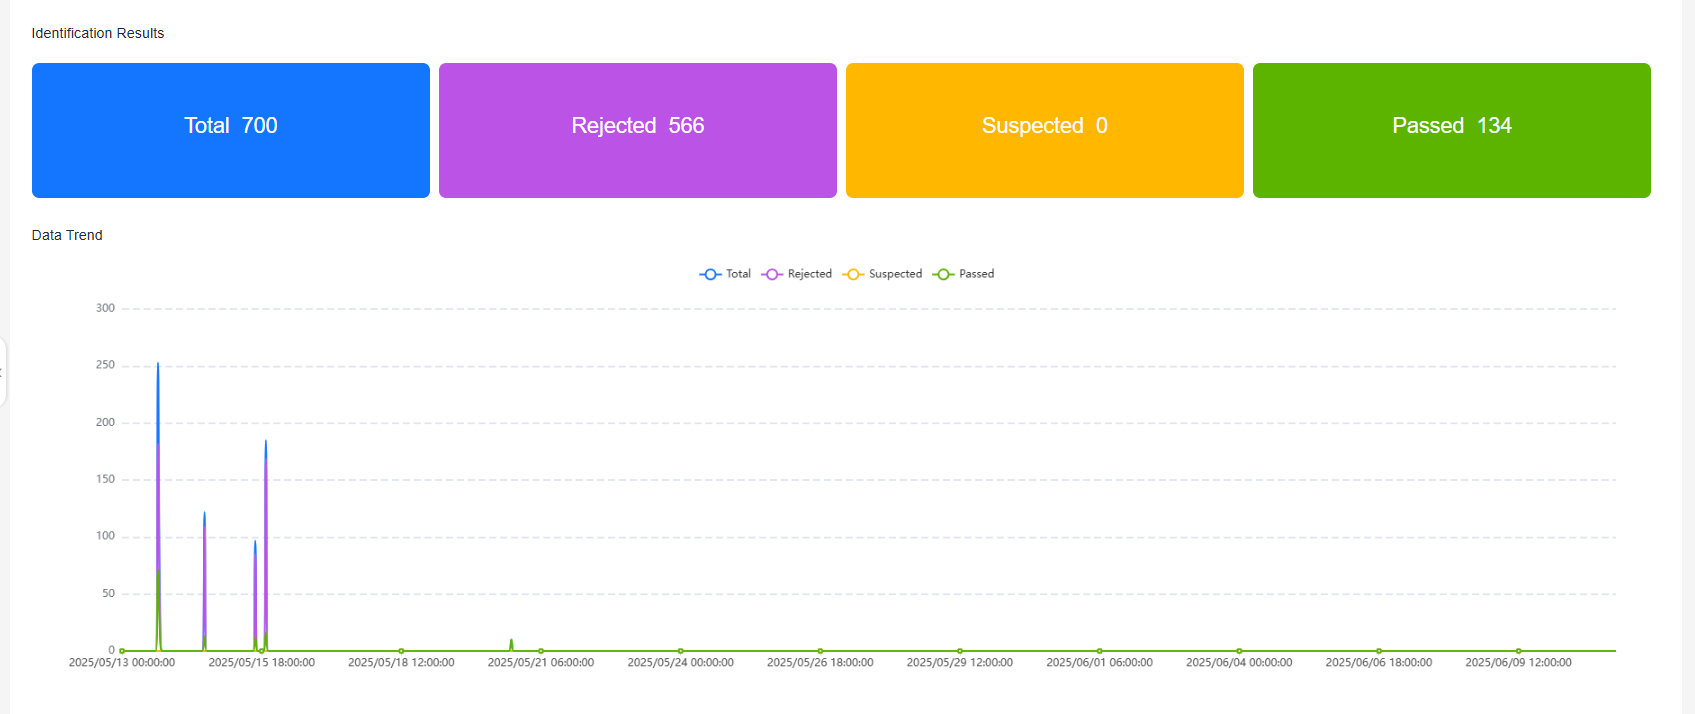
- View the number of API calls. Choose , and view call statistics and call details. See Figure 4.
- Identification Statistics: total number of calls to Content Moderation, number of rejected calls, number of suspected calls, and number of passed calls within a specified period of time, helping you better learn the calls and moderation status of Content Moderation.
- Total: total number of calls made to Content Moderation
- Rejected: number of calls made to Content Moderation that are rejected because the text contains sensitive information
- Suspected: number of calls made to Content Moderation that require manual review
- Passed: number of calls made to Content Moderation that are approved
- Data Trend: trend of the total number of calls, number of rejected calls, number of suspected calls, and number of passed calls within the specified period of time Figure 5 Causes
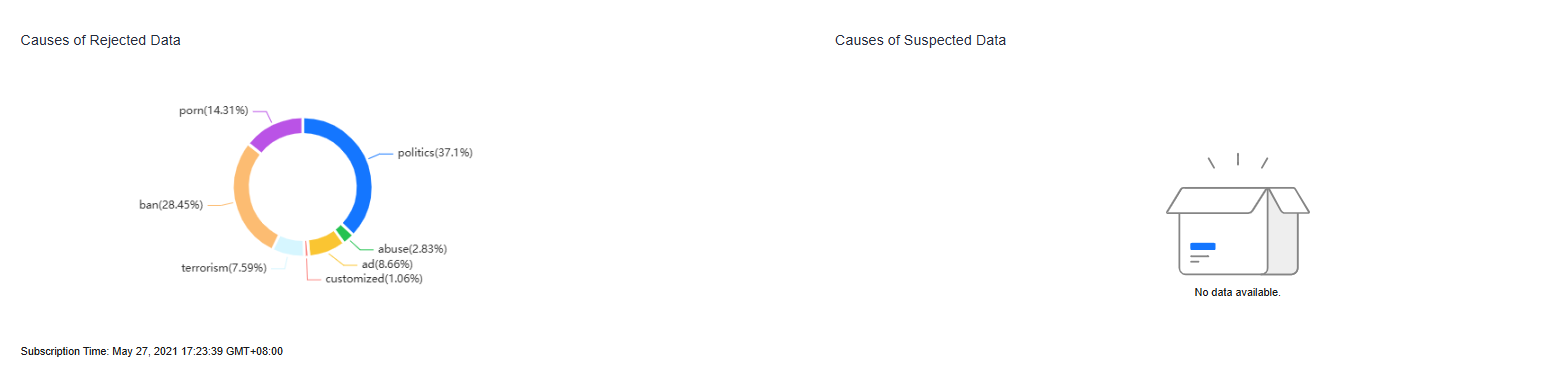
- Causes of Rejected Data: proportion of detection scenarios that fail to pass the review within the specified period of time
- Causes of Suspected Data: proportion of detection scenarios that require manual review within the specified period of time
- Identification Statistics: total number of calls to Content Moderation, number of rejected calls, number of suspected calls, and number of passed calls within a specified period of time, helping you better learn the calls and moderation status of Content Moderation.
Feedback
Was this page helpful?
Provide feedbackThank you very much for your feedback. We will continue working to improve the documentation.See the reply and handling status in My Cloud VOC.
For any further questions, feel free to contact us through the chatbot.
Chatbot


