
Updated on 2022-11-15 GMT+08:00
Creating a Graph
Creating a Custom Graph
- Log in to the GES console and click Create Graph in the upper right corner of the home page. The Create Graph page is displayed.
- In the Configure tab, set the following parameters:
- Graph Name: Use the default name. After a graph is created, its name cannot be changed.
- GES Software Version: The system uses the latest version by default.
- VPC: If your account has VPCs, a VPC will be automatically selected. You can change it as needed. If no VPC is available, you need to create a VPC. After the VPC is created, it will be automatically selected.
- Subnet: A subnet is automatically selected. Change it to the subnet where the cluster will be created. Click View VPC and go to the subnet page to view available subnets.
- Other options: Use the default values.
Figure 1 Network information
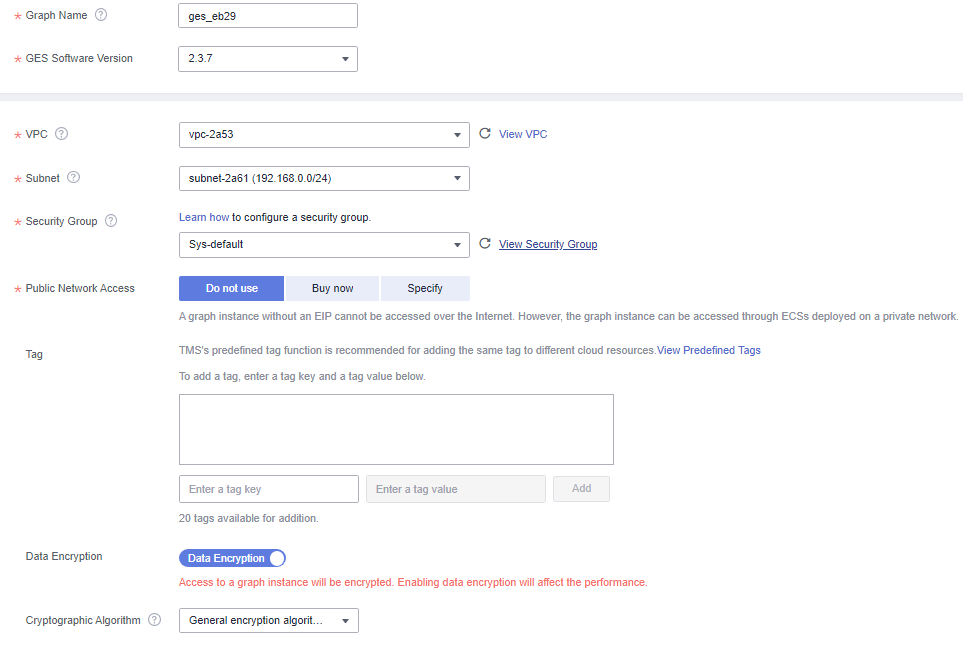 Figure 2 Graph parameters
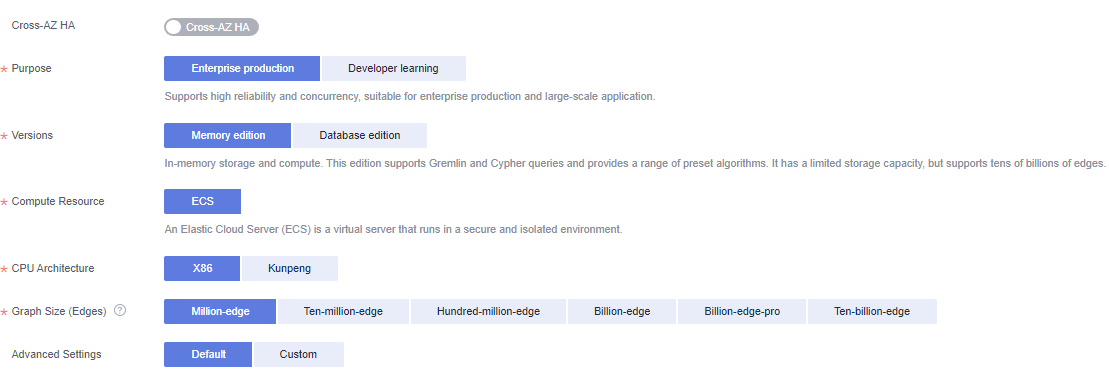
- Click Next. In the displayed Confirm tab, click Submit.
- The Finish tab is displayed indicating the submission is successful. Click Back to Task Center to view the status and running result of the created graph.
Feedback
Was this page helpful?
Provide feedbackThank you very much for your feedback. We will continue working to improve the documentation.See the reply and handling status in My Cloud VOC.
The system is busy. Please try again later.
For any further questions, feel free to contact us through the chatbot.
Chatbot


