
Help Center/
Console Quick Start/
Getting Started/
Management Console (LA-Sao Paulo1)/
Configuring the Custom Console
Updated on 2025-08-20 GMT+08:00
Configuring the Custom Console
Scenarios
You can add, delete, move, and resize the modules displayed on the custom console.
Notes and Constraints
Only the LA-Sao Paulo1 region is supported.
Procedure
- Log in to the management console.
- Click
 in the upper left corner of the management console and select the LA-Sao Paulo1 region.
 - Click Custom Console on the top of the page.
- Click
 on the right of Custom Console.
 - On the displayed page, customize titles to be displayed.
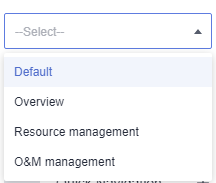
- Template selection: You can select a predefined template.
- To add a module, select a module to be added from the left navigation pane, and click
 to add it to the right pane.
Figure 1 Adding a module
to add it to the right pane.
Figure 1 Adding a module

 : The module has been added to the displayed area.
 : The module has not been added to the displayed area.
- To delete a module, in the display area, click
 in the upper right corner of the module or click
  in the module list.
 - To arrange modules
- Hover over a tile and drag-and-drop it to a new location.
- Hover over the edge or a corner of a tile and drag it to resize.
- To immediately clear all modules in a template, in the upper right corner of the page, click
 .
.
After the modules are cleared, the message "Select at least one widget." is displayed when you save the settings.
- Template selection: You can select a predefined template.
- In the upper right corner of the page, click Finish to save the custom settings.
You can also click Restore in the upper right corner of the page to restore to the default settings.
Parent topic: Management Console (LA-Sao Paulo1)
Feedback
Was this page helpful?
Provide feedbackThank you very much for your feedback. We will continue working to improve the documentation.See the reply and handling status in My Cloud VOC.
The system is busy. Please try again later.
For any further questions, feel free to contact us through the chatbot.
Chatbot


