Changing the Billing Mode
If the billing mode of your ModelArts Standard dedicated resource pool cannot meet your service requirements, you can change the billing mode.
If you want to use a pay-per-use ModelArts Standard dedicated resource pool for a long time, you can change its billing mode to yearly/monthly to reduce costs. By doing so, a new order is generated. After you pay the order, the yearly/monthly resource takes effect immediately.
Assume that you purchase a pay-per-use dedicated resource pool on April 18, 2023 at 15:29:16. Due to service requirements, you change the billing mode from pay-per-use to yearly/monthly on April 18, 2023 at 16:30:30 and a change-to-yearly/monthly order is generated. After you pay for the order, the dedicated resource pool immediately enters the yearly/monthly billing mode. The following bills are generated in the Billing Center:
- Pay-per-use: 2023/04/18 15:00:00 to 2023/04/18 16:00:00. Fees are generated between 15:29:16 and 16:00:00.
- Pay-per-use: 2023/04/18 16:00:00 to 2023/04/18 17:00:00. Fees are generated between 16:00:00 and 16:30:30.
- Yearly/Monthly: 2023/04/18 16:30:30
Constraints
- Currently, you can only change the billing mode of a ModelArts Standard dedicated resource pool from pay-per-use to yearly/monthly.
- Public resource pools cannot be purchased separately, and the billing mode cannot be changed.
- The billing mode of the ModelArts Standard dedicated resource pool is pay-per-use.
- Only the billing mode of those resources in the Enabled status can be changed.
- The billing mode can be changed only for dedicated resource pools, but not for flavors.
- All nodes of the target dedicated resource pool must use the same billing mode (pay-per-use or yearly/monthly).
- ModelArts does not support the change from yearly/monthly to pay-per-use.
- The billing mode of ModelArts Lite Server and Lite Cluster resource pools cannot be changed.
Procedure
- Log in to the ModelArts console.
- In the navigation pane on the left, choose Standard Cluster under Resource Management. Then, click the target dedicated resource pool. In the upper right corner of the details page, choose More > Change To Prepaid.
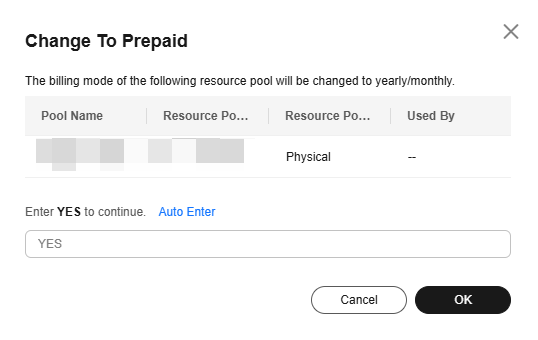
- In the displayed dialog box, confirm the information, enter YES, and click OK.
Figure 1 Change To Prepaid

- Select the required duration, determine whether to enable auto-renewal, confirm the expected expiration date and price, and click Pay.
- Select a payment method and confirm the payment. After you pay the order, the change is complete.
Feedback
Was this page helpful?
Provide feedbackThank you very much for your feedback. We will continue working to improve the documentation.See the reply and handling status in My Cloud VOC.
For any further questions, feel free to contact us through the chatbot.
Chatbot


