
Help Center/
Scalable File Service/
User Guide (Kuala Lumpur Region)/
Troubleshooting/
Mounting a File System Times Out
Updated on 2025-11-07 GMT+08:00
Mounting a File System Times Out
Symptom
When a file system was mounted to a cloud server using the mount command, message timed out was returned.
Possible Causes
- Cause 1: The network status is not stable.
- Cause 2: The network connection is abnormal.
- Cause 3: The DNS configuration of the is incorrect. As a result, the domain name of the file system cannot be resolved, and the mount fails.
- Cause 4: The server that mounts the file system runs Ubuntu18 or later.
Fault Diagnosis
After the network fault is excluded, run the mount command again.
Solution
- Cause 1 and Cause 2: The network status is not stable or the network connection is abnormal.
Re-mount the file system after the network issue is addressed.
- If the mount is successful, no further action is required.
- If the problem persists, see the solution for cause 3.
- Cause 3: The DNS configuration of the is incorrect. As a result, the domain name of the file system cannot be resolved, and the mount fails.
- Check the DNS configuration of the tenant and run the cat /etc/resolv.conf command.
- If the DNS has not been configured, configure it. For details, see .
- If the DNS has been configured, run the following command to check whether the DNS is correct:
nslookup File system domain name
If the resolved IP address is in network segment 100, the DNS configuration is correct. If the IP address is in another network segment, the DNS configuration is incorrect. In this case, go to 2.
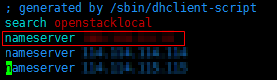
- Modify the /etc/resolv.conf configuration file, configure the correct tenant DNS, and run vi /etc/resolv.conf to edit the /etc/resolv.conf file. Add the DNS server IP address above the existing nameserver information.
Figure 1 Configuring DNS
The format is as follows:
- Press Esc, input :wq, and press Enter to save the changes and exit the vi editor.
- By default, the server inherits the DNS configuration of the VPC every time the server restarts. Changing only the DNS configuration does not resolve the issue completely. You need to modify configurations in the VPC. Set a correct tenant DNS for the subnet of the VPC to which the belongs.
- (Optional) Restart the server.
- Run the mount command again.
- If the mount is successful, no further action is required.
- If the problem persists, see the solution for .
- Check the DNS configuration of the tenant and run the cat /etc/resolv.conf command.
- Cause 4: The server that mounts the file system runs Ubuntu18 or later.
- Check whether the server running Ubuntu18 or later was created from a private image.
- Convert the public image server to a private image server.
- Create a private image for the server by referring to section "Creating an Image" in the Elastic Cloud Server User Guide.
- Use the private image obtained in 2.a to create a server or change the server OS to the created private image by referring to section "Changing the OS" in the Elastic Cloud Server User Guide.
- Log in to the server and remount the file system.

Parent topic: Troubleshooting
Feedback
Was this page helpful?
Provide feedbackThank you very much for your feedback. We will continue working to improve the documentation.See the reply and handling status in My Cloud VOC.
The system is busy. Please try again later.
For any further questions, feel free to contact us through the chatbot.
Chatbot


