
Connecting to a Replica Set Instance Using Robo 3T
If you connect to an instance from your local device, you can bind an EIP to the instance and use Robo 3T to connect to the instance over a public network.
This section describes how to use Robo 3T to connect to a replica set instance over a public network.
A local Windows device is used as an example.
Robo 3T can connect to an instance with an unencrypted connection or an encrypted connection (SSL). To improve data transmission security, you are advised to connect to instances using the SSL connection.
Prerequisites
- An EIP has been bound to a replica set instance, and security group rules have been configured to ensure that the instance is accessible from Robo 3T over the EIP. For details, see Binding and Unbinding an EIP and Configuring Security Group Rules.
- Install Robo 3T.
For details, see How Do I Install Robo 3T?
SSL Connection

If you connect to an instance over the SSL connection, enable SSL first. Otherwise, an error is reported. For details about how to enable SSL, see Configuring an SSL Connection.
- Obtain the EIP and port of the replica set instance.

Primary node: You can read and write data.
Secondary node: You can only read data.
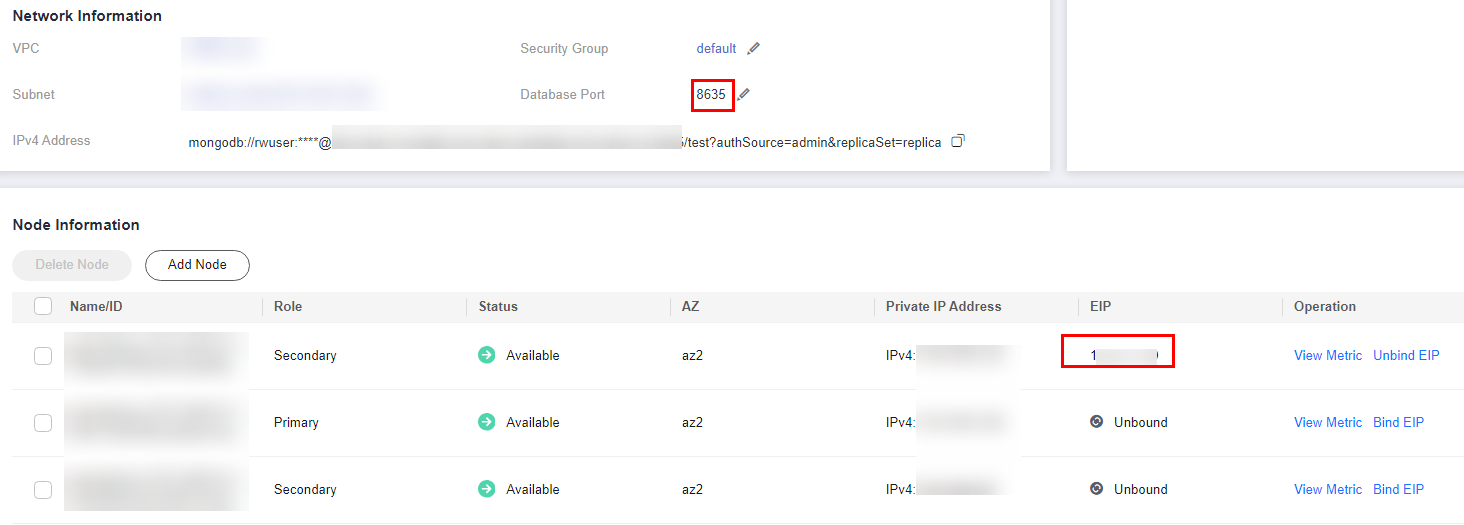
- You can click the instance name to go to the Basic Information page. In the Network Information area, the port is displayed in the Database Port field and the node EIPs are displayed in Node Information area.
Figure 1 Obtaining connection information

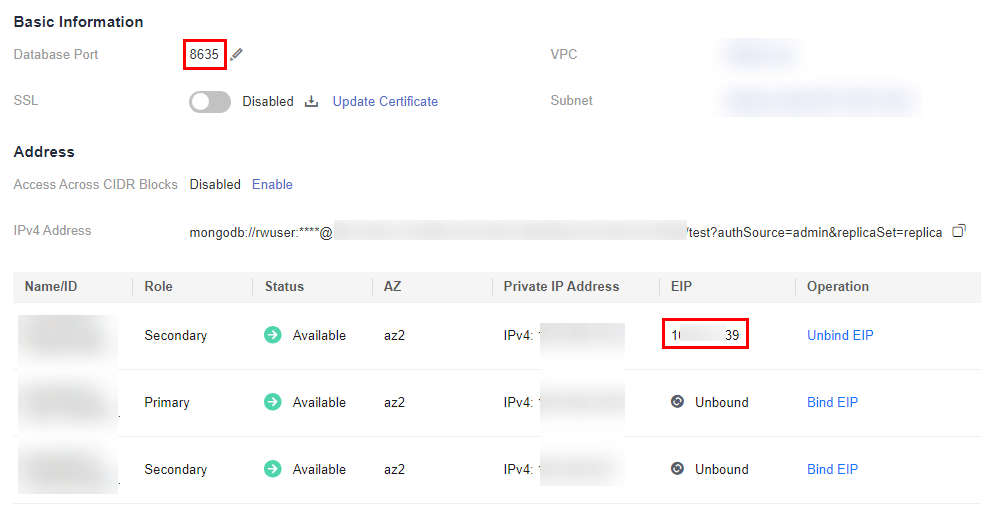
- Alternatively, click the target instance. On the displayed Basic Information page, click Connections in the navigation pane on the left. Obtain the port and EIP on the Connections page.
Figure 2 Viewing EIPs

- You can click the instance name to go to the Basic Information page. In the Network Information area, the port is displayed in the Database Port field and the node EIPs are displayed in Node Information area.
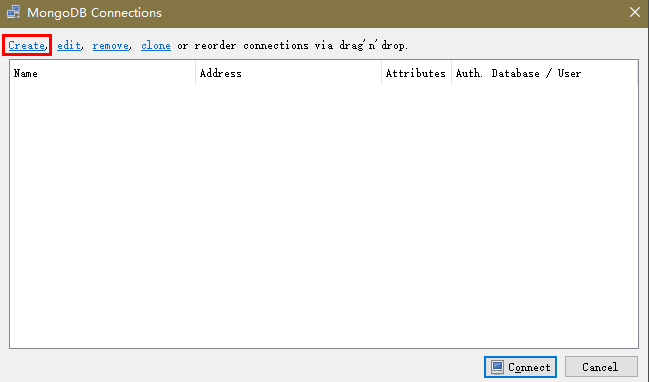
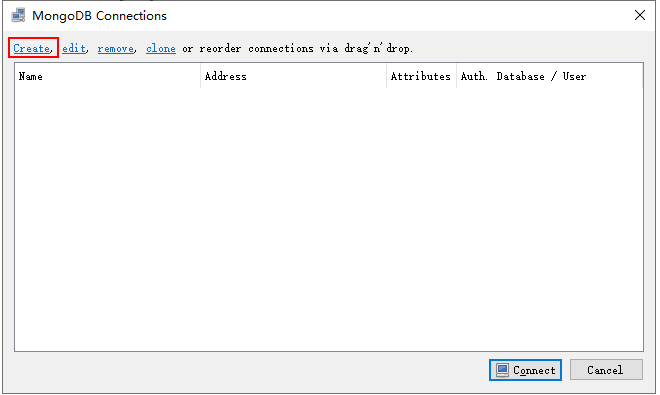
- Run the installed Robo 3T. On the displayed dialog box, click Create.
Figure 3 Connection information
- In the Connection Settings dialog box, set the parameters of the new connection.
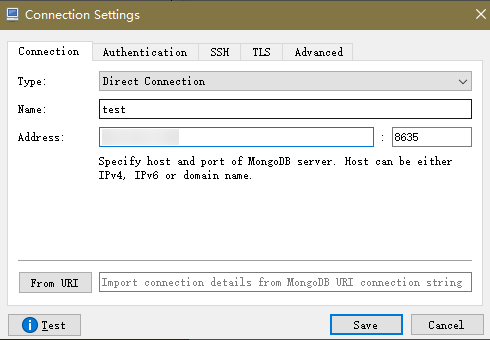
- On the Connection tab, enter the name of the new connection in the Name text box and enter the EIP and database port that are bound to the replica set instance in the Address text box.
Figure 4 Connection

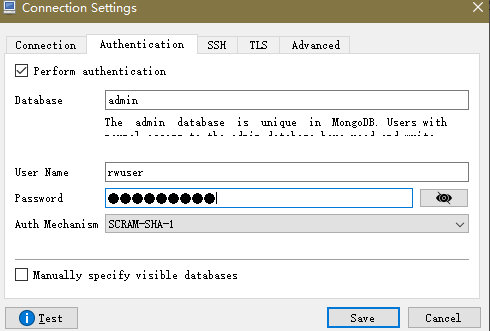
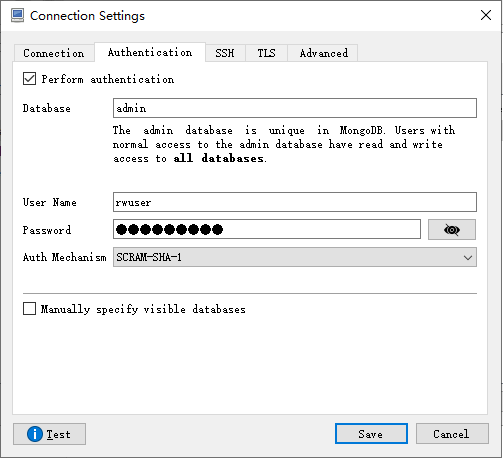
- On the Authentication tab, set Database to admin, User Name to rwuser, and Password to the administrator password you set during the creation of the replica set instance.
Figure 5 Authentication
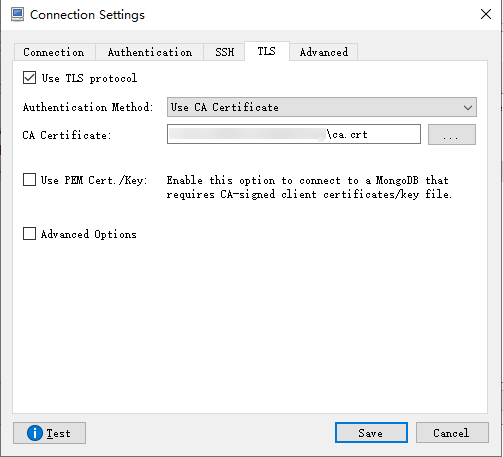
- Click the TLS tab, select Use TLS protocol, set Authentication Method to Use CA Certificate, and upload the obtained SSL certificate.
Figure 6 SSL
- Click Save.
- On the Connection tab, enter the name of the new connection in the Name text box and enter the EIP and database port that are bound to the replica set instance in the Address text box.
- On the MongoDB Connections page, click Connect to connect to the replica set instance.
Figure 7 Replica set connection information

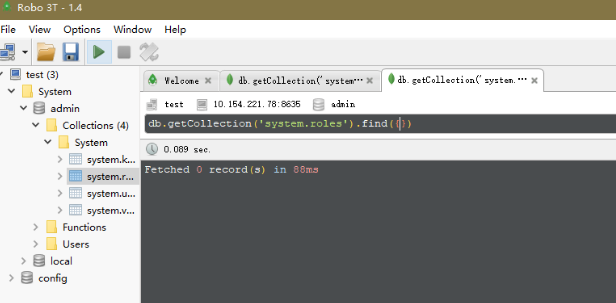
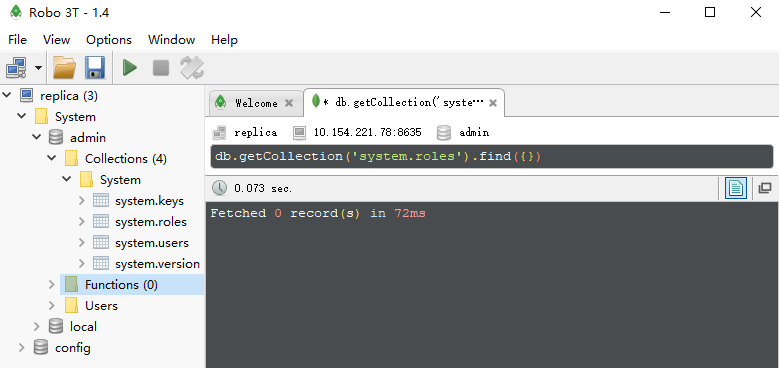
- If the replica set instance is successfully connected, the following page is displayed.
Figure 8 Connection succeeded
Non-SSL Connection
If you connect to an instance over an unencrypted connection, disable SSL first. Otherwise, an error is reported. For details about how to disable SSL, see Configuring an SSL Connection.
- Obtain the EIP and port of the replica set instance.
Primary node: You can read and write data.
Secondary node: You can only read data.
- You can click the instance name to go to the Basic Information page. In the Network Information area, the port is displayed in the Database Port field and the node EIPs are displayed in Node Information area.
Figure 9 Obtaining connection information
- Alternatively, click the target instance. On the displayed Basic Information page, click Connections in the navigation pane on the left. Obtain the port and EIP on the Connections page.
Figure 10 Viewing EIPs
- You can click the instance name to go to the Basic Information page. In the Network Information area, the port is displayed in the Database Port field and the node EIPs are displayed in Node Information area.
- Run the installed Robo 3T. On the displayed dialog box, click Create.
Figure 11 Connection information
- In the Connection Settings dialog box, set the parameters of the new connection.
- On the Connection tab, specify the connection name in Name and enter the EIP and port of the replica set instance obtained in 1 in Address.
Figure 12 Connection
- On the Authentication tab, set Database to admin, User Name to rwuser, and Password to the administrator password you set during the creation of the replica set instance.
Figure 13 Authentication
- Click Save.
- On the Connection tab, specify the connection name in Name and enter the EIP and port of the replica set instance obtained in 1 in Address.
- On the MongoDB Connections page, click Connect to connect to the replica set instance.
Figure 14 Connection information

- If the replica set instance is successfully connected, the page shown in Figure 15 is displayed.
Feedback
Was this page helpful?
Provide feedbackThank you very much for your feedback. We will continue working to improve the documentation.See the reply and handling status in My Cloud VOC.
For any further questions, feel free to contact us through the chatbot.
Chatbot


