
Labeling Data
Model training requires a large number of labeled images. Therefore, before model training, add labels to the images that are not labeled. ModelArts allows you to add labels in batches by one click. You can also modify or delete labels that have been added to images.

The number of labeled images in the dataset must be no fewer than 100. Otherwise, checking the dataset will fail, affecting your model training.
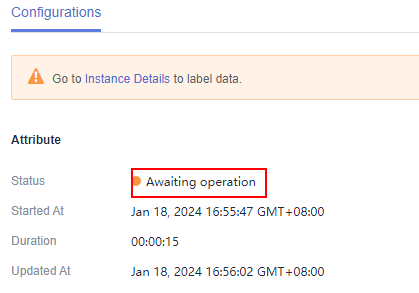
After the project is created, you will be directed to the ExeML page and the project starts to run. Click the data labeling phase. After the status changes to Awaiting operation, confirm the data labeling status in the dataset. You can also modify labels, add data, or delete data in the dataset.
Labeling Images
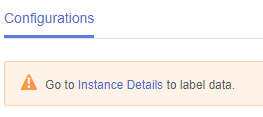
- On the labeling phase of the new-version ExeML, click Instance Details. The data labeling page is displayed.
Figure 2 Clicking Instance Details
- Select the images to be labeled in sequence, or tick Select Images on Current Page to select all images on the page, and then add labels to the images in the right pane.
Figure 3 Labeling an image

- After selecting an image, input a label in the Label text box, or select an existing label from the drop-down list. Click OK. The selected image is labeled. For example, you can select multiple images containing tulips and add label tulips to them. Then select other unlabeled images and label them as sunflowers and roses. After the labeling is complete, the images are saved on the Labeled tab page.
- You can add multiple labels to an image.
- A label consists of letters, digits, hyphens (-), and underscores (_).
Figure 4 Image labeling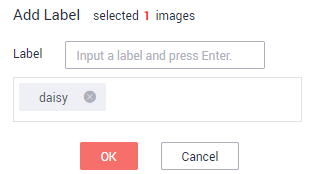
- After all the images are labeled, view them on the Labeled tab page or view All Labels in the right pane to check the name and quantity of the labels.
Synchronizing or Adding Images
On the labeling phase, click Instance Details to go to the data labeling page. Then, add images from your local PC or synchronize image data from OBS.
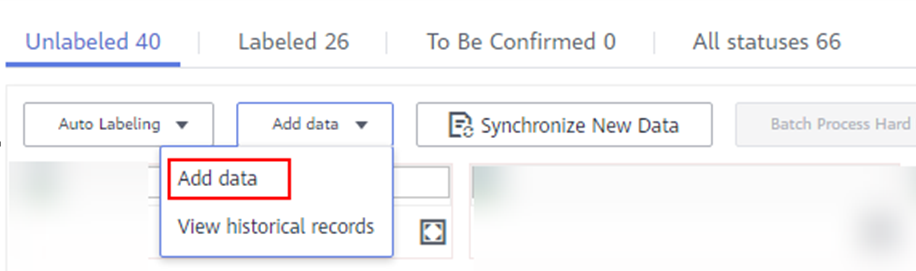

- Add data: You can click Add data to quickly add images on a local PC to ModelArts. These images will be automatically synchronized to the OBS path specified during project creation.
- Synchronize New Data: You can upload images to the OBS directory specified during project creation and click Synchronize New Data to quickly add the images in the OBS directory to ModelArts.
- Delete Image: You can delete images one by one, or tick Select Current Page to delete all images on the page.
The deleted images cannot be recovered. Exercise caution when performing this operation.
Modifying Labeled Data
After labeling data, you can modify the labeled data on the Labeled tab page.
- Modifying based on images
On the data labeling page, click the Labeled tab, and select one or more images to be modified from the image list. Modify the image information in the label information area on the right.
- Adding a label: In the Label text box, select an existing label or enter a new label name, and then click
 .
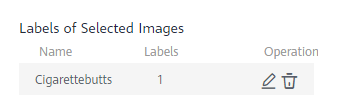
. - Modifying a label: In the Labels of Selected Images area, click the editing icon in the Operation column, enter the correct label name in the text box, and click the check mark icon to complete the modification.
Figure 7 Modifying a label
- Deleting a label: In the Labels of Selected Images area, click
 in the Operation column to delete the label.
- Adding a label: In the Label text box, select an existing label or enter a new label name, and then click
- Modifying based on labels
On the labeling overview page, click Label Management. Information about all labels is displayed.
Figure 8 Information about all labels
- Modifying a label: In the Operation column of the target label, click Modify, enter the new label, and click OK.
- Deleting a label: In the Operation column of the target label, click Delete, and click OK.
Deleted tags cannot be restored.
Resuming Workflow Execution
After confirming data labeling, return back to the new-version ExeML. Click Next. Then, the workflow continues to run in sequence until all phases are executed.

Feedback
Was this page helpful?
Provide feedbackThank you very much for your feedback. We will continue working to improve the documentation.See the reply and handling status in My Cloud VOC.
For any further questions, feel free to contact us through the chatbot.
Chatbot


