How Do I Create an AD Domain?
Active Directory, which is short for AD, is a directory service on Windows Standard Server, Windows Enterprise Server, and Windows Datacenter Server. (Active Directory cannot run on the Windows Web Server, but it can manage the computers running the Windows Web Server.) Active Directory stores information about objects on the network and makes this information easy for administrators and users to find and use. Active Directory uses a structured data store as the basis for a logical, hierarchical organization of directory information.
Procedure
This section describes how to use Windows Server 2012 R2 to create a domain server.

- When you configure an AD domain information during the DB instance creation, do not configure or disable Group Policy Object (GPO) for your domain controller server. Otherwise, the DB instance creation will fail.
- If GPO is required, you need to create an ECS and set up a new domain controller server with GPO disabled. Then, establish trust between your domain controller server and the new domain controller server. For details, contact customer service.
- Install an AD domain controller.
- In Server Manager, choose Manage > Add Roles and Features.
- In the Add Roles and Features Wizard dialog box, click Next until the Select server roles page is displayed. Select Active Directory Domain Services and click Add Features in the displayed box.
- Click Next until the Confirm installation selections page is displayed. Click Install to start the role installation process.
- After the installation is complete, a yellow triangle icon is displayed. Click Promote this server to a domain controller. The Active Directory Domain Services Configuration Wizard window is displayed.
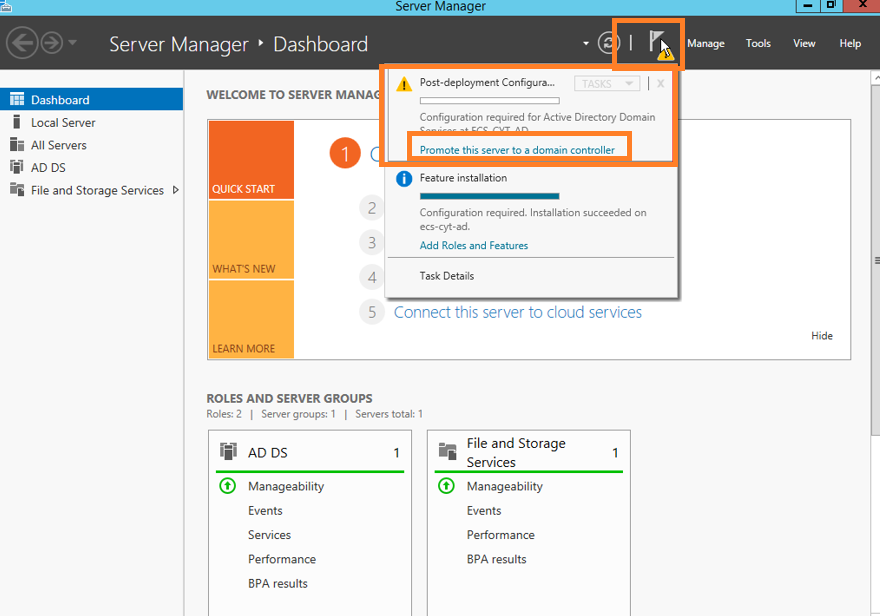
- On the Deployment Configuration page, select Add a new forest and set a domain name, such as newrds.com.
- Click Next. On the displayed page, enter the DSRM password (non-domain user).
- Click Next until the Prerequisites Check page displayed. Click Install. After the installation is complete, the server automatically reboots.
- Modify the DNS configuration of the network interface. Set the IP address of the active DNS server to the server's private IP address, such as 192.168.0.133.
- Create and add a domain account.
- Open Active Directory Users and Computers, right-click on the Users and choose New > User. Enter the username and click Next.
- Enter the first name, last name, and user login name, such as luna@newrds.com.
- Enter the password and then confirm it. Deselect all check boxes (do not change the password at the first login).
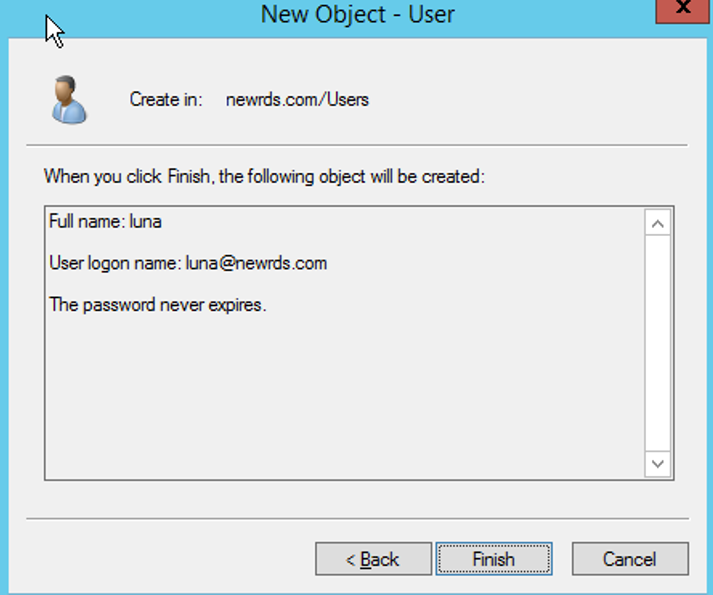
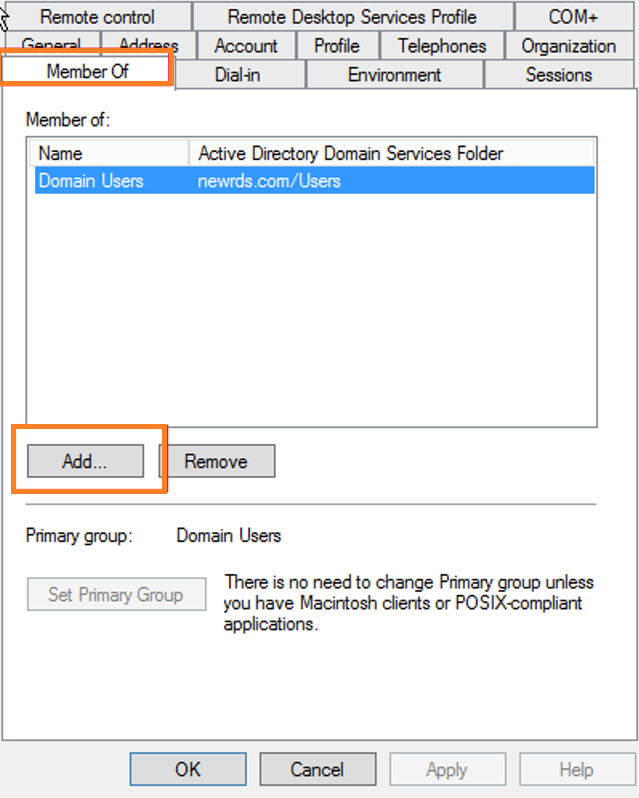
- After the user is added, a figure similar to the following is displayed. You can add domain accounts to user groups for permission control.
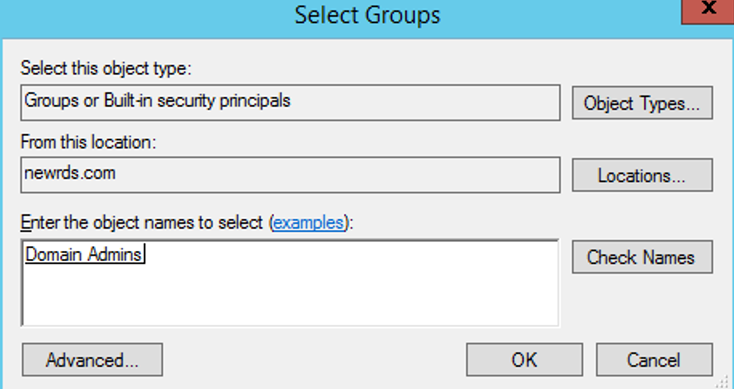
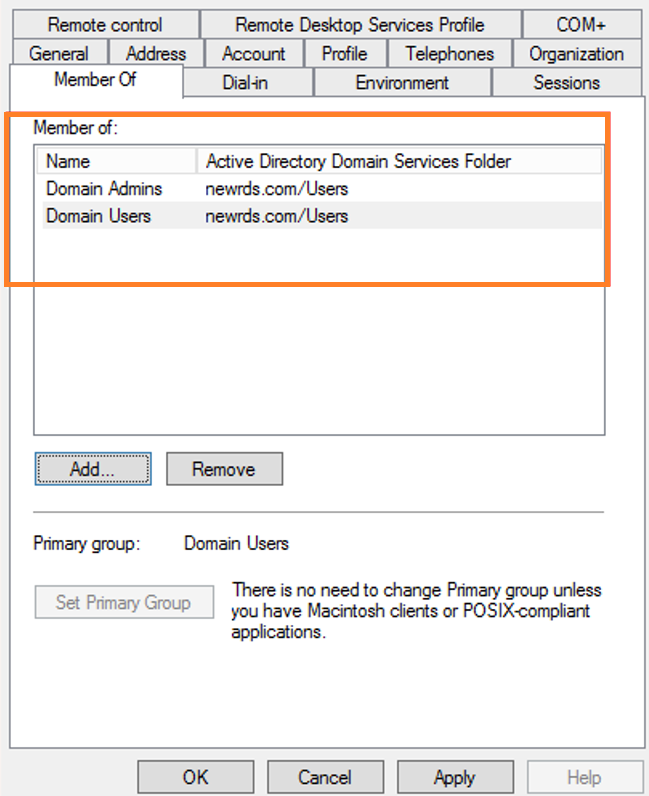
- Add the domain account for logging in to RDS to the Active Directory Admin group.
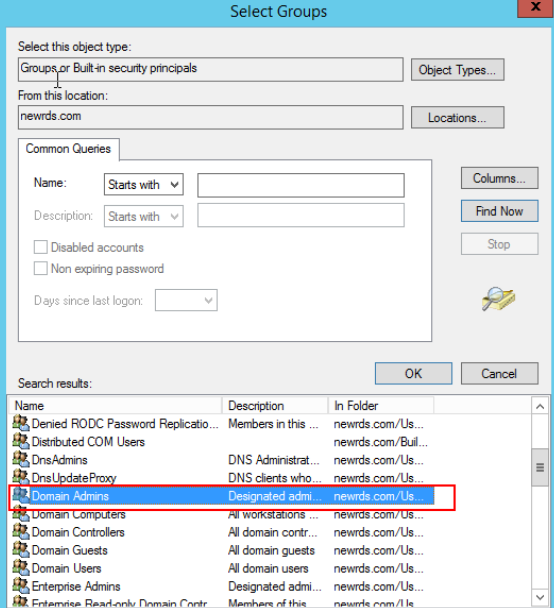
- Add an RDS DB instance to the domain.
On the instance creation page, click Configure to configure the AD domain and then complete the DB instance creation. After the instance is created, the AD domain can be used.
Table 1 AD domain parameters Parameter
Description
Directory Address
Enter the IP address of the ECS that supports the AD domain.
For example: 192.168.x.x.
NOTE:Ensure that the ECS IP address can connect to the RDS DB instance.
Domain Name
A fully qualified domain name, such as DBStest.com, must:
- Be the same as the ECS domain name.
- Be no more than 48 characters long.
- Only include letters, digits, dots (.), and hyphens (-).
- Include a valid top-level domain name which contains at least 2 characters long and contains only dots (.) and letters.
Directory Administrator
You are advised to enter the domain administrator username.
Directory Administrator Password
Password of the directory administrator.
Keep this password secure. The system cannot retrieve it.
Feedback
Was this page helpful?
Provide feedbackThank you very much for your feedback. We will continue working to improve the documentation.See the reply and handling status in My Cloud VOC.
For any further questions, feel free to contact us through the chatbot.
Chatbot

