
Configuring and Importing Sample Projects
Procedure
- Obtain the sample project folder manager-examples in the src directory where the sample code is decompressed. For details, see Obtaining Sample Projects from Huawei Mirrors.
- In the application development environment, import the sample project to the IntelliJ IDEA development environment.
- Start IntelliJ IDEA, and then choose File > New > Project from Existing Sources. In the Select File or Directory to Import dialog box, select the sample code folder.
- Select the pom.xml file from the sample project folder, choose Import project from external model > Maven, and click Next and then Finish.

The sample code is a Maven project. You can adjust the project configuration based on the site requirements. The operations vary according to the IntelliJ IDEA version. The actual information displayed on the software interface prevails.
- Add the src and conf directories in the project to the source file path.
After the project is imported, choose File > Project Structure on the menu bar of Intellij IDEA. In the displayed window, choose Project Settings > Modules.
Select the current project, click the src folder, click Sources on the right of Mark as, click the conf folder, and click Sources on the right of Mark as. Click Apply and then OK.

- Set the JDK of the project.
- On the IntelliJ IDEA menu bar, choose File > Project Structure.... The Project Structure window is displayed.
- Select SDKs, click the plus sign (+), and select JDK.
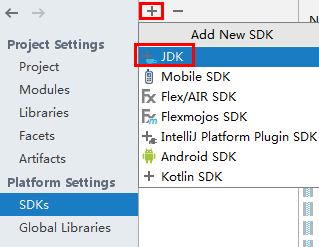
- On the Select Home Directory for JDK page that is displayed, select the JDK directory and click OK.
- After selecting the JDK, click Apply.
- Select Project, select the JDK added in SDKs from the Project SDK drop-down list box, and select 8 - Lambdas, type annotations etc. from the Project language level drop-down list box.

- Click Apply.
- Choose Modules. On the Source page, change the value of Language level to 8 - Lambdas, type annotations etc.
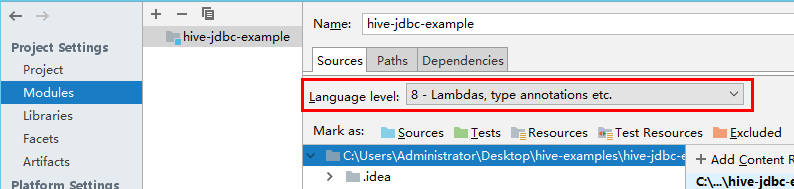
On the Dependencies page, change the value of Module SDK to the JDK added in SDKs.

- Click Apply and OK.
- Configure Maven.
- Add the configuration information such as the address of the open-source image repository to the setting.xml configuration file of the local Maven by referring to Configuring Huawei Open-Source Mirrors.
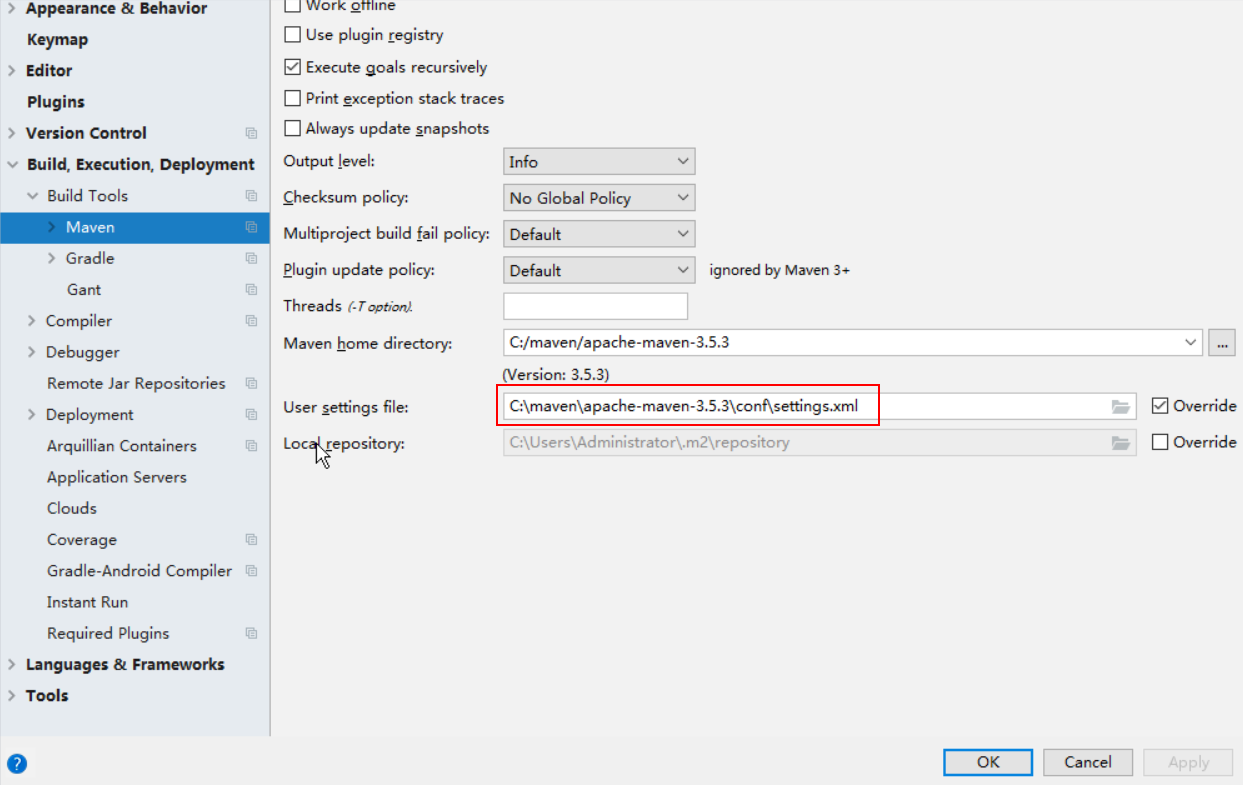
- On the IntelliJ IDEA page, select File > Settings > Build, Execution, Deployment > Build Tools > Maven, select Override next to User settings file, and change the value of User settings file to the directory where the settings.xml file is stored. Ensure that the directory is <Local Maven installation directory>\conf\settings.xml.
Figure 1 Directory for storing the settings.xml file
- Click the drop-down list next to Maven home directory and select the Maven installation directory.
- Click Apply, and then click OK.
- On the right of the IntelliJ IDEA home page, click Maven Projects. On the Maven Projects page, choose Project name > Lifecycle and run the clean and compile scripts.
Figure 2 Maven Projects page

Feedback
Was this page helpful?
Provide feedbackThank you very much for your feedback. We will continue working to improve the documentation.See the reply and handling status in My Cloud VOC.
For any further questions, feel free to contact us through the chatbot.
Chatbot


