CA Certificate
Exporting a CA Certificate
The CA certificate on the application server can be exported as follows:
- Start a browser, and type the callback address in the address box. Internet Explorer is used as an example.
- Check the certificate. The methods for checking a self-signed certificate and non-self-signed certificate are different.
- If the callback address uses a self-signed certificate, the message "There is a problem with this website's security certificate" is displayed. Choose .
Figure 1 Self-signed certificate callback address prompt
 Figure 2 Checking the self-signed certificate
- If the callback address is not a self-signed certificate, choose .
Figure 3 Checking the non-self-signed certificate

- If the callback address uses a self-signed certificate, the message "There is a problem with this website's security certificate" is displayed. Choose .
- Check the certificate level on the Certification Path tab page. The current certificate level is the last level of the certificate.
Figure 4 Certificate Directory
 Figure 5 Common certificate information
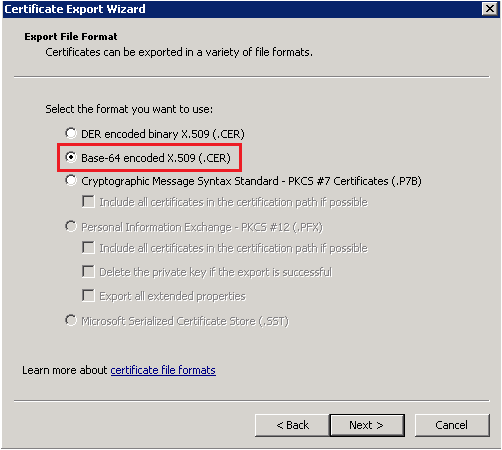
- On the Details tab page, click Copy to File, and select Base-64 encoded X.509 (.CER) to export the certificate of the current level based on the certificate export wizard.
Figure 6 Detailed certificate information
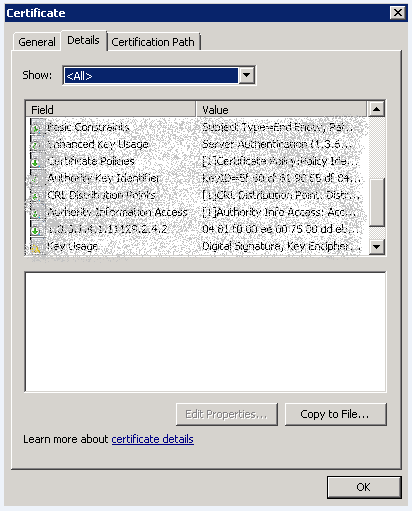 Figure 7 Selecting the certificate export format
- Double-click the upper-level certificate. In the displayed dialog box, choose to export the upper-layer certificate by following instructions provided by the certificate export wizard.
- Repeat 5 until all levels of certificates are exported.
- Use the text editor to combine all the exported certificates into a file.
 NOTE:
NOTE:
No newline character exists between the combined files.
Figure 8 Combining certificates
- Change the file name suffix to pem.
- On the Developer Center, choose to upload the certificate to the IoT platform.
Figure 9 Uploading a Certificate

Uploading a CA Certificate
The CA certificate of the application server must be uploaded to the IoT platform for the IoT platform to push HTTPS messages to the NA server. The CA certificate can be uploaded through the Developer Center or the SP portal.
Uploading the CA Certificate Through the Developer Center
- Choose . In the Push Certificate area, click Certificate Management.

- The CA Certificate dialog box is displayed. Check whether the CA certificate has been uploaded. If not, click Add.

- In the displayed Upload CA Certificate dialog box, select the certificate file, set parameters, and click Upload.

Uploading the CA Certificate on the Management Portal
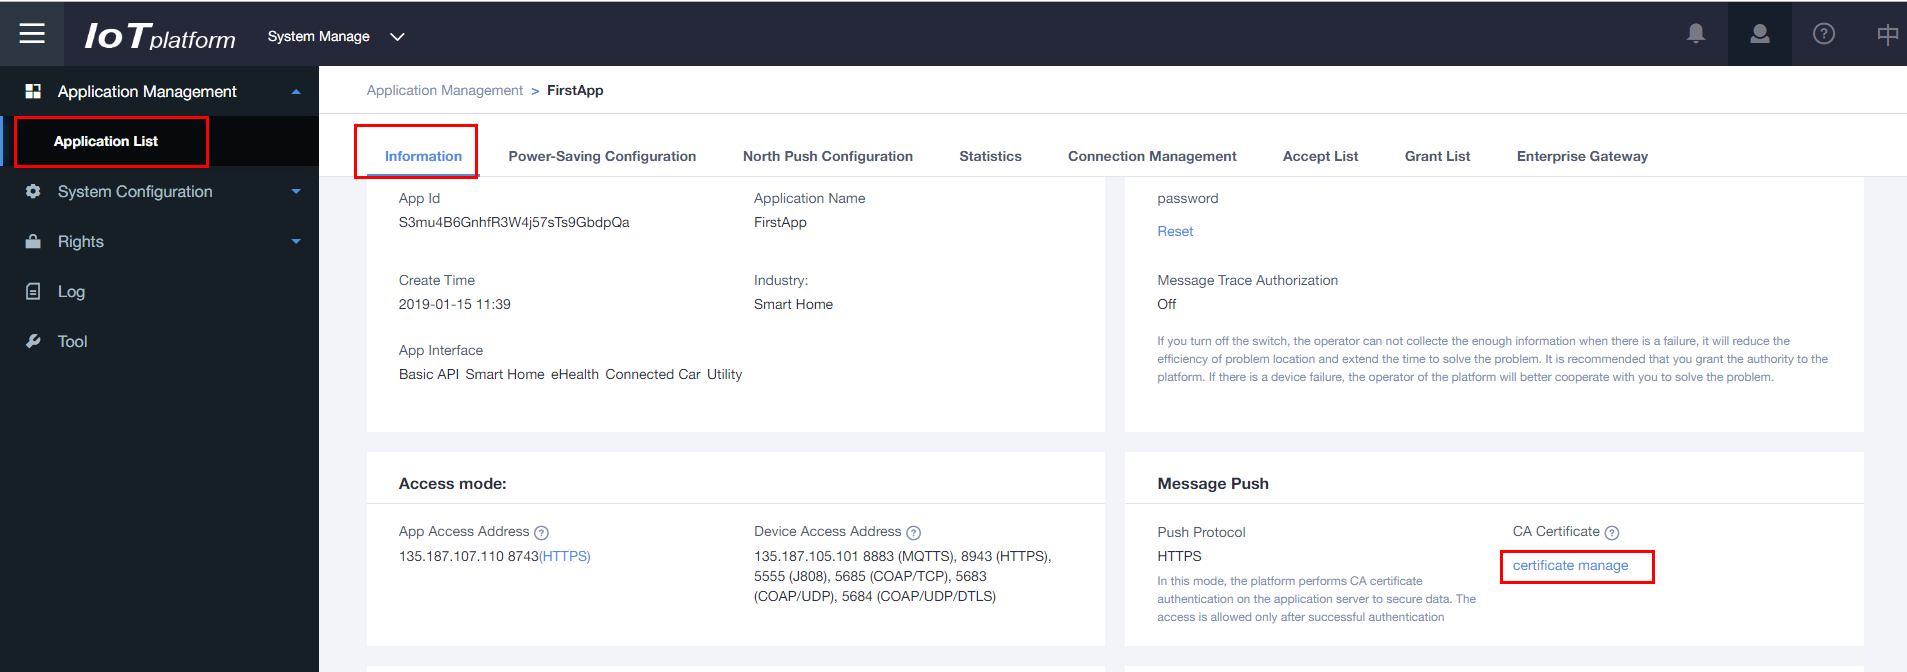
- Choose System Manage from the upper navigation bar, select , select an application, and click certificate manage on the Information tab page.
- The CA Certificate dialog box is displayed. Check whether the CA certificate has been uploaded. If not, click Add.
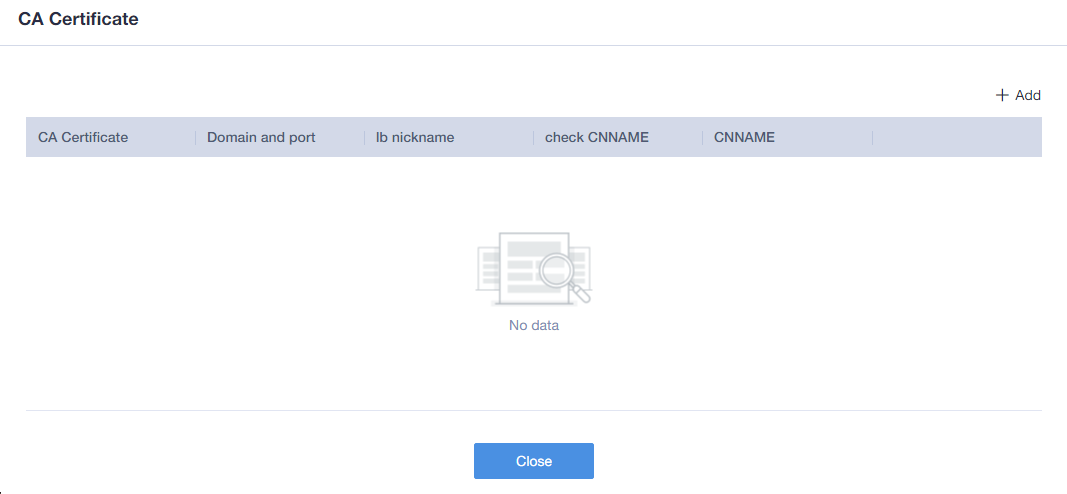
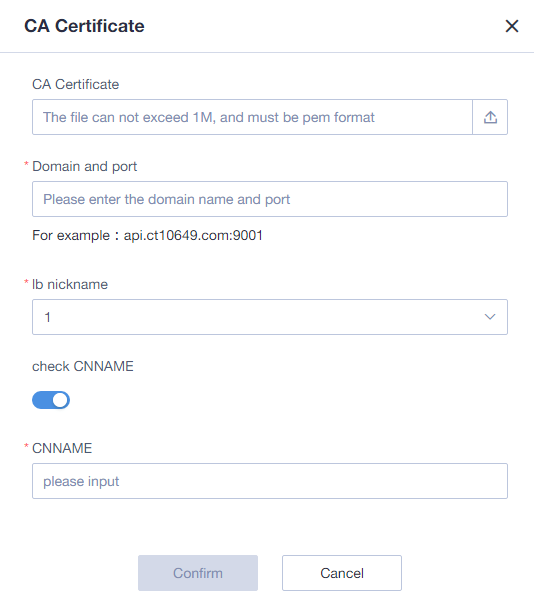
- In the displayed CA Certificate dialog box, select the certificate file, set parameters, and click Confirm.
Feedback
Was this page helpful?
Provide feedbackThank you very much for your feedback. We will continue working to improve the documentation.See the reply and handling status in My Cloud VOC.
For any further questions, feel free to contact us through the chatbot.
Chatbot


