
Using the PostObject API to Upload Data from a Web Client to OBS
Context
Files are commonly uploaded through a browser to the app server and then uploaded to OBS. Data transfer on the app server results in a low efficiency. Moreover, the app server will be heavily loaded if multiple tasks are concurrently uploaded.
This section describes how to use the PostObject API to directly upload files from a web client to OBS, which is called form-based upload. As shown in Figure 1, you can directly upload data to OBS, without having to upload data to the app server first. This makes the transmission faster and does not impose pressure on the server. Additionally, direct transmission with a signature returned by the server is more secure.

Prerequisites
An OBS bucket is available. For details about how to create a bucket, see Creating a Bucket.
Procedure
The configuration consists of the following two steps:
Step 1: Configure CORS.
In web page requests, website scripts and contents in one origin cannot interact with those in another origin because of Same Origin Policies (SOPs).
Cross Origin Resource Sharing (CORS) is a browser-standard mechanism. It defines how a web client in one origin interacts with resources in another one. OBS supports CORS rules and allows resources in OBS to be accessed across origins.
- In the navigation pane of OBS Console, choose Object Storage.
- In the bucket list, click the bucket you want to go to the Objects page.
- In the navigation pane, choose Permissions > CORS Rules.
- Click Create. The Create CORS Rule dialog box is displayed. See Figure 2 for details.

A bucket can have a maximum of 100 CORS rules configured.
- In the Create CORS Rule dialog box, configure Allowed Origin, Allowed Method, Allowed Header, Exposed Header, and Cache Duration (s).
If CDN acceleration is enabled for the bucket, HTTP header must be configured on CDN. For details, see HTTP Header Settings.
Table 1 CORS rule parameters Parameter
Description
Recommended Configurations
Allowed Origin
Mandatory. It specifies the origin from which the requests can access the bucket.
You can enter multiple origins, with one separated from another using a line break. Each origin can contain one wildcard character (*) at most. An example is as follows:
http://rds.example.com
https://*.vbs.example.com
*
Allowed Method
Mandatory. It specifies the allowed cross-origin request methods, same as the operation types of buckets and objects. Request methods include Get, Post, Put, Delete, and Head.
Select all of them.
Allowed Header
Optional. It specifies the allowed headers for cross-origin requests. Only CORS requests matching the allowed headers are valid.
You can enter multiple allowed headers, with one separated from another using a line break. Each header can contain one wildcard character (*) at most. Spaces, ampersands (&), colons (:), and less-than signs (<) are not allowed.
*
Exposed Header
Optional. It specifies the supplemented headers in CORS responses, providing additional information for clients.
You can enter multiple exposed headers, with one separated from another using a line break. Spaces, wildcard characters (*), ampersands (&), colons (:), and less-than signs (<) are not allowed.
- ETag
- x-obs-request-id
- x-obs-api
- Content-Type
- Content-Length
- Cache-Control
- Content-Disposition
- Content-Encoding
- Content-Language
- Expires
- x-obs-id-2
- x-reserved-indicator
- x-obs-version-id
- x-obs-copy-source-version-id
- x-obs-storage-class
- x-obs-delete-marker
- x-obs-expiration
- x-obs-website-redirect-location
- x-obs-restore
- x-obs-version
- x-obs-object-type
- x-obs-next-append-position
Cache Duration (s)
Mandatory. It specifies the duration (in seconds) that your browser can cache CORS responses. The default value is 100.
Configure it based on your service needs.
- Click OK.
Message "The CORS rule created successfully." is displayed. The CORS configuration will take effect within two minutes.
Then, only the addresses specified in Allowed Origin can access the OBS bucket over the methods specified in Allowed Method. Suppose you are configuring a CORS rule for bucket testbucket by setting Allowed Origin to https://www.example.com, Allowed Method to GET, Allowed Header to *, Exposed Header to ETag, and Cache Duration (s) to 100. Then, only GET requests from https://www.example.com are allowed to access bucket testbucket. In addition, there are no limits on headers in a request, the ETag value can be returned in the response, and the client which the requests are from can cache the CORS response for 100 seconds.

Step 2: Upload data using a form.
The following describes how to use the BrowserJS SDK to calculate a signature.
A form-based upload is to upload objects in HTML form to a bucket. The uploaded object cannot exceed 5 GB in size.
You can call ObsClient.createPostSignatureSync to generate request parameters for a form-based upload. Click post-object-sample to download the sample code for using BrowserJS to perform a form-based upload. Alternatively, you can perform the following operations to implement a form-based upload:
- Call ObsClient.createPostSignatureSync to generate request parameters for authentication.
Two request parameters generated:
- Policy: corresponding to the policy field in the form
- Signature: corresponding to the signature field in the form
Sample code:// Create an ObsClient instance. var obsClient = new ObsClient({ // Hard-coded or plaintext AK and SK are risky. For security purposes, encrypt your AK and SK before storing them in the configuration file or environment variables. In this example, the AK and SK are stored in environment variables for identity authentication. Before running the code in this example, configure environment variables AccessKeyID and SecretAccessKey. // Obtain an AK and SK pair on the management console. For details, see https://support.huaweicloud.com/intl/en-us/usermanual-ca/ca_01_0003.html. access_key_id: process.env.AccessKeyID, secret_access_key: process.env.SecretAccessKey, server : 'https://your-endpoint', signature : 'obs' }); // Configure form parameters. var formParams = { // Set the object ACL to public-read. 'x-obs-acl': obsClient.enums.AclPublicRead, // Configure the object's MIME type. 'content-type': 'text/plain' }; // Configure the validity period (in seconds) for a form-based upload request. var expires = 3600; var res = obsClient.createPostSignatureSync({Expires:expires, FormParams: formParams}); // Obtain the request parameters. console.log('\t' + res.Policy); console.log('\t' + res.Signature); - Prepare an HTML page.
Sample code for the HTML form is as follows:
<html>
<head>
<meta http-equiv="Content-Type" content="text/html; charset=UTF-8" />
</head>
<body>

<form action="http://bucketname.your-endpoint/" method="post" enctype="multipart/form-data">
Object key
<!-- Object name -->
<input type="text" name="key" value="objectname" />
<p>
ACL
<!-- Object ACL -->
<input type="text" name="x-obs-acl" value="public-read" />
<p>
Content-Type
<!-- Object MIME type -->
<input type="text" name="content-type" value="text/plain" />
<p>
<!-- Base64-coded policy -->
<input type="hidden" name="policy" value="*** Provide your policy ***" />
<!-- AK -->
<input type="hidden" name="AccessKeyId" value="*** Provide your access key ***"/>
<!-- Signature string -->
<input type="hidden" name="signature" value="*** Provide your signature ***"/>

<input name="file" type="file" />
<input name="submit" value="Upload" type="submit" />
</form>
</body>
</html>
- Values of policy and signature in the HTML form are obtained from the result returned by ObsClient.createPostSignatureSync.
- Click PostDemo to download an HTML form example.
- Enter the request parameters on the HTML page.
- Select a file from your local PC and upload it using the form.
Verification
The HTML form contains a file selection box and an upload button. You can select the file to be uploaded and submit the form.
When the form is submitted, JavaScript sends a request to the server to obtain the required signature. Once a valid response is received, the FormData object is constructed and populated with all required data. A POST request is then made to the OBS server using the fetch method to complete the file upload.
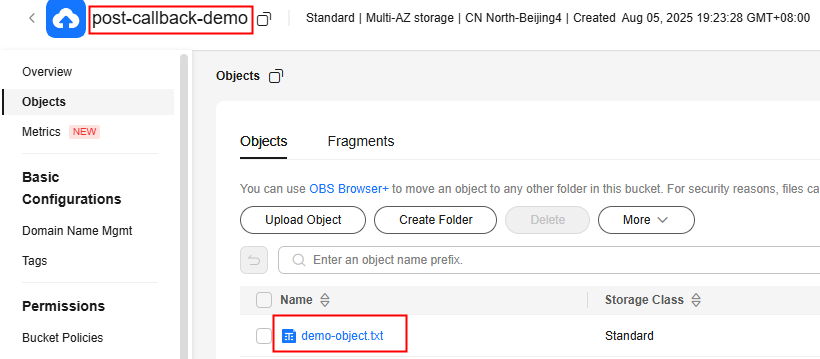
Upload the demo-object file to bucket post-callback-demo using the form. If the demo-object file can be found in the bucket post-callback-demo, the file is successfully uploaded.
More Information
Using the BrowserJS SDK for signature calculation may cause the AK/SK to display on the frontend, which has risks.
You can also use the client-server model. In this model, the server side uses SDKs such as Java and Python SDKs to calculate the POST upload signature, while the client side uses JavaScript to obtain the signature from the server and uses the signature to access OBS.
For details about how to calculate the POST upload signature, see the corresponding SDK languages:
To prevent sensitive data leakage caused by direct access to OBS using AK/SK in other scenarios, except POST upload, you can calculate a temporary URL in the backend and use it to authorize the frontend to access OBS.
Use the Go SDK to calculate a temporary URL. The frontend JS uses the temporary URL to list objects in an OBS bucket. An example is provided as follows:
- The Go SDK calculates the temporary URL in the backend for listing buckets.
// Import a dependency. import ( "fmt" "obs" "strings" ) // Obtain an AK and SK pair using environment variables or import the AK and SK pair in other ways. Using hard coding may result in leakage. // Obtain an AK and SK pair on the management console. For details, see https://support.huaweicloud.com/intl/en-us/usermanual-ca/ca_01_0003.html. var ak = os.Getenv("AccessKeyID") var sk = os.Getenv("SecretAccessKey") var endpoint = "https://your-endpoint" // Create an ObsClient struct. var obsClient, _ = obs.New(ak, sk, endpoint) func main() { input := &obs.CreateSignedUrlInput{} input.Expires = 3600 // Generate a temporary URL for listing objects. // Set the request type to GET and pass the bucket name. input.Method = obs.HttpMethodGet input.Bucket = "bucketname" output, _ := obsClient.CreateSignedUrl(input) // Obtain the generated temporary URL and request headers. fmt.Printf("SignedUrl:%s\n", output.SignedUrl) fmt.Printf("ActualSignedRequestHeaders:%v\n", output.ActualSignedRequestHeaders) } - The frontend uses the obtained signed URL (SignedUrl) and request headers ActualSignedRequestHeaders to access OBS to list buckets.
// Make a GET request to obtain the object list.
var bucketName = 'bucketname';
var method = 'GET';

// SignedUrl is the temporary URL calculated by the backend service in the previous step.
// ActualSignedRequestHeaders is the one used in the previous step by the backend service to calculate the temporary URL. The frontend requests should also use ActualSignedRequestHeaders.
var reopt = {
       method : method,
       url : SignedUrl,
       withCredentials: false,
       headers : ActualSignedRequestHeaders || {},
       validateStatus: function(status){
              return status >= 200;
       },
       maxRedirects : 0,
       responseType : 'text',
};

axios.request(reopt).then(function (response) {
       if(response.status < 300){
              console.log('Listing object using temporary signature succeed.');
       }else{
              console.log('Listing object using temporary signature failed!');
              console.log('status:' + response.status);
              console.log('\n');
       }
       console.log(response.data);
       console.log('\n');
}).catch(function (err) {
       console.log('Listing object using temporary signature failed!');
       console.log(err);
       console.log('\n');
});
For details about how to generate a temporarily authorized URL, see the corresponding SDK languages:
Feedback
Was this page helpful?
Provide feedbackThank you very much for your feedback. We will continue working to improve the documentation.See the reply and handling status in My Cloud VOC.
For any further questions, feel free to contact us through the chatbot.
Chatbot


