Batch Enabling Auto-Renewal
Auto-renewal prevents resource data from expiring and being deleted. If auto-renewal is enabled, your resources will be automatically renewed before they expire.
Procedure
- Go to the Renewals page.
- Select the resources you want to enable auto-renewal for and click Enable Auto-Renew in the upper left corner of the list.


You can auto renew up to 100 resources at a time. The number of selected resources is displayed in the prompt message.

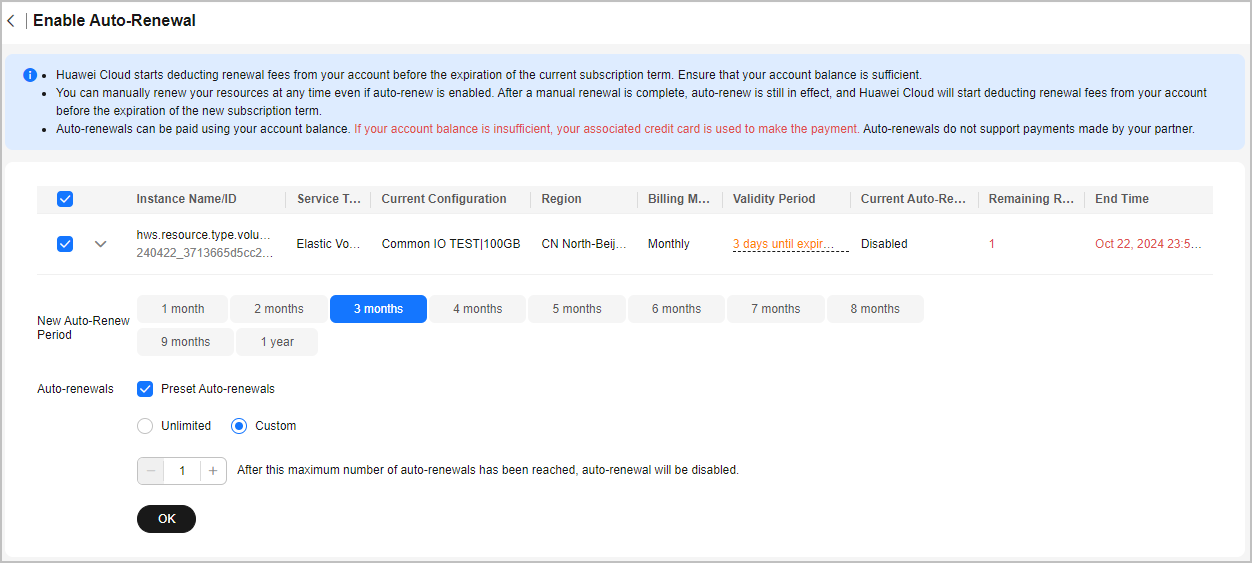
- Set New Auto-Renew Period and Auto-renewals, and click OK.


- New Auto-Renew Period: indicates how often an instance is automatically renewed.
As shown in the preceding figure, if New Auto-Renew Period is changed to 3 months, the system automatically renews the subscription term every three months and charges the renewal fee for three months each time.
- Auto-renewals: By default, this option is not selected, indicating that the number of auto-renewals is not limited. You can select Reset Auto-renewals and set the auto-renewals to a required value. After the number of auto-renewals reaches the preset value, the instance is automatically moved on the Manual Renewals tab, and you need to manually renew it.
- New Auto-Renew Period: indicates how often an instance is automatically renewed.
- Wait for the "Operation successful" message in the upper right corner of the Renewals page, and confirm that the resources are displayed on the Auto Renewals page. Auto-renewal is enabled for these resources.

- Refer to the preceding steps to enable auto-renewal for resources in batches.
Feedback
Was this page helpful?
Provide feedbackThank you very much for your feedback. We will continue working to improve the documentation.See the reply and handling status in My Cloud VOC.
For any further questions, feel free to contact us through the chatbot.
Chatbot


