Help Center/
Application Performance Management/
Best Practices(2.0)/
Connecting to APM/
Connecting IDE to APM
Updated on 2025-03-27 GMT+08:00
Connecting IDE to APM
Prerequisite
The public network has been connected.
Procedure
- Download the APM Agent.
- Log in to the management console.
- Click
 on the left and choose Application > Application Performance Management.
 - In the navigation pane, choose Application Monitoring > Applications.
Figure 1 Connecting an application

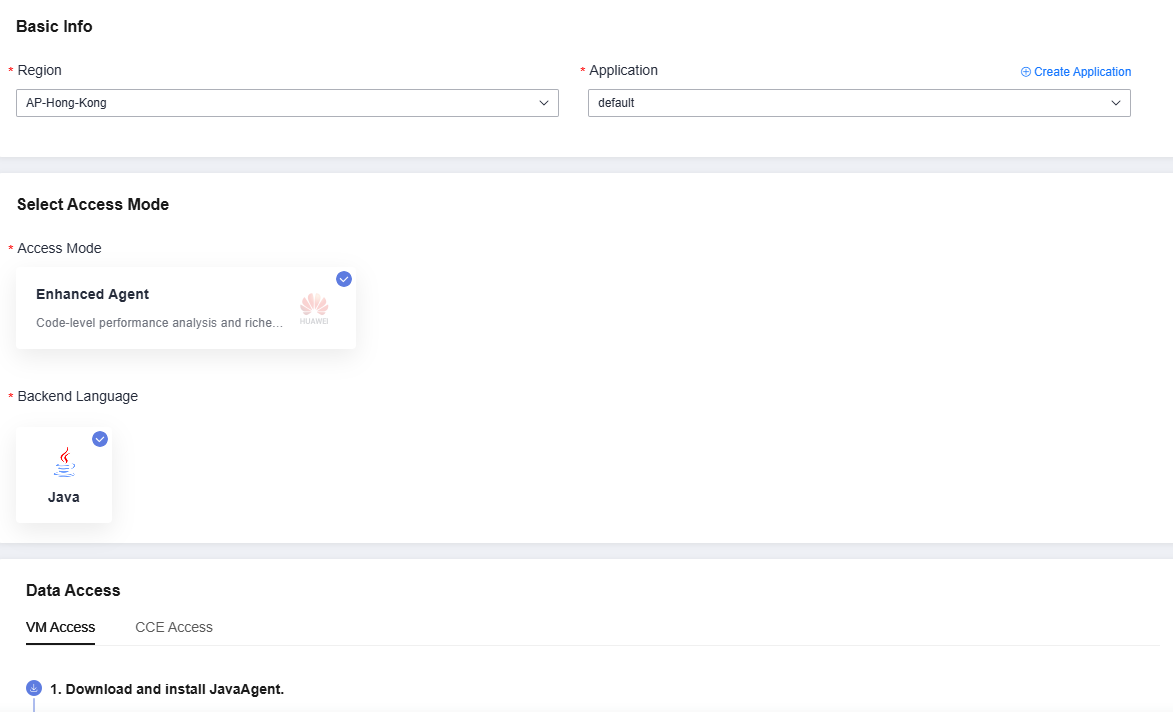
- On the displayed page, click Connect Application.
Figure 2 Connecting an application

- In the navigation pane on the left, choose System Management > Access Keys. On the displayed page, obtain an AK and SK for the JavaAgent. For details, see Access Keys.
- Replace APM_AK and APM_SK in the installation command with the AK and SK obtained from the Access Keys page.
- Run the git bash command. In the Agent directory of drive D on the local PC, run the copied command to install JavaAgent.
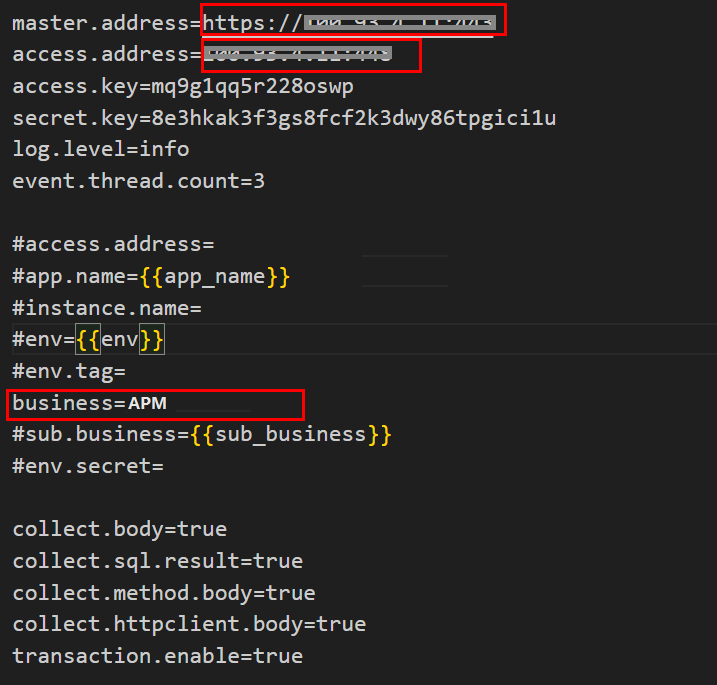
- Change the values of master.address, access.address, and business in the apm.config file.
Figure 3 Modifying the configuration file

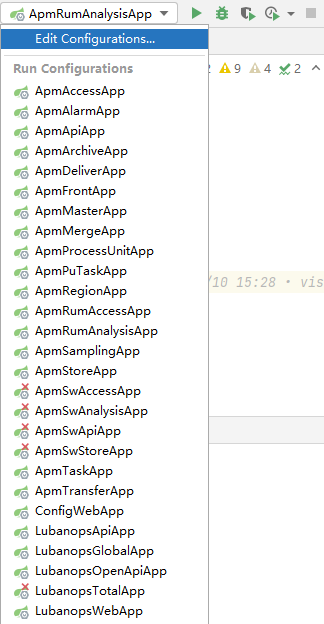
- Click the drop-down list and choose Edit Configurations.
- Modify the running/debugging configuration of IDE.
Figure 4 Modifying the running/debugging configuration

- On the Run/Debug Configurations page, choose ApmMasterApp from the navigation pane. Add -javaagent:D:\agent\apm-javaagent\apm-javaagent.jar=appName=apm-master to Build and run.
Figure 5 Modifying the configuration under "Build and run"

- Click OK.
- Modify the running/debugging configuration of IDE.
- Restart the service. If APM is displayed in the Application drop-down list, the connection is successful.
Parent topic: Connecting to APM
Feedback
Was this page helpful?
Provide feedbackThank you very much for your feedback. We will continue working to improve the documentation.See the reply and handling status in My Cloud VOC.
The system is busy. Please try again later.
For any further questions, feel free to contact us through the chatbot.
Chatbot


