
Managing Members
This section describes how to add members and roles to a workspace, as well as the permissions and differences of the roles.
If you want to use DLV through a cloud account, skip this section.
If you need to invite other users to use DLV, prepare an IAM user by referring to the instructions in Creating Users and Assigning DLV Permissions and perform the following operations.
Background
- The cloud account has all execution permissions of DLV. By default, the account has permission to add workspace members.
- If a sub-user of an account needs to add workspace members, the account needs to grant the required permissions to the sub-user. Only the following three types of sub-user have permission to add workspace members:
- User who is assigned the DLV workspace administrator role and has the IAM ReadOnlyAccess permission
- User who has the DLV FullAccess permission
By default, a user with the DLV FullAccess permission can perform all operations on DLV.
- User who has the Tenant Administrator permission
The Tenant Administrator permission has all cloud service administrator permissions except the IAM management permission. For security purposes, you are not advised to grant this permission to IAM users.
To grant the preceding permissions to a sub-user, log in to the IAM console, create a user group, grant the required permissions to the user group, and add the sub-user to the user group.
Adding Workspace Members and Roles
- Log in to the DLV console.
- In the navigation tree on the left, click . The Workspace page is displayed.
- In the workspace list, click the workspace you want to access. In the Workspace Member area, click Add Member.
Figure 1 Selecting a workspace

- In the Add Member dialog box, use either of the following methods to add a member or user group:
- Add User
- Account: Select one or more members from the drop-down list.
- Role: All selected member accounts will be set as the selected role. The role can be Administrator, Developer, Analyst, and Visitor. Each role has different workspace access permissions. The workspace creator is the administrator role by default.
- Add Group
- Account: Select one or more user groups from the drop-down list.
- Role: All selected user groups will be set as the selected roles, and users in these user groups will obtain the permissions of the selected roles.
Figure 2 Adding a member
- Add User
- Click OK. View or modify the existing members and roles in the member list, or delete a member from the workspace.
Modifying Member Roles
- Log in to the DLV console.
- In the navigation tree on the left, click . The Workspace page is displayed.
- In the workspace list, click the workspace to be set. In the Workspace Member area, locate the member to be edited, and click Edit in the Operation column.
Figure 3 Workspace member

- In the Edit Member dialog box, select one or more roles and click OK.
The role can be Administrator, Developer, Analyst, and Visitor. Each role has different workspace access permissions. The workspace creator is the administrator role by default.
Figure 4 Editing a member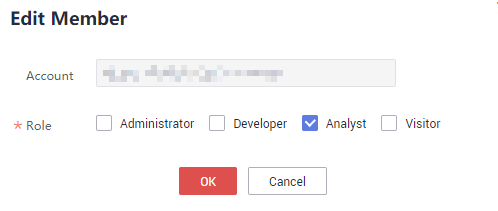
- After the member is added, you can view the member and the member role in the workspace member list.
Removing Members
- Log in to the DLV console.
- In the navigation tree on the left, click . The Workspace page is displayed.
- In the workspace list, click the workspace to be set. In the Workspace Member area, locate the member to be deleted and click Remove in the Operation column.
Figure 5 Removing a member

- In the dialog box that is displayed, click OK.
Feedback
Was this page helpful?
Provide feedbackThank you very much for your feedback. We will continue working to improve the documentation.See the reply and handling status in My Cloud VOC.
For any further questions, feel free to contact us through the chatbot.
Chatbot


