
Deployment Using a CCE Cluster
BCS instances can be deployed using Cloud Container Engine (CCE). CCE is a high-performance, high-reliability service through which enterprises can manage containerized applications. CCE supports native Kubernetes applications and tools, allowing you to easily set up a container runtime environment on the cloud. For more information, see Cloud Container Engine User Guide. When creating a BCS instance, configure basic parameters and network nodes to quickly create and deploy the instance.
Enhanced Hyperledger Fabric instances can be deployed in CCE clusters. This section describes how to deploy an enhanced Hyperledger Fabric instance using a CCE cluster.

- The BCS instance will use the CCE cluster exclusively. Ensure that the CCE cluster is available before you deploy the BCS instance.
- You can prepare a CCE cluster in advance, and select it when you create an enhanced Hyperledger Fabric instance. Alternatively, you can customize a CCE cluster or select Quick Config to use the default specifications when you create an enhanced Hyperledger Fabric instance.
Prerequisites
Only IAM users with robust permissions can create BCS instances. For details, see Permissions Management.
You can create a user group, grant permissions to the user group, and then add the user to the user group. In this way, the user has the permissions of the user group.
Deploying a BCS Instance
After the environment is ready, perform the following steps to create a BCS instance:
- Create a blockchain instance.
Log in to the BCS console, click Instance Management, and click Create BCS Instance in the upper right corner.
- Configure basic information about the BCS instance by referring to Table 1.
Table 1 Basic information parameters Parameter
Description
Example Setting
Region
Select the region where the blockchain infrastructure is located. You are advised to select the same region as the service application system.
Retain the default value.
Enterprise Project
Select an existing enterprise project, to which the BCS instance will be added.
NOTE:- If the Enterprise Management service is not enabled, this parameter is unavailable.
- When deploying an instance in an existing CCE cluster, choose the same enterprise project as that used by the cluster to ensure instance performance.
default
Instance Name
An instance name can contain 4 to 24 characters, including letters, digits, and hyphens (-). It cannot start with a hyphen (-).
NOTE:Currently, the name of a created BCS instance cannot be changed. You can only create a new instance with a new name.
Enter bcs-wh.
Edition
BCS provides basic and professional editions.
NOTE:Editions cannot be changed for a deployed BCS instance.
Select Professional.
Blockchain Type
A private blockchain is used only by the tenant that creates it. A consortium blockchain can be used by multiple tenants.
Select Private.
Enhanced Hyperledger Fabric Version
BCS instance version.
BCS v4.x.x corresponds to Hyperledger Fabric v2.2.
Select v2.2.
Consensus Mechanism
The supported mechanisms for blockchain nodes reaching consensus include:
Raft (crash fault tolerant) and Fast Byzantine fault tolerance (FBFT).
NOTE:If Raft (CFT) is selected, a basic or professional edition instance has three orderers by default.
Select FBFT.
Resource Access Initial Password
Password of blockchain administration user admin, ECS user root, or CouchDB database user.
It will be used as such a password if you do not set Blockchain Mgmt. Initial Password, Password of Root User, or Initial Password displayed when NoSQL (CouchDB) is selected for Ledger Storage.
-
Confirm Password
Confirm the resource access initial password.
-
- (Optional) Click Quick Config to allow the system to automatically create an instance with the specifications listed in Table 2.
Table 2 Default specifications Item
Basic Edition
Professional Edition
Number of CCE cluster nodes
1
2
CCE node specifications
4 vCPUs | 8 GB
4 vCPUs | 8 GB
Note: If the default specifications cannot be selected, other higher specifications will be created by default.
Storage space of SFS Turbo
510 GB
510 GB
EIP
Type: Dynamic BGP; Bandwidth: 5 Mbit/s
- Click Next: Configure Resources. Table 3 describes the resource parameters.
Table 3 Resource parameters Parameter
Description
Example Setting
Environment Resources
Use the default environment or customize your environment resources.
Select Custom.
Cluster
Cluster where the BCS instance will be deployed. You can use an existing cluster or create a new CCE cluster.
NOTE:CCE clusters of v1.21 or earlier are supported.
Select Create a new CCE cluster.
AZ
Select the AZ where the ECS is located.
Select AZ1.
ECS Specifications
Specifications of the ECSs in the CCE cluster.
Select the flavor for 4 vCPUs | 8 GB.
ECS Quantity
Enter the required ECS quantity.
Enter 2.
High Availability
If you have high requirements on system reliability, create high-availability ECSs.
Yes
VPC
You can create a new virtual private cloud (VPC), select an existing VPC, or let the system automatically create a VPC.
Select Automatically create VPC.
Subnet
A subnet provides dedicated network resources that are logically isolated from other networks for network security.
Select Automatically create subnet.
ECS Login Method
Either a password or key pair can be used to log in to ECSs.
Select Password.
Password of Root User
Password of the root user for logging in to ECSs.
If you do not enter a password here, the previously specified resource access initial password will be used.
-
Confirm Password
Confirm the ECS login password of the root user.
-
Use EIP of a CCE Node
- If you select Yes, an EIP bound to the cluster will be used as the blockchain network access address. If the cluster is not bound with any EIP, bind an EIP to the cluster first.
- If you select No, a private address of the cluster will be used as the blockchain network access address. Ensure that the application can communicate with the internal network of the cluster.
Select Yes.
EIP Billed By
Specifies whether the bandwidth is charged by fixed bandwidth or by traffic.
Select Bandwidth.
EIP Bandwidth
Select a bandwidth as required.
Set it to 5 Mbit/s.
- Click Next: Configure Blockchain. Table 4 describes the blockchain parameters.
Table 4 Blockchain parameters Parameter
Description
Example Setting
Blockchain Configuration
Use the default blockchain configurations or customize your own blockchain configurations.
Select Custom.
Blockchain Mgmt. Initial Password
Enter the blockchain management initial password.
If you do not enter a password here, the previously specified resource access initial password will be used.
-
Confirm Password
Enter the blockchain management initial password again for confirmation.
-
Volume Type
SFS Turbo provides low-latency and high-IOPS file storage.
Select SFS Turbo.
Storage Capacity of Peer Organization (GB)
Stores shared distributed ledger, consensus data, and other intermediate data of the blockchain system.
Set it to 500 GB.
Ledger Storage
File database (GoLevelDB) and NoSQL (CouchDB) are supported.
- File database (GoLevelDB): The Fabric native storage mode is used. Historical transaction data is stored in the blockchain, and status data is stored in the LevelDB.
- NoSQL (CouchDB): The CouchDB storage mode supported by the Fabric is used to store transaction data and status data. Each CouchDB database is a collection of independent documents. Each document maintains its own data and self-contained schema.
Select File database (GoLevelDB).
Peer Organization
Peer organizations to be added to the BCS instance.
- If you use an existing cluster, customize the peer organization name and peer quantity. Automatically create SFS Turbo file system will be displayed in the Network Storage area.
- If you use a new CCE cluster, customize the peer organization name and peer quantity.
Add a peer organization named organization with 2 peers.
Channel Configuration
Channels isolate business in a consortium blockchain. Business participants (some or all of the organizations in a consortium) are channel members. Each channel can be regarded as a sub-chain and corresponds to one distributed ledger.
By default, a channel named channel has been created, and the peer organization you just specified has been added to the channel.
Orderer Quantity
Number of nodes that order transactions into blocks in the blockchain network.
When the consensus mechanism is Raft (CFT), the number of orderers is 3.
Enter 3.
Security Mechanism
Encryption algorithm used to ensure data security. ECDSA and OSCCA-published cryptographic algorithms are supported.
Select ECDSA.
Configure Block Generation
The configuration of block generation includes the block generation interval, maximum number of transactions in a block, and maximum size of a block. A new block is generated at the specified interval or when the transaction quantity or size of a block reaches the threshold. Configure these parameters based on the transaction frequency and service volume.
Select Yes or No as required.
- Yes: Set the block generation interval, transaction quantity per block, and block size as required.
- No: You do not need to set parameters. By default, the block generation interval is 2 seconds, the number of transactions per block is 500, and the block size is 2 MB.
Select No.
Enable Support for RESTful API
If you need to use RESTful APIs to invoke chaincodes, select Yes.
Select No.
- Click Next: Confirm.
- Confirm the configurations and click Submit.
Wait for several minutes. After a message is displayed indicating successful installation, check the status of the instance. If it is Normal, the deployment is completed.

Subsequent Operations (Optional)
View the operation records of creating, deleting, and upgrading instances, adding organizations, expanding peers, creating channels, and adding peers to channels. In the left part of the window, you can filter records by status, including In progress, Upgrading, Deleting, Finished, and Failed. The figure is for reference only.
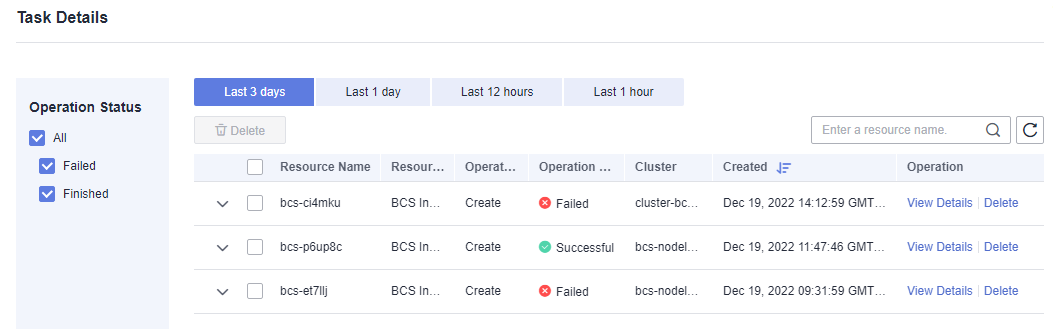
The system stores records of the latest three days.
- Log in to the BCS console. In the navigation pane, click Instance Management.
- Click Task Details.
Search records by the resource name. You can also view details or delete records.
You can configure an anti-affinity label for the cluster node where the BCS instance is deployed. This label can be used to isolate the instance from other applications in the same cluster to ensure normal running of the system.
- Log in to the CCE console. In the navigation pane, choose Resource Management > Nodes. The node list is displayed. Choose Operation > Manage Label in the Operation column.
- Click Add Label. Set Key to nodeScope and Value to userApplication for the label to be added.
- Click OK. After Label updated successfully. is displayed, click Manage Labels again. Then you can see the label that you have added.
Feedback
Was this page helpful?
Provide feedbackThank you very much for your feedback. We will continue working to improve the documentation.See the reply and handling status in My Cloud VOC.
For any further questions, feel free to contact us through the chatbot.
Chatbot


