
Creating a Mind Map and Generating a Test Case
Mind maps, also called brain maps, are used to plan test schemes, design test scenarios, define test points, orchestrate test steps, and generate test cases. You can use the mind map function on the test design page.
Prerequisites
You have been assigned a role (except the viewer, participant, and O&M manager) that has permissions to create mind maps in the target project. For details, see Adding Members and Assigning Roles.
Constraints
The description of a single node in a mind map can contain a maximum of 5,000 characters.
Creating a Mind Map from Scratch
- Search for your target project and click the name to access the project.
- In the navigation pane, choose .
- Click Create in the upper left corner of the page.
The new mind map page is displayed. The root node named Mind Map by default is displayed in the middle of the page. You can double-click the root node to change its name.
- In the upper left corner of the page, click
 , rename the mind map, and click Confirm.
 - Click
 in the upper left corner of the page. The test design list is displayed. The created mind map is displayed in the list.
Creating a Mind Map from Template
- Log in to the CodeArts homepage, search for your target project, and click the project name to access the project.
- In the navigation pane, choose .
- Click
 next to Create and choose Templates.
 - Select a required template. Click Preview to view the mind map details. Click Use to access the mind map.
- View the displayed mind map page and details about the selected template.
- Click
 in the upper left corner of the page. The test design list is displayed.
 - To open multiple mind maps on multiple tab pages, click
 in the Operation column and choose Open in New Tab.
Renaming a Mind Map
- In the mind map list, click
 in the Operation column and choose Rename.
 - The name of the mind map is displayed in the dialog box. Enter a new name. The length cannot exceed 500 characters.
- Click OK. The mind map is renamed.
Drawing a Mind Map
On the page, click the name of a mind map to be edited, and draw the mind map.
Adding a Node
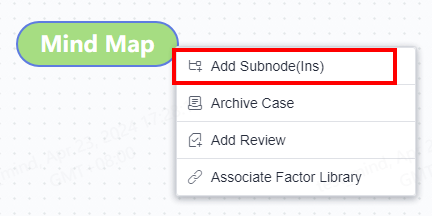
- Add a subnode.
Access a mind map, select a node, and add a subnode in either of the following ways:
- Right-click and choose Add Subnode (Ins) from the shortcut menu.
- Press Insert or Tab.
- Add a sibling node.
Access a mind map, select any node except the root node, and add a sibling node in either of the following ways:
- Right-click and choose Add Sibling Node (Enter) from the shortcut menu.
- Press Enter.

Deleting a Node
You can delete any node except the root node in the mind map. If the deleted node contains subnodes, the subnodes are also deleted.
Access a mind map, select any node except the root node, and delete the node in one of the following ways:
- Right-click and choose Delete Node (Del) from the shortcut menu.
- Click
 in the upper right corner of the page and select Delete Current Node.
 - Press Delete.
Moving a Node
- Move a node up or down.
Access a mind map, select the node to be moved, and click
 or
or  on the toolbar above the mind map to move the node up or down among its sibling nodes.
 - Drag a node.
Access a mind map, select the node to be moved, hold down the left mouse button, drag the node to the required position, and release the mouse.

Expanding Display Levels
Expand to the required mind map node level.
Right-click a node, choose Display Layer Number from the shortcut menu, and choose the target level.
Designing a Scenario
Design scenarios based on the requirement for which the mind map is created.
- Go to a mind map.
- Add a subnode to the root node. (You can set any non-root node as a scenario.)
- Enter a scenario description. For example, Membership registration.
- Select the node created in 2 and click
 on the toolbar above the mind map.
 If
 is displayed on the selected node, the scenario is added successfully.
Designing a Test Point
Design test points based on the requirement for which the mind map is created.
- Go to a mind map.
- Add a subnode to the root node. (You can set any non-root node as a test point.)
- Enter a subnode name. For example, Membership registration.
The test point name can contain 1 to 128 characters. Only letters, digits, and special characters (-_/|*&`'^~;:(){}=+,×...—!@#$%.[]<>?–") are supported.
- Select the node created in 2 and click
 on the toolbar above the mind map.
 If
 is displayed on the selected node, the test point is added successfully.
Designing a Test Case
Design a test case to refine a test point.
A test case consists of prerequisites, steps, and expected results. Set the three parts as subnodes of the test point node.
- Go to a mind map.
- Under the Membership registration node, create subnodes and enter the descriptions of prerequisites, steps, and expected results.
- Select a node to which you have entered a prerequisite, and click
 on the toolbar above the mind map.
 If
 is displayed on the node, it is set as a prerequisite node.
- Select a node to which you have entered a step, and click
 on the toolbar above the mind map.
 If
 is displayed on the node, it is set as a step node.
- Select a node to which you have entered an expected result, and click
 on the toolbar above the mind map.
 If
 is displayed on the node, it is set as an expected result node.
Adding a Tag
Add tags to nodes as auxiliary information. Only one tag can be added to a node. The tag length must be 1 to 128 characters.
- Access a mind map, right-click a node, and choose Add Tag.
- Enter the tag content in the text box under the node and click any position on the screen to save.
- After the settings are saved, a tag with a yellow background is displayed under the node.

Adding Remarks
Add remarks to nodes as auxiliary information. Only one remark can be added to a node. The remark length must be 1 to 500 characters.
- Access a mind map, select a node, and click Remarks in the upper part of the page.
- Enter remarks in the window that is displayed on the right of the page and click anywhere on the screen to save.
- If
 is displayed on the node, the remarks are successfully added to the node.
Performing Online Review
Review and comment on mind map nodes.
- Access the mind map to be reviewed, right-click a test case node, and choose Add Review.
- In the displayed dialog box, select a type and enter comments.
- Select reviewers. A maximum of five reviewers can be selected.
- Click Add Review.
- View the review record in the historical review comments.
- On the right of the review record, click
 . Then edit the content in the Type and Comments boxes. (Only the creator and reviewers of the review can edit and delete it.)
 To close a confirmed review, toggle off the switch on its right.
Generating Test Cases
After test case design, generate test cases on the mind map.
Generating a Single Test Case
- In the mind map, right-click the test point (TP) node for which a test case is to be generated, and choose Generate Case.
- Check whether
 is displayed on the node. This icon indicates that a draft test case is generated.
 - Click
 . The case details drawer page is displayed.
 Before generating cases, enable or disable the function of generating each step with an expected result. For details, see Function Switch.
- To generate a new test case after you modify the previous nodes, repeat the preceding steps.

Generating Cases in Batches
If a scenario has multiple test points, generate draft test cases in batches for it.
- In the mind map, select a scenario node that contains multiple test points.
- Right-click the node and choose Generate Case from the shortcut menu.
The
 icon is displayed on all test point nodes of the scenario node, indicating that draft test cases have been generated for them.
Updating a Case
To update draft test cases after you modify the mind map, perform the following operations.
- Modify the mind map and right-click the target TP node.
- Click Update Case.
- In the displayed dialog box, select the draft test cases to be updated.
- Click Confirm.
Archiving Cases
Archive draft test cases. Archived test cases will be displayed on the Testing Case page.
- In the mind map, right-click a node for which test cases have been generated and choose Archive Case from the shortcut menu. The Archive Case window is displayed.
- On the left, select the test cases to be archived. On the right, set the version, test case library/test plan, execution type, and feature, and click Confirm.


- Check whether
 is displayed on the node. The archived test cases are displayed on the Testing Case page.
 Click
 . The test case details page is displayed.
Deleting Archived Test Cases from a Mind Map
- Right-click the node with test points for which test cases have been generated.
- Choose Delete Case from the short-cut menu.
- Select one of the following options:
- Do not delete them.: Only the test case formats will be removed from the mind map. The test cases remain in the list in the Testing Case page.
- Label them as "Discarded".: In the manual test case list, the cases will be tagged with Discarded in the basic information.
- Delete them.: Those in the case library and test plan will also be deleted. The associations with test suites, requirements, and bugs cannot be restored.
- Enter DELETE in the text box and click OK.
Feedback
Was this page helpful?
Provide feedbackThank you very much for your feedback. We will continue working to improve the documentation.See the reply and handling status in My Cloud VOC.
For any further questions, feel free to contact us through the chatbot.
Chatbot


